The Way That I Cast: Lost Wax Process Part 5

Last time we ran through the basics of the end of my lost wax casting process. But I often get questions about how I got started casting, and how other people could get started, too.

Well, like many people who hang around with reenactment groups, I had seen pewter casting, and took a basic class on carving soapstone molds and pewter casting. It was fun and I wanted to learn more about casting.

Only an hour drive from my house there was a community college with a jewelry department. They taught all day classes on Friday – 8 AM to 5PM. One of my girlfriends suggested that we take a Friday class together. So I went back to college. The classes were different every semester, and included casting, enamelwork, and metal forming. We had about three hours of lecture time and then the rest of the day was hands-on. Best of all we had access to all of the equipment that the jewelry lab had: kilns, centrifugal casting machines, torches, hydraulic presses, you name it. They didn’t care what sort of items we made, just that we were learning to do the semester’s processes.

I loved it. I took classes for a couple of years, and started collecting equipment to be able to do my own casting. I started casting using casting sand, instead of lost wax. It required a LOT less equipment.

Equipment is the big barrier for most beginning jewelers. My current set-up, if I had to buy it new, would be worth about $10,000, and that isn’t even counting the small tools and a lot of the expendable supplies. More basic set-ups are certainly possible. As I mentioned, I started my home casting projects using casting sand. This eliminated the need for almost all of the wax equipment, the mold making equipment, the flasks, the de-waxing and burnout ovens, the vacuum machine and the vacuum caster. The minute that you decide that you want to do lost wax casting there are a lot of expenses that can’t be avoided.

Equipment can be purchased used. I have actually purchased a lot of my equipment used through Rio Grande Jewelry supply. My basic bench and some of my hand tools were bought used from a jewelry company that was shutting down.

The most basic kit that I can think of, that would allow successful lost wax casting would require: a wax model, a flask large enough for the model, a base for the flask, investment to create the mold in the flask, a vacuum machine for removing the bubbles from the investment in the flask, a kiln to melt out the wax and harden the investment into a useable mold, a torch to melt the metal for the casting, a crucible to melt the metal in, and a centrifugal casting machine. Here is a picture of my centrifugal caster.

centrifugal caster

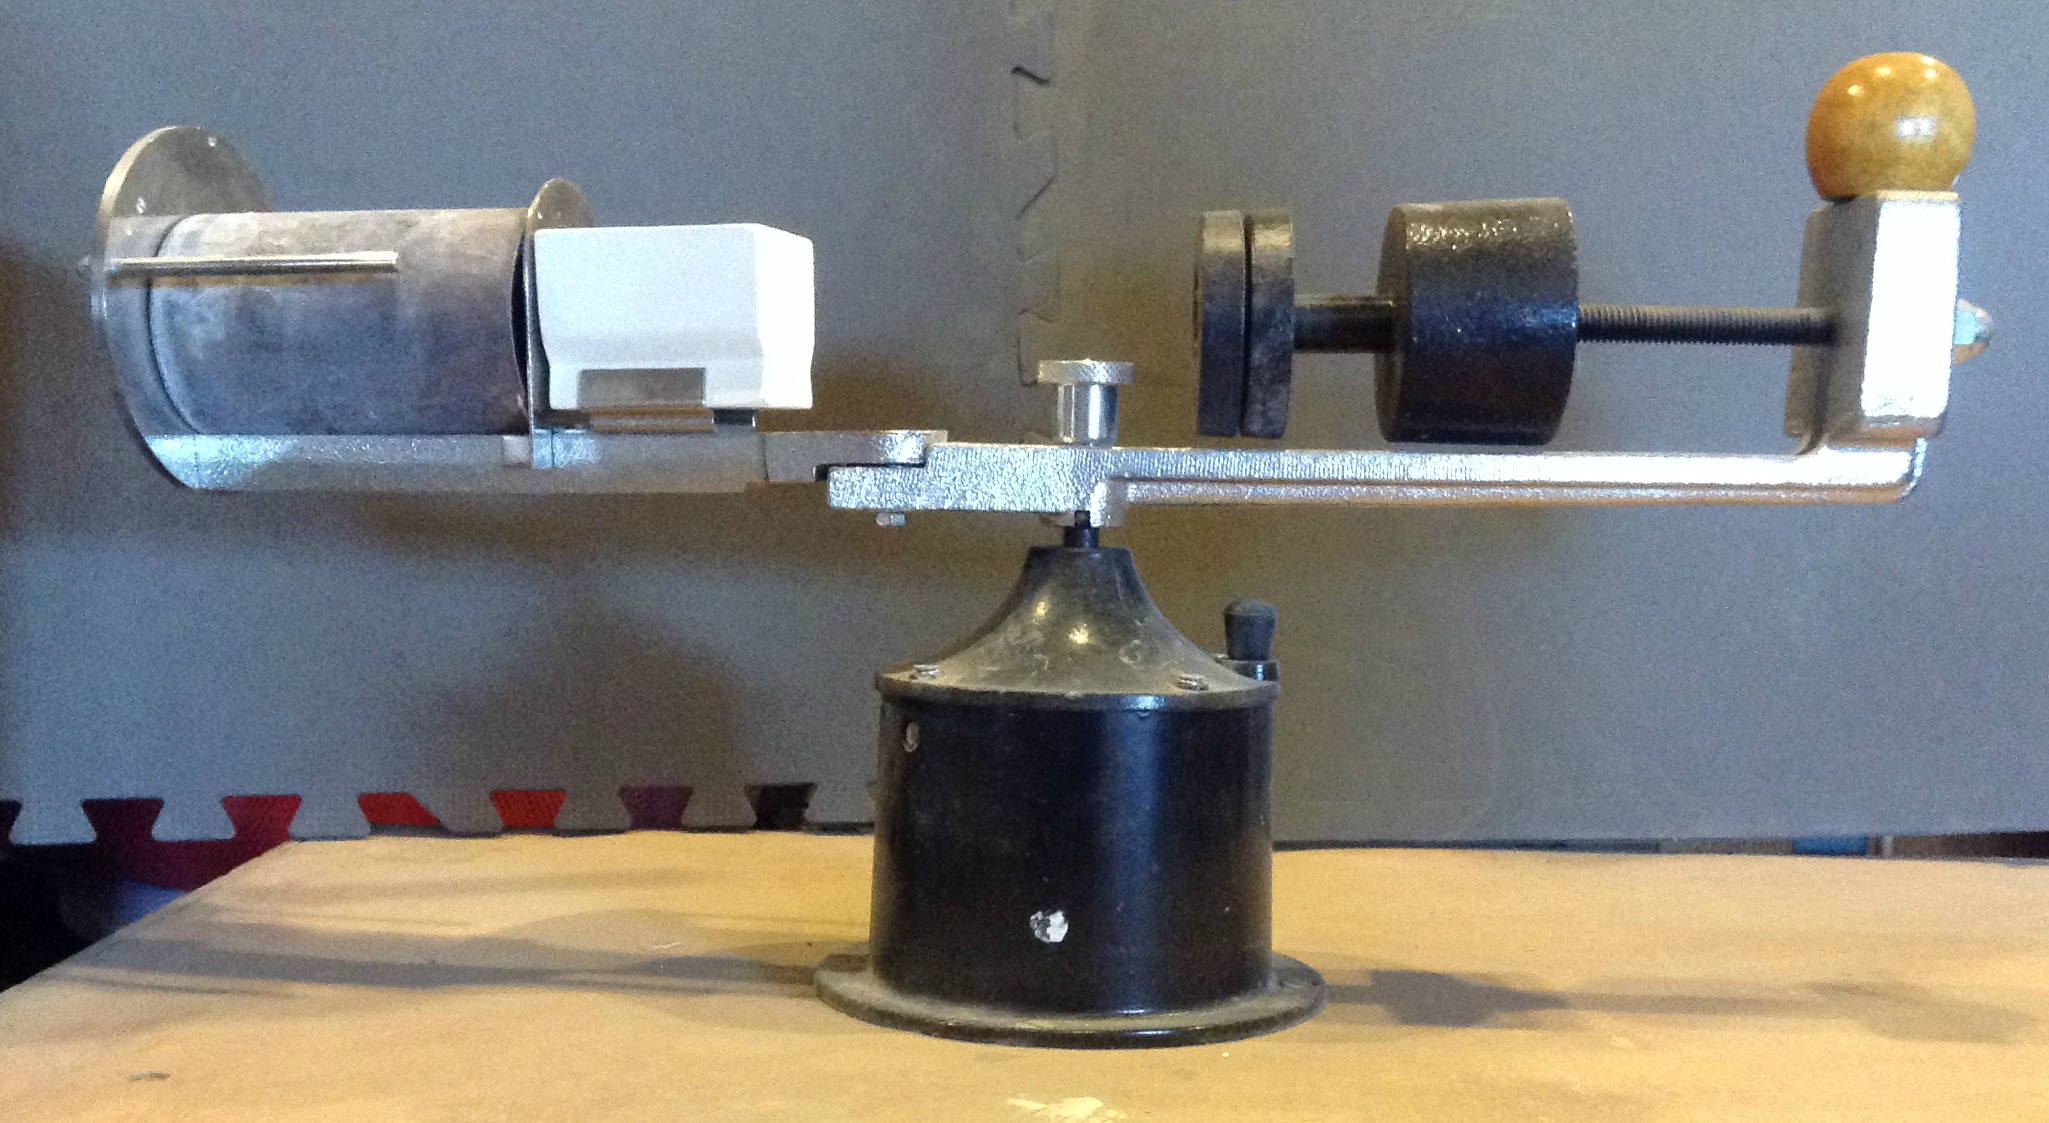
It literally, at the flip of a switch, flings the molten metal into the flask using centrifugal force. The biggest problem with the process that I just mentioned? You destroy your model. If the casting fails you have to create a new model.

Next time: More About Lost Wax Casting Options

The Way That I Cast: Lost Wax Process Part 4

Last time we created the actual molds that are used for casting, and we poured the molten metal into them. But what happens now? Well, they need to be quenched.

Quenched? Yes. The metal needs to be cooled down the rest of the way so that it can be handled, and it needs to be removed from the plaster in the flask. Quenching accomplishes both of these things at the same time. Here is a picture of my high tech quenching arrangement. I have a bucket of water sitting up on a metal stool. The still hot flask (in the tongs) is lowered into the bucket of water. Sizzle, spit, steam and it all happens. The forceps in my other hand are used to remove the still warm metal from the flask. I set it aside into another smaller container of water while I clean the flask.

quench and reveal

There is always some plaster left in the flask, so I scrape it out with a putty knife and throw it into the other bucket that you can see next to me on the floor. The flask is then scrubbed with a wire brush, rinsed and put on the floor to dry.

flasks drying

And here they are drying! Meanwhile the newly cast piece is sitting in a small container (an old cooking pot) full of water. It is now cool to the touch, and this is what a typical one looks like.

newly cast buttons

Once I am done casting it is time to begin making these messy looking blobs into something worthy of being put in my shop. This picture shows the basic process. First the pieces, in this case buttons, are cut off of their sprues. This process often requires that the metal has to be cut apart in stages so that none of the buttons are damaged. Then the sprues are set aside to be cleaned and the buttons are given an initial tumble to remove any remaining investment and reveal any surface imperfections. Any flawed buttons go into the sprue pile to be recycled later. The remaining buttons are sanded, polished, inspected, and touched up until they look like this.

smaller button picture

The sprues are then cleaned and polished to remove all traces of investment and metal oxides. They are then dried and put away for later use.

I thought it was important to include a lovely picture of me in all of my pouring safety gear. Quite the fashion statement!

full kit

So for those wishing to replicate this major fashion statement…Starting at the top we have a full face shield to prevent burns from splashing molten metal and boiling water. Under that shield we have a high quality particle dust mask. The process of quenching the flasks can put quite a bit of fine particulate silicon into the air, which is very bad for your lungs. The blue jacket with leather sleeves is a welding jacket – doesn’t catch on fire easily and protects from an assortment of hot things. Leather welding apron and gloves complete the ensemble. What you can’t see is loose fit cotton jeans and high top leather boots.

Next time: How I Got Started Casting

The Way That I Cast: Lost Wax Process Part 3

Last time we created a mold by using a wax model and investment. But is it really a mold that we can pour molten metal into yet? Nope! We now need – Heat, Heat, and More Heat!

Right now the investment is still soft and it still contains waaay too much water to be anywhere near molten metal. Most of the wax has been melted out by the dewaxer, but the investment now needs to be hardened, the remaining wax needs to be burned away, and any remaining moisture in the investment needs to be driven off. The way this is accomplished is by placing the flasks into a burnout oven and cooking them for hours. Here is a picture of my burnout oven.

burnout oven

And yes, 947 is the temperature in the oven. This is actually the low end of the temperature cycle, the temperature at which the flasks are held, at the end of the burn-out cycle while they are waiting to be cast. The high temperature portion of the cycle varies, depending on exactly the type of investment that is used, but it is often around 1300 degrees Fahrenheit. The burnout cycle starts slowly, at about 200 degrees and gradually increases. By the time it is at 700 degrees we open all of the windows and doors in the Studio to let the fumes out. Burning casting wax is a truly nasty smell, and not good for you. By the time the cycle is finished and we are at the holding temperature, about eight hours later, the smell is gone and there is no more wax residue left in the flasks. They are now officially molds!

Once the end of the casting cycle is coming to an end it is time to start melting the metal. I have two electric melting furnaces, a small one that uses a removal crucible, and a bigger one, which is called a “tilt and pour” This just means that you pick up the entire furnace and pour the molten metal directly from the furnace into the flasks.  In either case I have to preheat the graphite crucibles in the furnaces, add the new casting grain and the old metal that I am re-melting, and wait. If you peek into the furnace while it is heating, this is what 1980 degrees Fahrenheit looks like.

recently recharged furnace

Once the metal has melted completely, I start bringing the flasks out of the burn-out oven one at a time. The flask is placed on the silicone pad on the vacuum machine, the vacuum is turned on, and the molten metal is poured into the flask. And this is what it looks like.

big furnace pour

The vacuum machine is actually pulling air out of the bottom of the flask, which helps produce better castings. The flasks are removed from the vacuum machine and set aside to cool. Here is a picture of three flasks cooling on a metal cart. They are sitting next to my small furnace.

small Furnace with flasks

This is a great picture because it really shows how you can see what temperature the metal is by its color. The right hand flask is yellow because it is the hottest. The almost black metal on the left is ready for the next step in the process.

Next Time – What Happens Now That We Have Poured the Metal?