Yes, They Had it… But What Was It?

One of the big problems that archaeologists deal with is finding things that they simply can’t identify.  For a number of years I was on an email list, conceived of and managed by Dr Dan Carlson, an Archaeologist working in Fröjel harbor in Sweden. Occasionally they would find something that they had questions about, and they would send a description and picture of the item out to the “hive mind” to ask for help. and often someone would have a clue. I remember one time in particular. I emailed this message:

“To me it looks like a tiny beater that could be used in tablet weaving or other narrow band weaving. I use something similar, made of wood, place it in the weaving shed and pull it gently towards the newly woven cloth to push the newly placed weft in place. I will be watching to see what other people think it is!”

The response from the archaeologist?

“You are obviously right! Most people have the same suggestions, and thinking of the pieces of thin plates of bone for tablet weaving at the sight, shows clearly that the technique was used at the site.”

The basic problem is that it is almost impossible for a researcher, or even a team of researchers, to have a complete knowledge of all of the equipment that was used in every art and craft, in any given culture. And now take even identifiable objects, and break them into pieces, and see if you can figure out what they used to be. And then take those pieces, and allow time and weather to corrode them and wear them away, and what do you have? Archaeology is often like a giant jigsaw puzzle where the box with the picture is missing, and the cat has eaten some pieces, and chewed up other ones.

And this problem does not become any less severe when we work during later time frames with more complex machinery. In about 1985 I was working in the Archaeology Lab at the University of Houston, as a grad student. One project involved a house that was burned because the inhabitants had died of Yellow Fever. (In the 1800’s people did not know that Yellow Fever was a mosquito borne disease, they thought it spread by contact, like Small Pox.) The head of the department suggested that I look at the finds because I “had a knack” for identifying odd pieces of metal. (I have always loved machinery and used to regularly take things apart and put them back together when I was a child.) They thought they were dealing with the daughter’s room, but could not be sure, and one of the other grad students poured out a bag of very rusty pieces of iron. And I knew what she had.


It was broken into about a dozen pieces, and had a different style frame than the one in the picture, but what she had were the pieces of a music box. The spring, the frame to hold the roller, the holder for the comb, and the comb to “plink” on the roller, were clear as day… to me. She had never seen the inside of a music box before, and had never even thought about how they worked.

So when you are busy looking through a museum’s digital collection, take a good look. Watch for mistakes (we all make them!), and if you think that you know what something is, do not hesitate to contact the museum. You could help them solve a mystery, or simply point out inadequate information on an old entry. And some, like the MET, may even send you a thank you email!

What Size Were Brooches in the Middle Ages – Part 13 – What other things were little?

Well, this is back to where this series originally started out – looking at tiny brooches and buckles and other things. Ideally I would have planned out the entire series, written all the installments and then just published them, one at a time. The reality is that I wrote one installment and then started reacting to questions and comments that I received from readers. So it may have not been a literary gem, but my goal was to answer questions. And I think that I have been doing that. Perhaps I have encouraged people to pay more attention to the historical facts, at least as we know them, instead of just accepting modern mythology. We have fashion, availability of materials, and the size of the people to thank for some of the size issues. But functionality is also a consideration.

I learned to do tablet weaving quite a number of years ago, and my original cards were a solid four inches square. Huge cardboard squares the size of bar drink coasters, with 1/4 inch holes in all four corners. Years later, my cards are 2 1/2 inches square and they are still larger than many of the real pre-1600’s weaving cards that I have seen.

To me, learning to tablet weave was a very cool thing. An opportunity to be creative and make something the same way it was made hundreds, or even thousands of years ago. And then I saw these videos – videos of women had learned to do the same sort of crafts that I was learning. Except that they had been doing it for decades – not as a fun hobby thing, but because they actually needed to make things for everyday use. There are a bunch of these movies out there, on You Tube, under the search term “Norsk Stumfilm”. They show women and men, filmed in the 1940s, doing some of the crafts that I do for fun. This one, called bandvev, shows several techniques for weaving bands and cords. They are black and white, and have no sound, but they were designed to show the actual hand movements of the women. They actually slow down the film for us so that we can see the hand movements.

Some of the equipment is small and some larger. The last woman does what I was taught to do as a Viking Cord. I learned to do it using two people. By using four very large weighted bobbins, she can do it by herself. Yes, I will be looking into this. While the technique that I was taught is a great project for children, or for forcing adults to cooperate with each other on a productive task, I always had a hard time believing that they would actually have made the cord that way.

And then there is this lady. This is a new color video that was made in Sweden to show an old technique for weaving bands quickly on an Inkle style loom. Again her hand movements are slowed down in order for us to be able to see what she is doing. Her bobbin is just large enough to hold the weft thread and the weaving knife that she uses is of a modest size.

And the point of all of this? Do not assume that just because we use something in a specific size modernly, that it was the same size before 1600. Do not assume that all things before 1600 were large, or small, or standardized in size in any way (they may vary greatly in size from time to time and place to place). And whatever you do, do NOT assume that because it is “traditional”, or because you saw it at a Renn Faire, it is correct for the timeframe before 1600. Go forth and do research!

frühmittelalterliches Webbrettchen (Augsburg, ...

frühmittelalterliches Webbrettchen (Augsburg, Inneres Pfaffengässchen) (Photo credit: Wikipedia)

Follow-up on My Double-faced Tablet Woven Band

I sit here, almost 12 years after I originally made the piece, looking at my Double-faced Tablet Woven Band with at least a small bit of amazement. When I made it I had some free time and an almost limitless amount of confidence in my ability to make things involving textiles and fiber. I was mostly self-taught. Only one formal crafty sort of class to get me started on tablet weaving – the basic principles of tablet weaving and how to cut down playing cards to create cards for weaving. I searched used book stores and libraries for books – fairly rare finds and most of them full of patterns that looked amazingly like my guitar strap from Junior High School (the 60’s). The original class that I had taken mentioned that tablet weaving was a very ancient technique and hinted that there might still be some surviving pieces of historic tablet weaving  around, so I started looking for sources, and to this day I have been adding to my collection of books and academic articles on tablet weaving and many other topics.

I really wanted to make a belt for my husband for Christmas, so I started experimenting. I chose the materials – medium weight crochet cotton (cheap and available in LOTS of good bright solid colors) and started experimenting with graphing patterns.  Somewhere along the way I had come across two self-published brochures by Marcus Caiaphas of York (Brian Eng), one from 1995 (Cardweaving Patterns) and one from 1996 (Double-Face Double Turn: A Variable-Pattern Tablet Weaving Technique). The 1995 brochure was interesting, but I had already had a considerable amount of experience with geometric patterns. But the second one, now THAT was cool. I have to admit, as I reread some of his instructions I can feel my eyes starting to cross, the same way as they did all of those years ago, but the ability to create shapely vines and leaves and such was just too much of a temptation – I HAD to learn to do this. One of the things that he provided in his book was a picture of elongated graph paper, so, with the help of our home office copy machine I copied, and then pasted and copied some more, until I had a strip of graph paper of a respectable length to be able to graph at least part of a belt. Using a legal size sheet of paper to allow me to work even longer, I got started.

I would graph a piece of a pattern and then analyze it to see if it looked the way I wanted it to. When I wove the design was it elongated or foreshortened? If so how did I need to change the way I turned the cards in order to fix the problem. I kept track of all my experiments on graph paper, so that I would know exactly what I had done. I find that this saves a LOT of time in the long run. Lots of crafty people say “Oh, I will remember what I did!” but the fact is that you may not, especially if it has been a while. Did I make 1, 2, or 3 turns for every box on my graph? Write it down and put the paper in a file folder for that craft. When you come back six years later you will be able to replicate your project or technique with very little effort instead of having to waste your precious time figuring it all out again! In fact, when I went to my tablet weaving folder in the filing cabinet – there it was – at least part of the notes and graphs. Now I will admit that some of the pieces are missing, but we have moved four times since then and I still have most of the information. Almost a little scary…

Anyway, the scan of the graph page shows the original pattern graph for the first section of hops vine, with the actual turns that I made noted on the side. The variations in the color of the black marks shows where I decided to change the pattern as I went along to achieve better lines and curves. Along the edge of the graph you can see a series of letters – F equals forward and B equals back. The notations were there because interruptions were a regular part of my existence (still are!). I had a daughter at home (high school aged), my husband and I had a consulting business that was very active, and we had a dog and three cats running around the house. Although it took a little time to make the notes it also meant that I could walk away from the loom, come back later that day, or the next day, and start right back to weaving. That was a very important bit of comfort for me – I do not like having to “figure out where I am”. I can do it, but I don’t like it. So, I kept notes.

TW chart

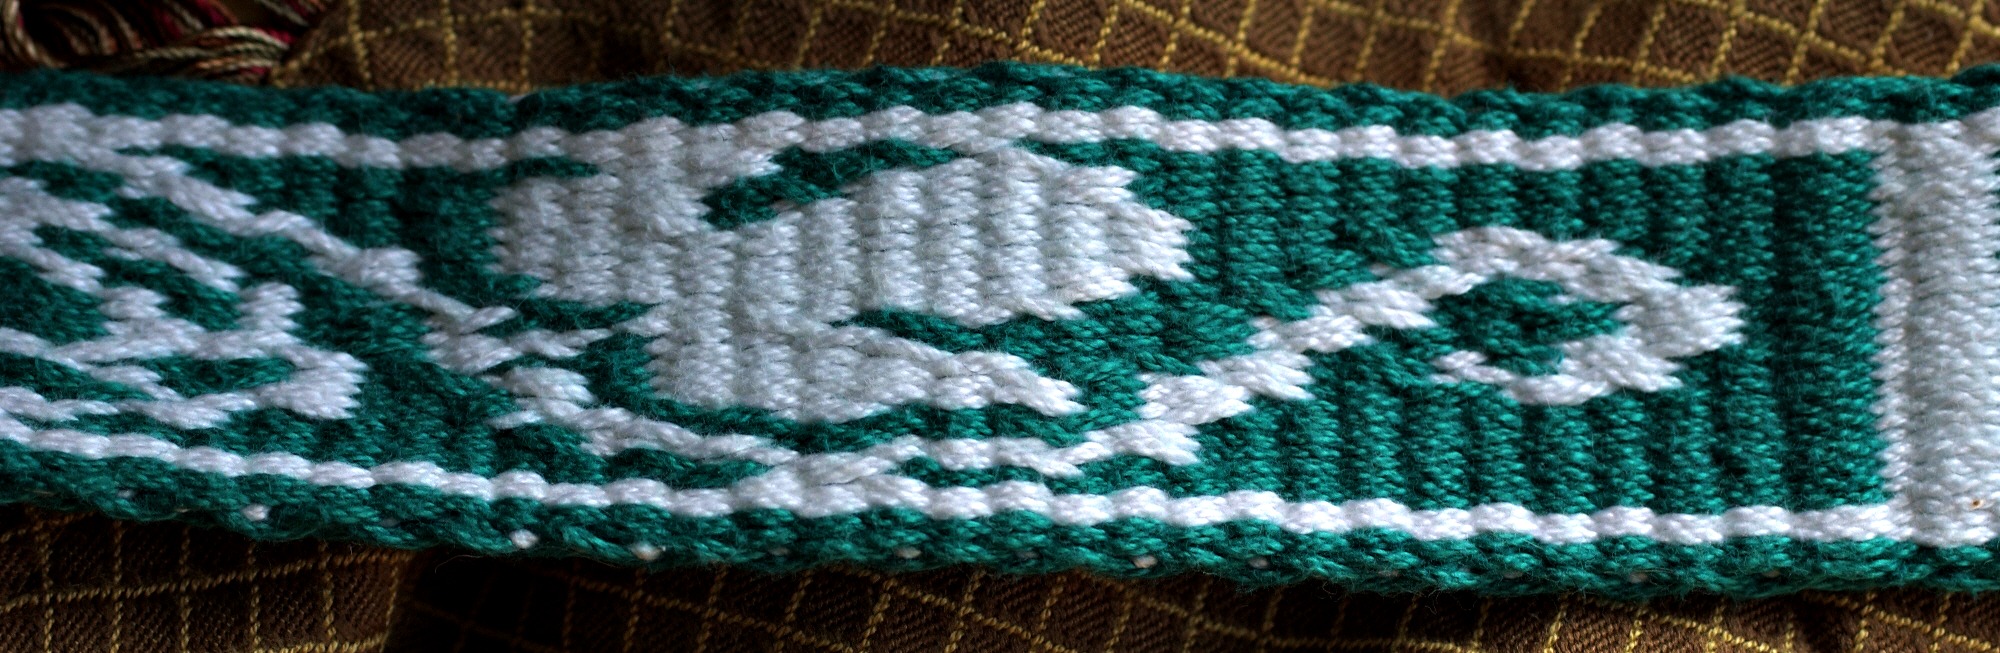
The words “on an elongated rather than square grid” are left over from the original graph paper provided by the brochure. Today I would do a neat scan of the page, pop the scan into a fancy picture processing program and eliminate anything that I didn’t want. But this was the era of cut and paste. I actually have a few more pieces of notes besides these, but you get the idea. And this is the result! The belt is not perfect, but I like the way the vines turned out. I included both the foliage and the fruit of the hops plant in the design.

both vines on belt

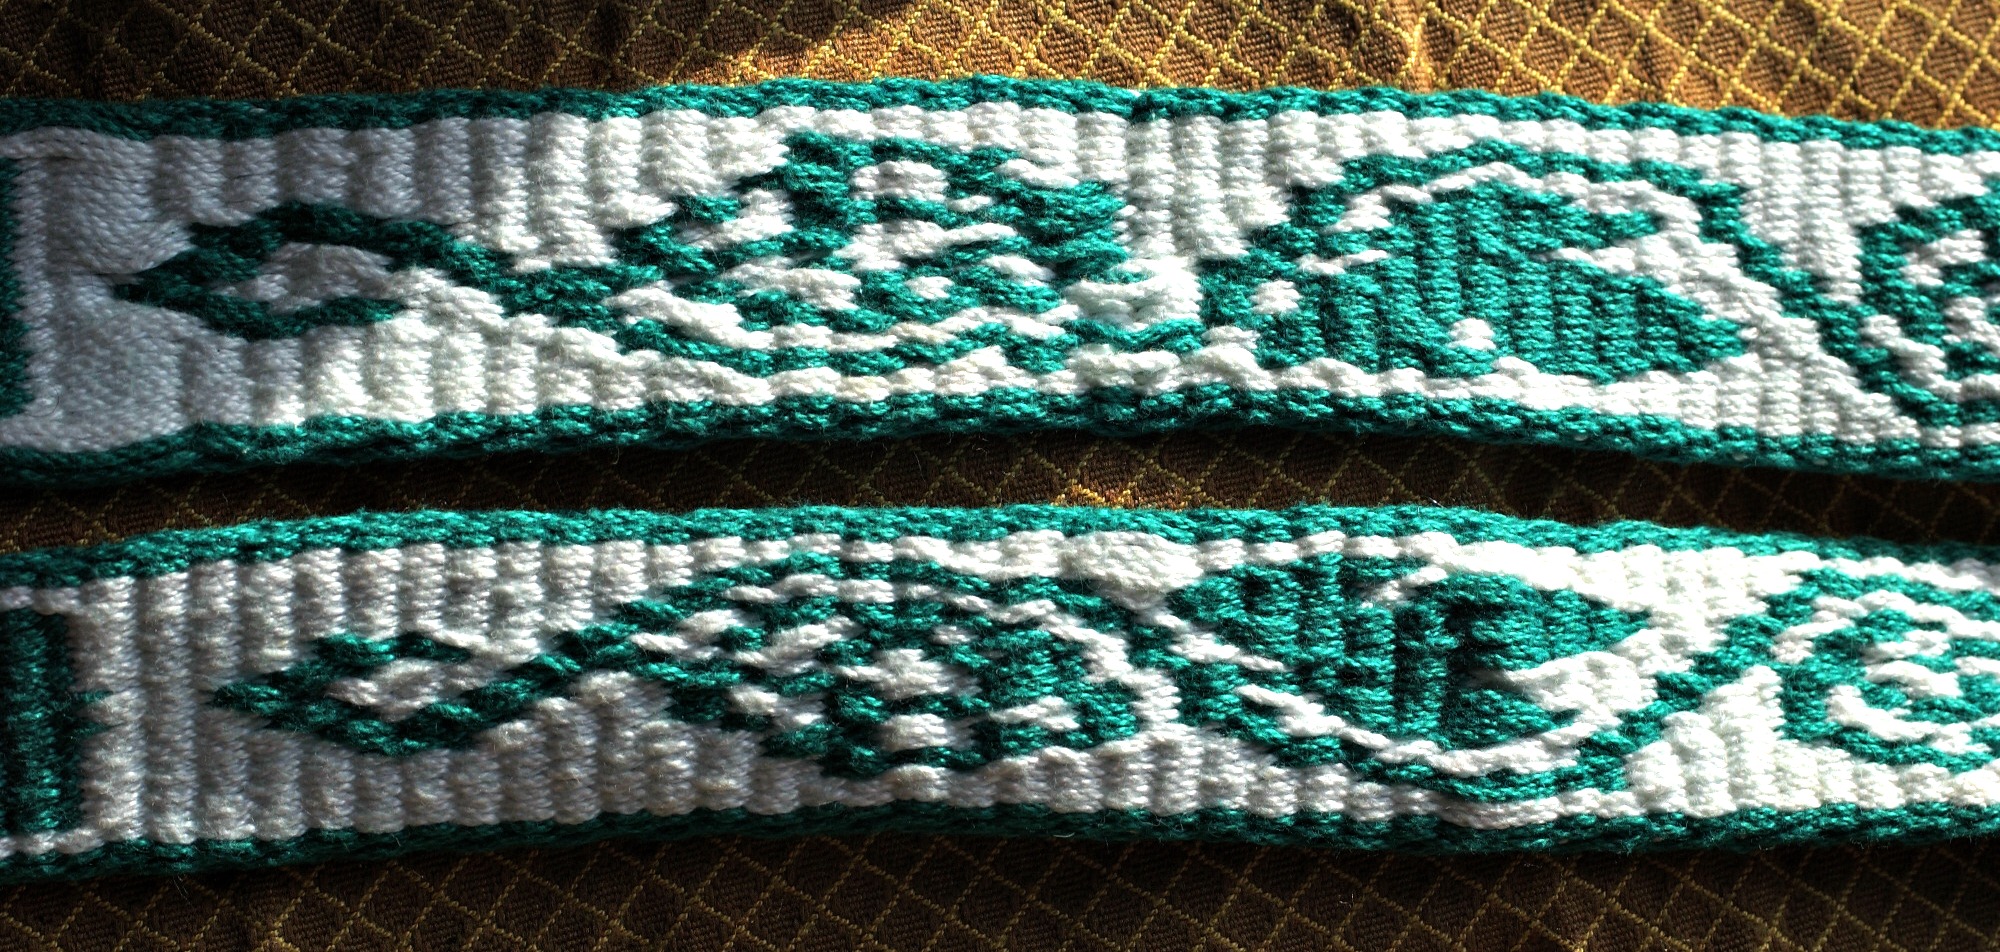
The selvages are straight, but I can easily see a few counting errors outside of the design area.

This picture shows the reverse of one of the vine areas. See how the colors are reversed – the vine is white and the background is green.

reverse of vine

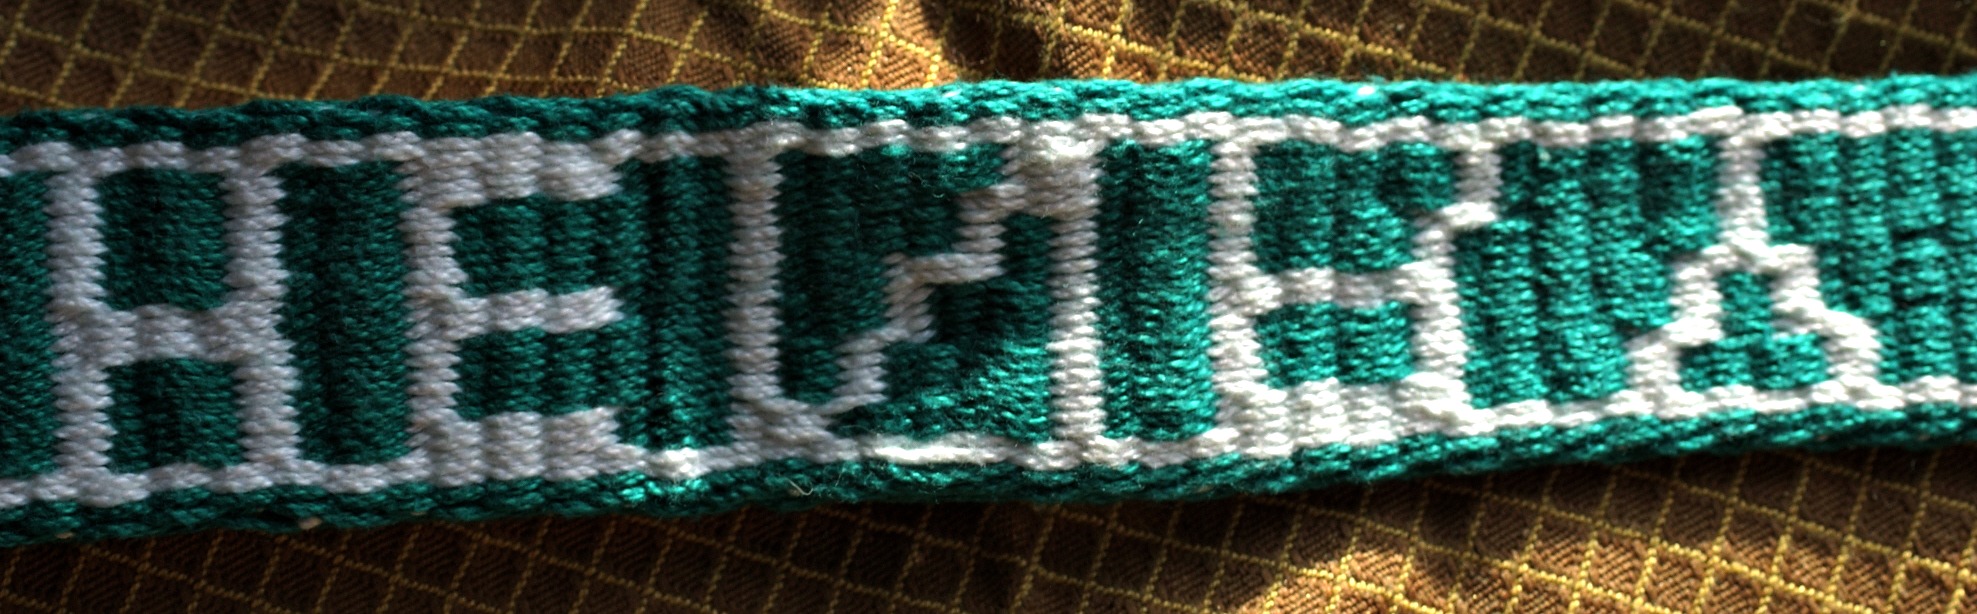
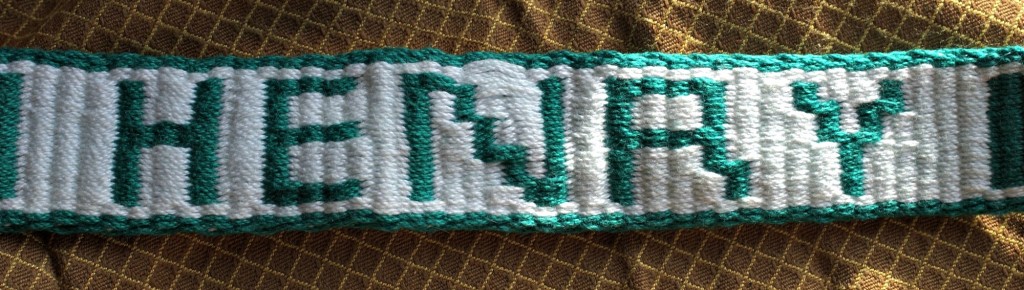
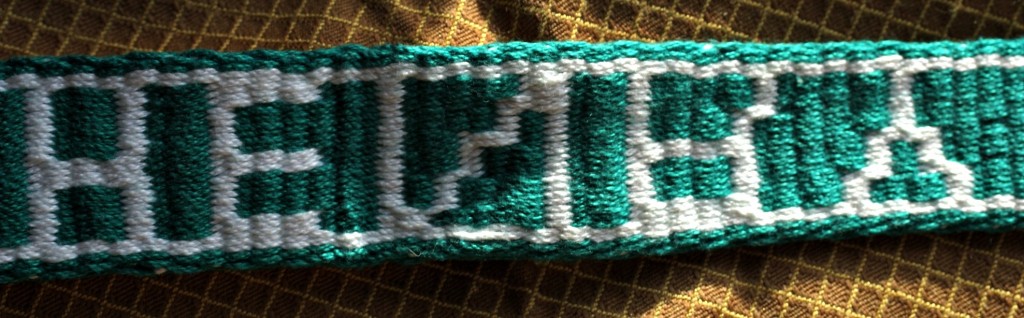
The “woven in words” on historic belts and Cingulums (religious regalia) are almost always in the center portion of the belt – so that is where I put my husband’s name.

Henry

If I had to do over again I would be more careful to make the letters the same width (I am picky like that!). At the time my biggest concern was that people would be able to recognize the hops vine – which of course most modern people can’t do anyway! Just goes to show you how your own knowledge base can affect what you perceive and expect others to perceive. The center portion, or perhaps I should say the words, is really the only portion of the belt that is not reversible. Well, it is, but the letters are either backwards or upside down, depending on how you look at it!

reverse of henry

The ends of the belt are my least favorite part. For some reason, which I do not currently remember clearly (see that is why we should always write things down!) the two ends are not identical, either in the width of the bars or even the number. I suspect that I was either running out of time, or weft, or both.

belt end

I did simple knotting patterns in the fringe to keep things from unraveling and included the end of the weft in one of the fringe bundles. The width of the belt is about 1 ¾ inches and the woven portion of the belt is 59 inches long, with another 8 ½ inches of fringe on each end. I keep looking at the fringe and considering whether I could reweave at least one end of the belt – I still think it would work better with a loop on one end. But not today!