Designing Displays for a Craft Show – Display Tables – Part 2

So last time we discussed the importance of having your display tables at a comfortable height for the customer.

If you are doing inside shows you will usually be dealing with a level carpeted or linoleum floor. PVC pipes are a lightweight and inexpensive way to raise table height. The following graphic shows the most common forms of table legs. If there are no cross braces or bends in your table legs, you can’t use this system for raising your tables. You will need to locate furniture risers or create a custom solution.

Making leg extensions is easy. Simply cut four pieces of PVC pipe that are large enough to go over the bottom of the table legs – choose the pipe diameter that is closest to the size of the table leg and cut it long enough to raise the table to the height you want it to be. Remember the table leg must fit inside the pipe, so measure the outside of the table leg – with the bottom cover, if you plan to leave it in place, and then measure the inside of the PVC pipe. When choosing the table height – don’t get carried away. They need to still be low enough to be stable.

table legs and pvc

I should mention that most of the plastic tables are NOT intended to be sat on. If you must sit on tables you should probably resort to the old chip board tables with a steel substructure. Tables on any sort of riser should never be sat on.

Now what about outside art events? A park may look fairly smooth and level, but the reality is that it isn’t. At the very least you need to always carry pieces of wood to use as chocks under the legs of you table. I have pieces of boards that are 2x4x4, 1x4x6, and 2x6x6. These are all pieces of wood that are left over from various construction projects. Simply lift up the table leg and place the wood underneath. This is also particularly helpful if you have to set up on a hill. I do one event where the shop is on a considerable hill. In this case, I level the tables on the uphill side of the tent separately from those on the downhill side. The shop is in a 20×20 pavilion at this event and there is almost a foot difference between uphill and downhill. It would be crazy to try to make the two sides level with each other.

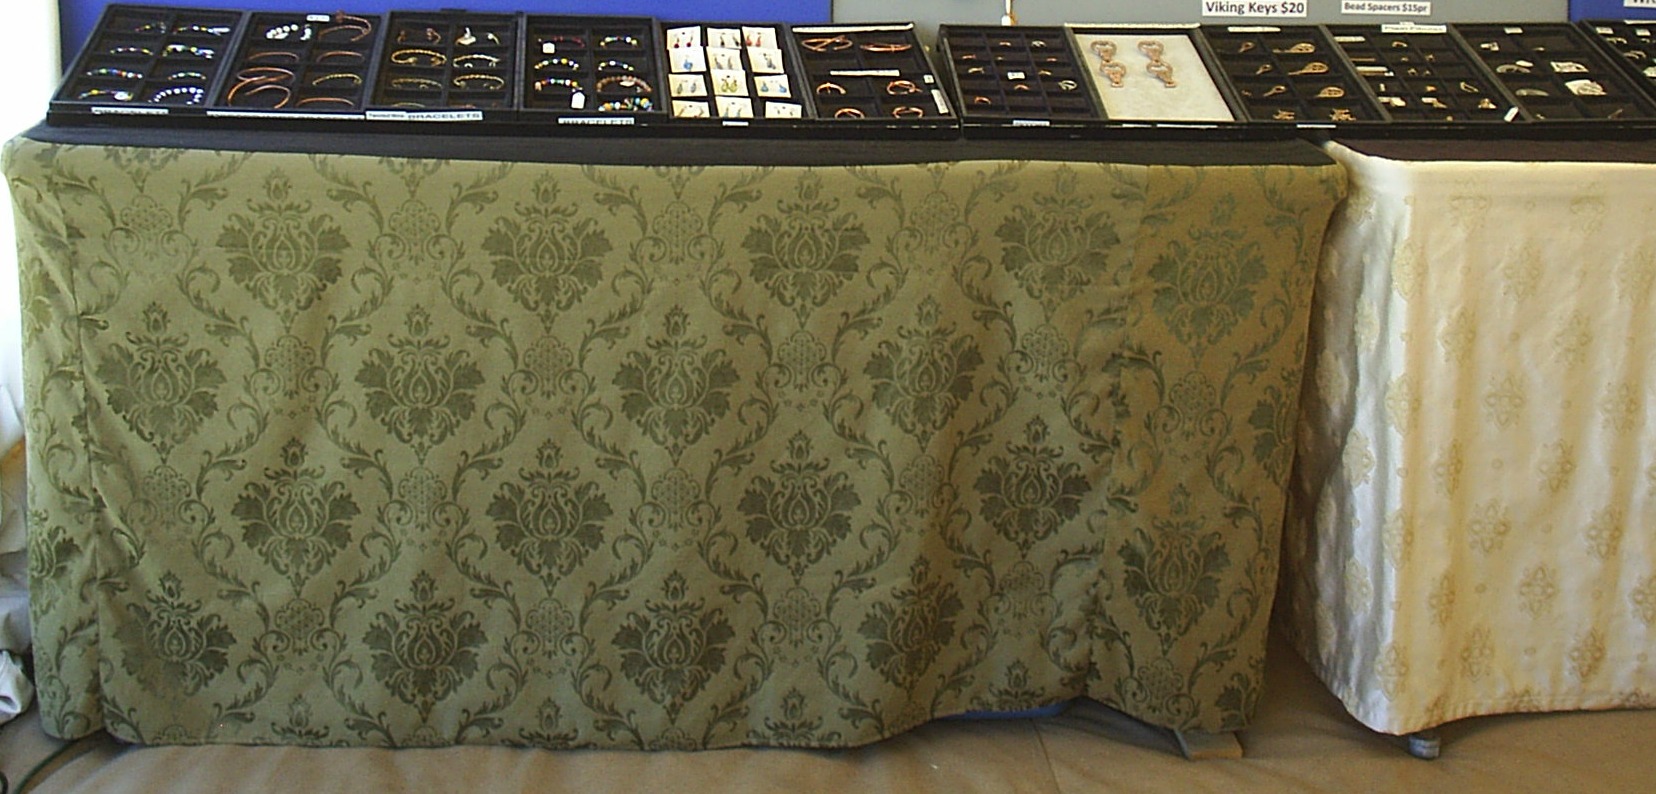
So far we have omitted one really important item – table cloths. Table cloths can be an important part of the decor of your booth.

When you go to a convention center for an event, the tables are often covered with table cloths as part of the space rental. If you have plastic or chip board tables, they need to be covered. You can choose to use flat table cloths, or fitted table cloths. I have created custom fitted table cloths for my shop. I purchased all the table cloths that I could find (that I liked) at a discount store and then sewed them to make fitted table cloths. I wanted them to be fitted because I did not like the flat table cloths flapping madly in the wind at outside events. These table cloths were cut and sewn so that they only cover three sides of the table – leaving the back open for easy storage access.

I hope these ideas help you create a successful and good looking booth!

M3361S-3034


Designing Displays for a Craft Show – Display Boards – Part 3

My display boards are a work in progress. Most of my boards are actually made as a sandwich – a piece of foam insulation with a layer of 1/4″ plywood on each side. I like the three dimensional look that this gives, along with relatively light weight and excellent warp resistance. The pieces of the “sandwich” are glued together with an industrial cement.

I have also used several boards over the years that are made from plain plywood, with varying degrees of “success”. I usually use 3/4 inch plywood, for strength and stability without too much weight – one of my current display boards is made of plywood. (Thin plywood warps with changes in moisture and eventually can warp quite badly.)

All of the display boards that I am currently using are covered with Velcro cloth. This fabric comes in many different colors and allows me to use “male” Velcro dots and strips to hold display hangers in place. These hangers can be put anywhere that I want to put them, allowing me to change the design of the display whenever I want to.

Before I discovered Velcro cloth I used to covered all of my boards with a neutral gray linen weave fabric. I liked the way the fabric showed off my jewelry – it was almost like having a model wear the piece. The linen looks nice but it isn’t as flexible, or durable, as Velcro cloth.

In addition to Velcro cloth I sometimes add short nails, called linoleum tacks, to the plywood boards to support items that are always placed in the same locations, and are fairly heavy. Before I switched to Velcro cloth all of my boards were made out of plywood and had permanent hangers made from linoleum tacks. For larger items some people also use cup hooks.

In order to work properly, Velcro cloth needs to be glued to the surface of the board. This is really not as difficult as it sounds, just use a spray adhesive like 3M 77. Be sure to follow the instructions on the can. Don’t forget to clean the spray nozzle by inverting the can and spraying to remove the adhesive in the nozzle. The Velcro cloth needs to be stretched gently to help it retain its shape. I use staples to fasten the cloth as it wraps around the display board.

OK, so now we have some sort of board, covered with fabric, to use as a display board. How do we keep the board vertical, and anchored to the table? The red boards that are shown in the graphic show the basic principle of my system. The boards are clamped to the table, preventing them from falling over in a wind, or being knocked over by a clumsy customer.

Basic display board set-upHere is a picture of an actual wooden support. You can see how the hinges are used to connect the boards and allow them to create a support.

back support on Display board fixed

The hasps used on the boards consists of a metal fastening that uses a hinged strap with a slot that fits over a staple and is secured by a pin. The picture shows the hinged strap. You can buy them at any hardware shop.

The next picture shows the top of the board, where the hasp on the support board is located. I use an inexpensive keychain karabiner to lock the hasp together through both the hinged strap and the staple. Using the karabiner allows the board to be set up and broken down very quickly.

top hasp of support

And a side view of the same support. All of these pictures are from one of my short boards, and were taken in the back of my box truck. The only difference between the tall and short boards is the size of the boards and support structure. A karabiner is put through the staple (loop in the picture) to secure the hasp. This creates a triangular structure that is sturdy and does not deform easily.

You can see how I use staples to permanently fasten the Velcro cloth to the board. I use a power staple gun (it’s pneumatic and is very helpful). The staples have to go through several thicknesses of cloth on the display board corners, and must pass through the ¼” plywood facing. You can do this with a manual stapler, but it will be some real work to complete. I usually put a staple about every 4” all the way around the back of the display board. The Velcro corners are folded like a hospital corner for sheets. As you see, there is a little tension on the Velcro cloth – this is important to keep the cloth from sagging when you put heavier items on hangers. It’s very helpful to have an assistant to help stretch the fabric and fold the cloth, holding it while you staple it.

side view of support cropped

I hope that seeing how I build my display boards will give you some ideas about how to build your own!

Designing Displays for a Craft Show – Display Boards Part 2

Last time we discussed the importance of understanding your booth and set-up needs before you design your display boards. Now onto designing the actual display boards.

I currently have two different heights of jewelry display boards – a set that is about 18 inches tall and another set that is about 40 inches tall. The boards are designed to be used in two very different shop set-ups. If I am in a small space where I need to stand behind the table and reach over to talk to customers and do transactions, I use the short boards.

When you are designing your boards, consider the board height and the length of your arms. I could have made the boards a little higher, but I wanted to COMFORTABLY be able to reach over them to wait on customers. Comfort becomes an important consideration when you are on your feet for hours at a time. When there are no customers around, the short boards still allow me a clear view of the display and the ability to welcome and interact with customers without standing up. This arrangement also allows me to set another tall board behind me for even more vertical display space when I have a slightly deeper booth.

display board layout

Before we go on to final board design, I need to mention the table that you will be using. When you rent a space at an inside show, it may or may not come with table(s), a tablecloth, a chair, and a trash can. Outside shows normally only rent you a piece of ground and you are responsible for your entire set-up. If it is your own table, you have complete control over the height and appearance of the table (more on that in an upcoming blog). Be sure that you know how tall your table will be when you design your display. If you design the board for a 30 inch high table and wind up using a 36 inch table you may not be able to reach over the display board comfortably.

So what kinds of material can we use to make a display board? Probably the most common material is plywood. It is readily available, easy to cut, flat, and sturdy. So what are the downsides? It can be heavy if the boards are large, the surface must be covered in order to give a finished look, and the plywood can warp.

You can make your boards out of metal sheeting, as long as you stiffen the edges with a frame of metal channel or bond the metal sheet to a sheet of plywood for stability. Using metal sheeting eliminates the need to cover the board and allows you to use magnets to attach items (as long as the sheet of metal is an iron alloy – check to make sure it works with a magnet before you build your board).

I don’t use plastic sheeting for any of my boards. The need for an additional frame, the tendency for plastic to scratch easily, and the fact that some plastics warp in the heat just made it too difficult.

Next Time: Building the Display Boards