Designing Displays for a Craft Show – The Aesthetics

Booth aesthetics can make or break your show. There are actually two components to your booth (other than your product of course!) your booth design and you!

Many of the larger art shows will make information about previous years’ attendance available, including the median income of the attendees and the previous year’s sales. If that information is available, use it. I have known people who went to a glossy, glittery, women’s show and used old bed sheets as their table cloths. Their displays were cluttered and amateurish. Their booth appearance was impacted further because the bed sheets weren‘t even ironed. Needless to say, the show was a disaster for them. If people do not want to go into your booth, you will not have good sales.

Your goal should be to create a pleasing, inviting booth, with a good traffic pattern, and enough room for people to move safely between displays. I never make an aisle in a booth less than 3 feet wide, and 3 1/2 or four is better. People generally don’t like to feel cramped and there needs to be enough room for people to circulate in the booth. Even if you do sell knickknacks, you don’t want your booth to look like a garage sale!

Be aware of how lighting makes your product look – ambient lighting can be enhanced with task lighting. Is it too bright? If so, colors may “wash out”? Are there dark corners where product tends to be ignored? Light it up if it’s too dark!

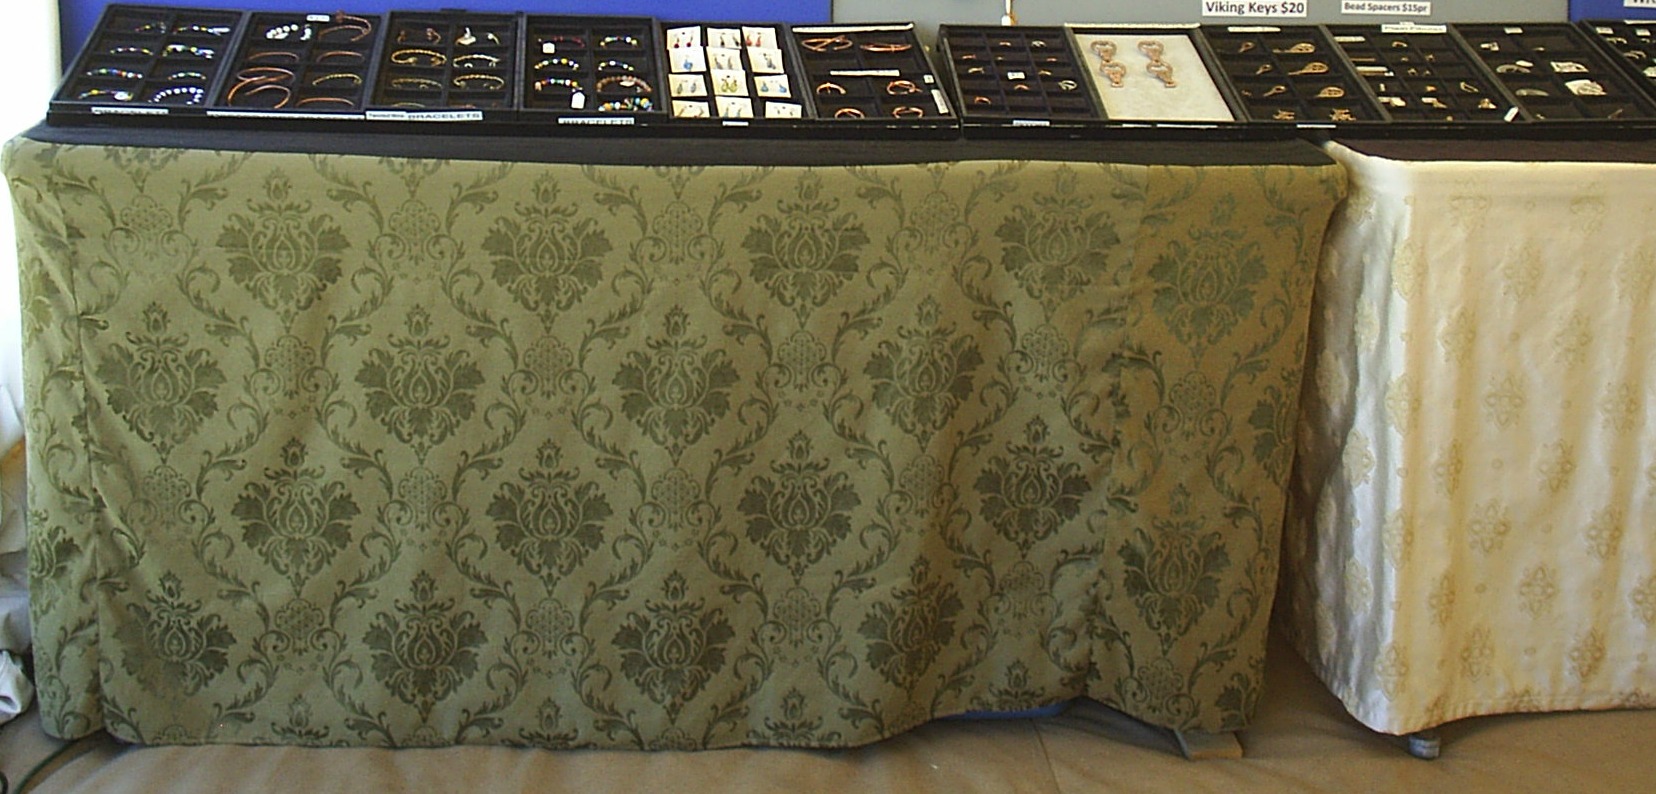
You probably have table cloths, or other colored displays; consider how the color of the table cloths and/or displays makes your product look.

I always try to set up my booth layout beforehand. You can take this to what some might consider an extreme and do a run-through of where everything goes. After years of doing this, I have several standard layouts that I can use. I actually have “maps” of how the booth is laid out. This is MUST if you employ booth labor! It makes setup go much more quickly if you know exactly where your tables and other display items go, and you do not need to move them around. Don’t underestimate the value of having a written plan when “things” are going wrong.

M3361S-3034

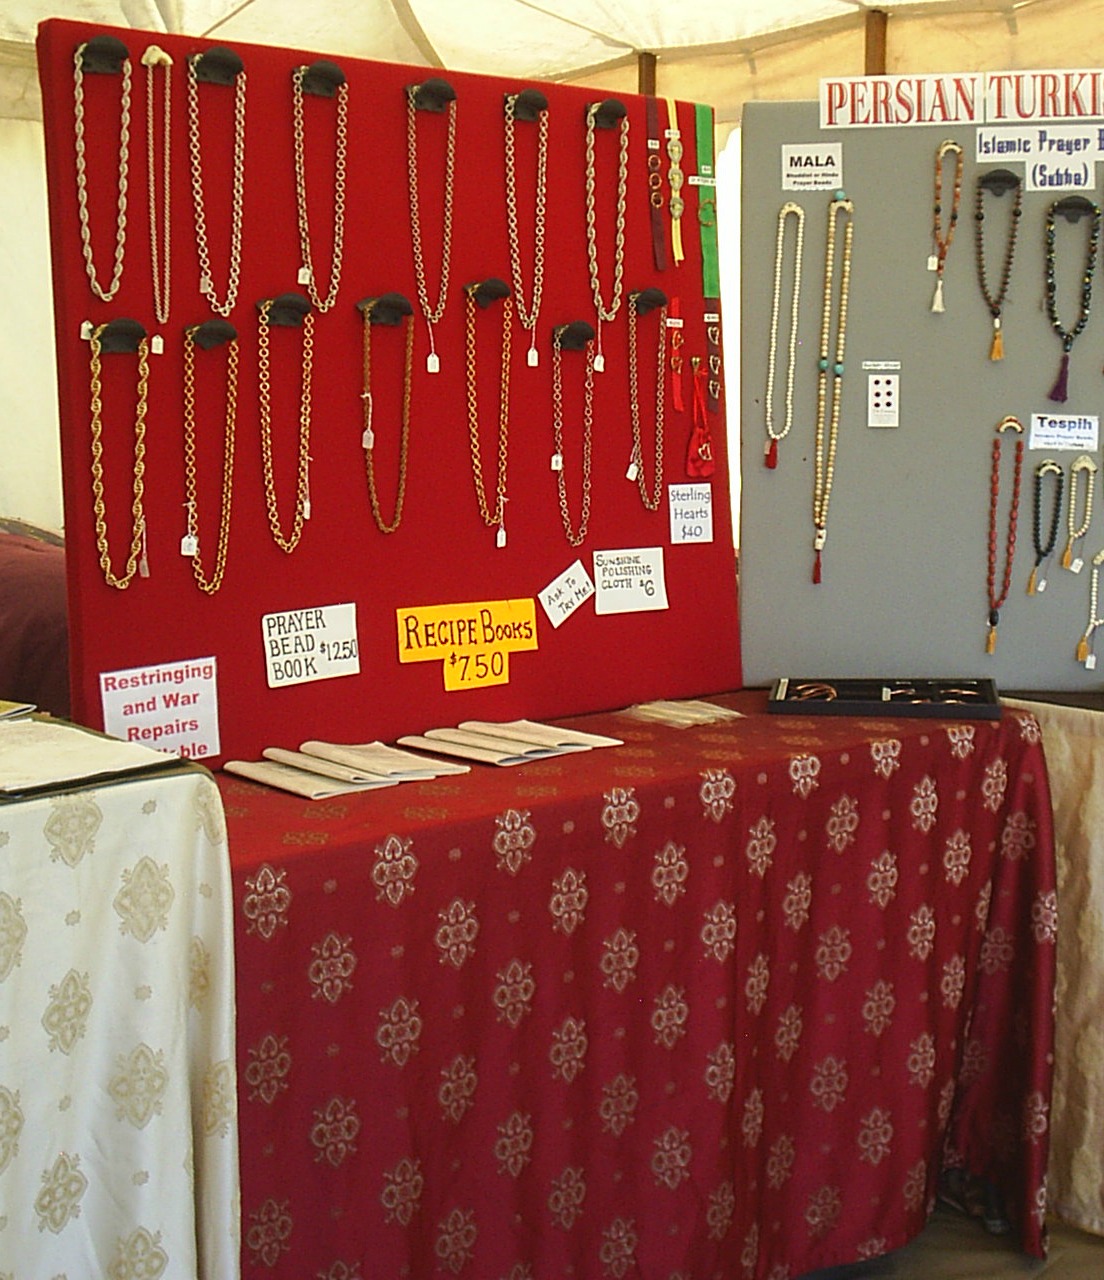
This is part of my booth layout for one of the Medieval events that I do. The table cloth designs were chosen to give a Medieval feel to the booth.

Do you dress for failure? I recently saw a picture of a friend that was taken at an outdoor event. To be blunt, she looked very unprofessional and sloppy. Casual is OK, as long as it suits the environment. I know that there have been times when the temperature was up around 100 degrees and I was soaked to the skin. But my hair was still combed and you could see that I had made an effort to dress nicely to start with. People are generally very forgiving of the affects of extreme weather.

If you are in a building it is particularly important to look good. Choose your clothes based on the theme of what you sell, or the theme of the event. If the event is Western for instance, showing up in a coat and tails is going to be just plain weird.

It is OK to look “artsy” if you are an artist, but generally the burned out hippie artist look is not a good idea. Consider your clientele and ask yourself “If I belonged to that social group, would I want to buy from someone who looked like me?” Your goal should be to make your potential customer feel comfortable with you, as a person and an artist, so that they will want to buy from you.

I hope that this blog gives you many helpful hints that you can use to either design a new booth, or improve and existing one.

Designing Displays for a Craft Show – Display Tables – Part 2

So last time we discussed the importance of having your display tables at a comfortable height for the customer.

If you are doing inside shows you will usually be dealing with a level carpeted or linoleum floor. PVC pipes are a lightweight and inexpensive way to raise table height. The following graphic shows the most common forms of table legs. If there are no cross braces or bends in your table legs, you can’t use this system for raising your tables. You will need to locate furniture risers or create a custom solution.

Making leg extensions is easy. Simply cut four pieces of PVC pipe that are large enough to go over the bottom of the table legs – choose the pipe diameter that is closest to the size of the table leg and cut it long enough to raise the table to the height you want it to be. Remember the table leg must fit inside the pipe, so measure the outside of the table leg – with the bottom cover, if you plan to leave it in place, and then measure the inside of the PVC pipe. When choosing the table height – don’t get carried away. They need to still be low enough to be stable.

table legs and pvc

I should mention that most of the plastic tables are NOT intended to be sat on. If you must sit on tables you should probably resort to the old chip board tables with a steel substructure. Tables on any sort of riser should never be sat on.

Now what about outside art events? A park may look fairly smooth and level, but the reality is that it isn’t. At the very least you need to always carry pieces of wood to use as chocks under the legs of you table. I have pieces of boards that are 2x4x4, 1x4x6, and 2x6x6. These are all pieces of wood that are left over from various construction projects. Simply lift up the table leg and place the wood underneath. This is also particularly helpful if you have to set up on a hill. I do one event where the shop is on a considerable hill. In this case, I level the tables on the uphill side of the tent separately from those on the downhill side. The shop is in a 20×20 pavilion at this event and there is almost a foot difference between uphill and downhill. It would be crazy to try to make the two sides level with each other.

So far we have omitted one really important item – table cloths. Table cloths can be an important part of the decor of your booth.

When you go to a convention center for an event, the tables are often covered with table cloths as part of the space rental. If you have plastic or chip board tables, they need to be covered. You can choose to use flat table cloths, or fitted table cloths. I have created custom fitted table cloths for my shop. I purchased all the table cloths that I could find (that I liked) at a discount store and then sewed them to make fitted table cloths. I wanted them to be fitted because I did not like the flat table cloths flapping madly in the wind at outside events. These table cloths were cut and sewn so that they only cover three sides of the table – leaving the back open for easy storage access.

I hope these ideas help you create a successful and good looking booth!

M3361S-3034


Designing Displays for a Craft Show – Display Tables – Part 1

A very important part of most craft show displays is your table. Some art displays do not use tables at all, relying instead in free-standing pedestals, but most beginning artists use tables for at least a part of their display. Tables are relatively inexpensive, and very available. But isn’t a table, just a table? Not really.

Consider the options that you have for your table: height, length, width, weight, and breakdown size. Tables really do come in an amazing selection of sizes and options. I have some old eight foot tables that are made of some sort of chipboard with a steel substructure and weigh almost as much as I do. I took those to a show once – just once. I was just starting up and I really needed to make do with what I owned. Aside from weighing way too much the old chip board tables will not survive any major contact with water – remember those discussions about protecting your products? Well, if you are doing outside shows you also need to consider whether rain, or even high humidity, will damage your displays, too. The large tables were also hard to pack because of their size.

So what do I use now? Folding plastic tables. They are impervious to water, relatively light, easy to carry and pack, and they come in a variety of styles. Most of them have a carrying handle to make moving them easier, and some of them even allow you to adjust how tall they are.

Many years ago I was fortunate enough to take a class on booth design from a very experienced business man. He understood how important the customer’s comfort was to keeping them interested in your booth; and a big part of comfort is table height. My original heavy tables were 28 1/2 inches tall, my card table is 28 inches tall, and my kitchen counter is almost 36 inches tall. Most tables were originally designed to sit at, but will your customers be sitting? Not usually. At most craft and art fairs the customers simply walk through your booth. So what height should your tables be? Generally between 32 and 38 inches tall. This makes it easy for the average person to view your items that are on the table without bending over. An added benefit is that the smallest children will have more difficulty reaching your items. While I would like to think that all parents are carefully monitoring their children, I know from experience that this is not the case. Taller tables keep the toddlers from getting into trouble quite as easily. Having to “instruct” someone’s child usually means that they will leave your booth in a huff, and taller tables help.

So what do we do if our tables do not have height adjustments? We raise them on risers! Whether you choose to use the furniture risers that are available at discount stores or something of your own construction, the tables need to be higher.

What do I use? Pipes! My original teacher did only indoor shows, so he recommended the use of pvc pipe risers to lift your tables. But exactly how do we do that? We’ll discuss that next time!