Purses Part 10: Time for Purse Frame Rings

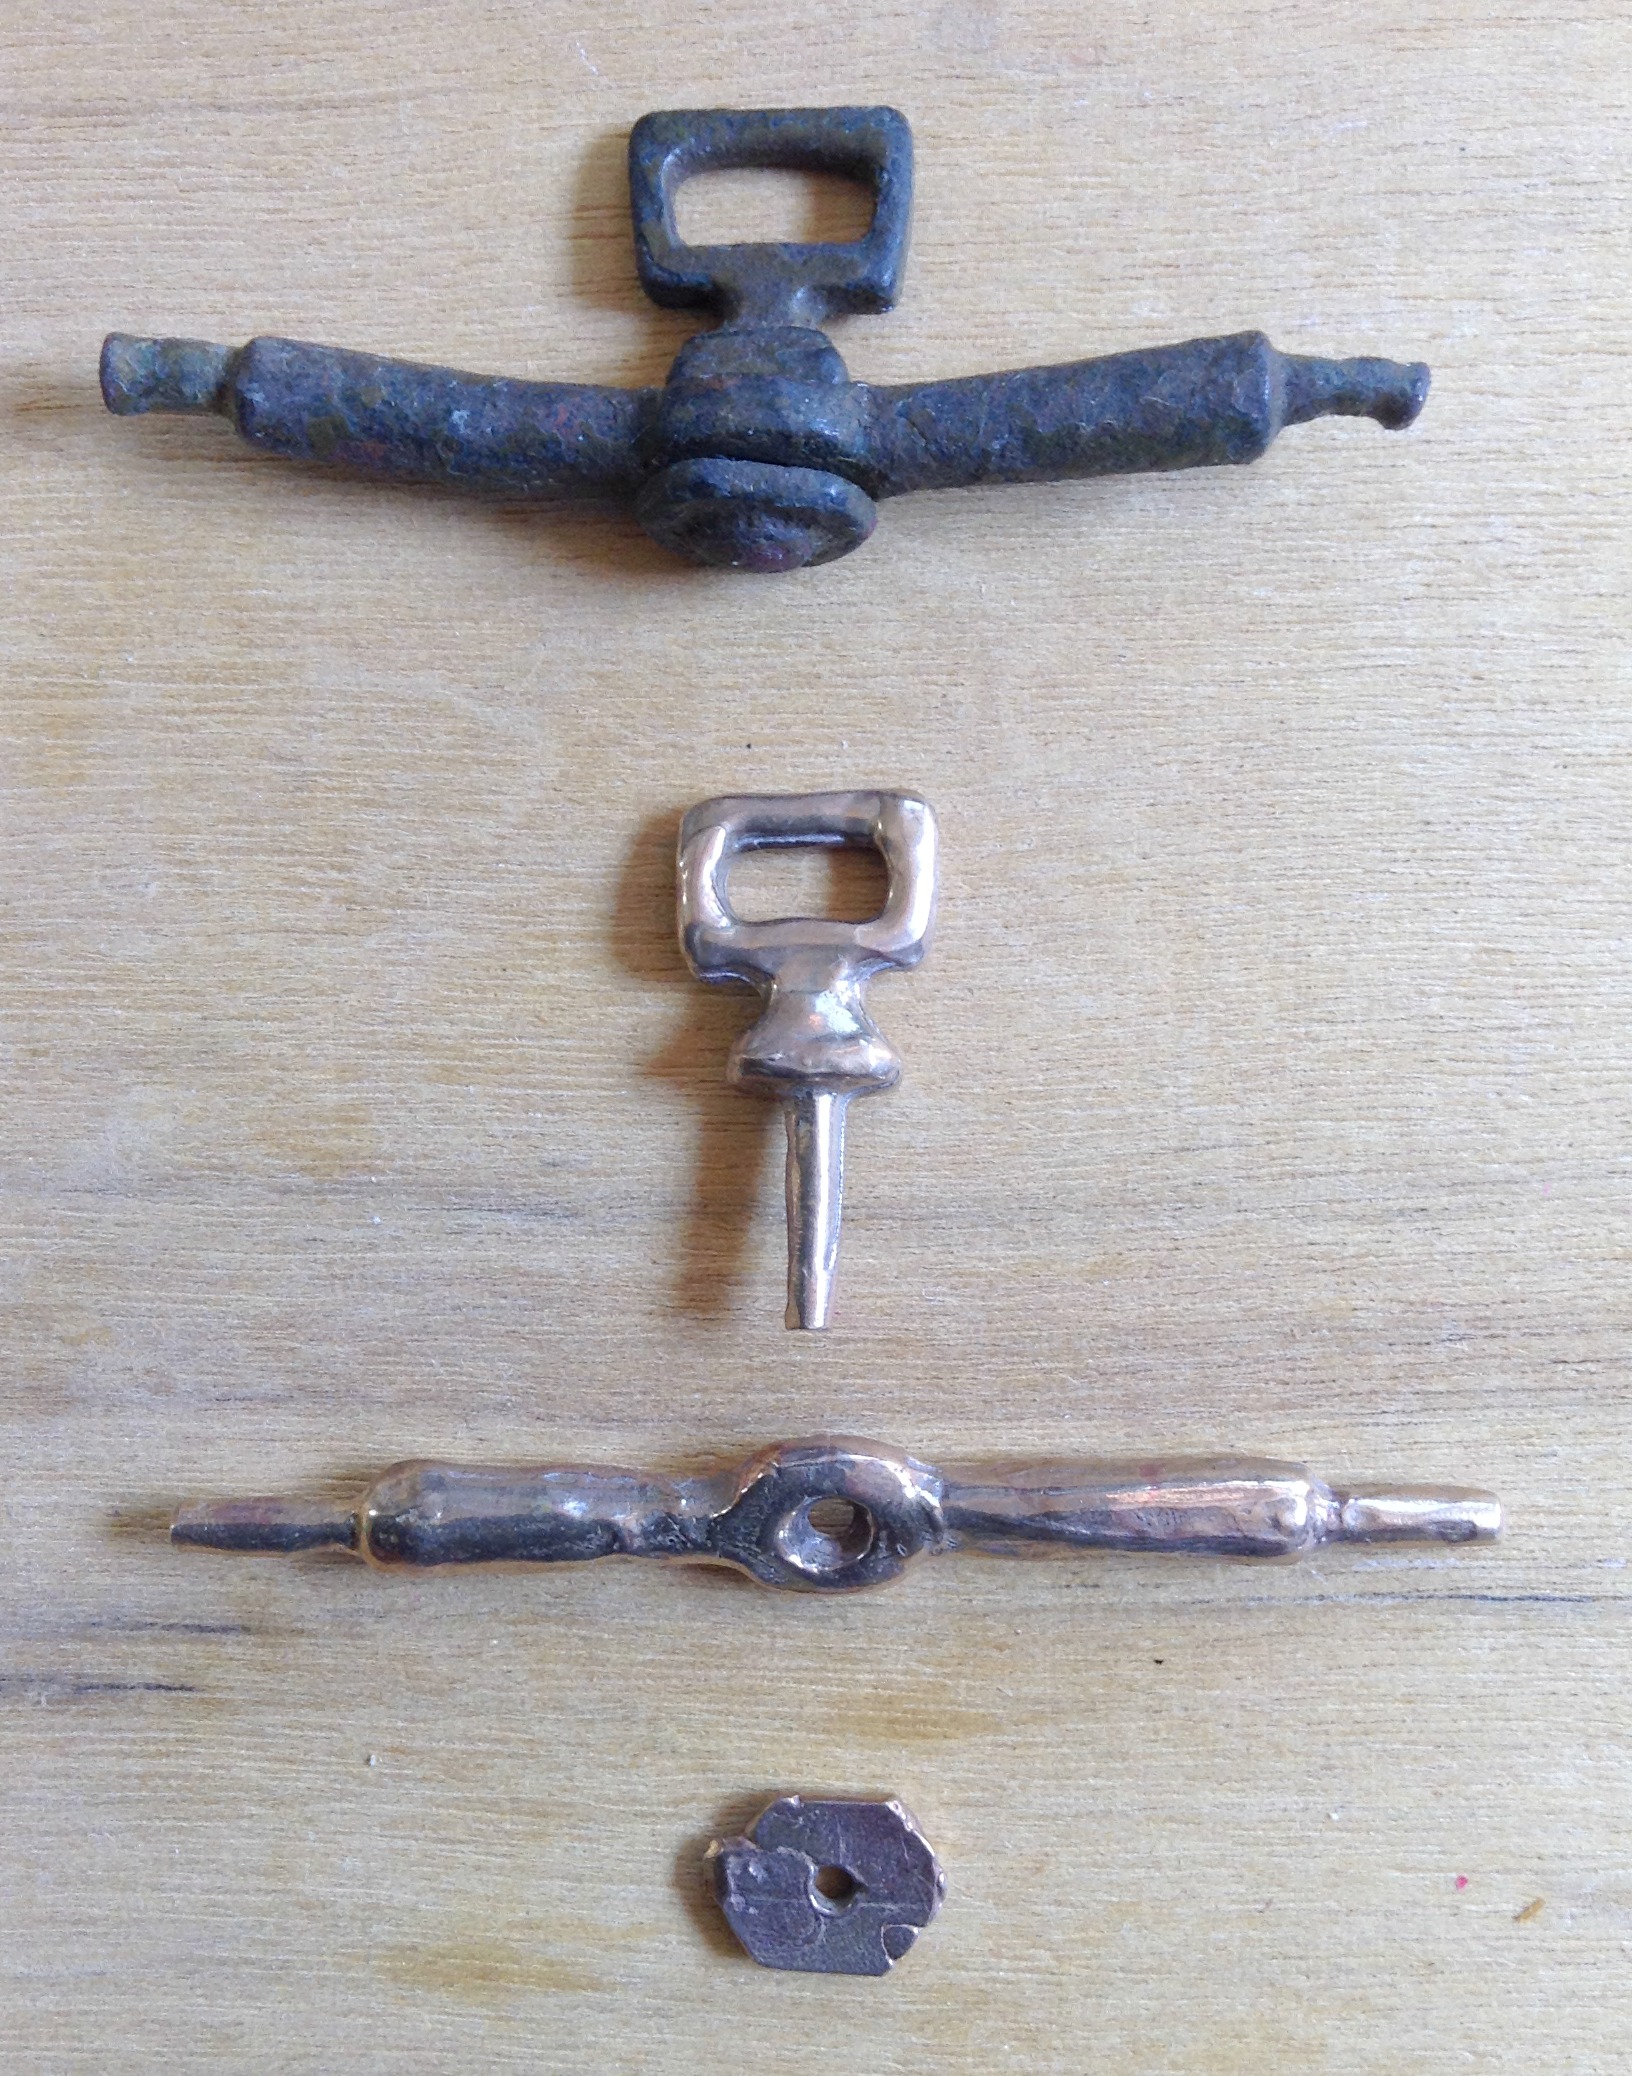
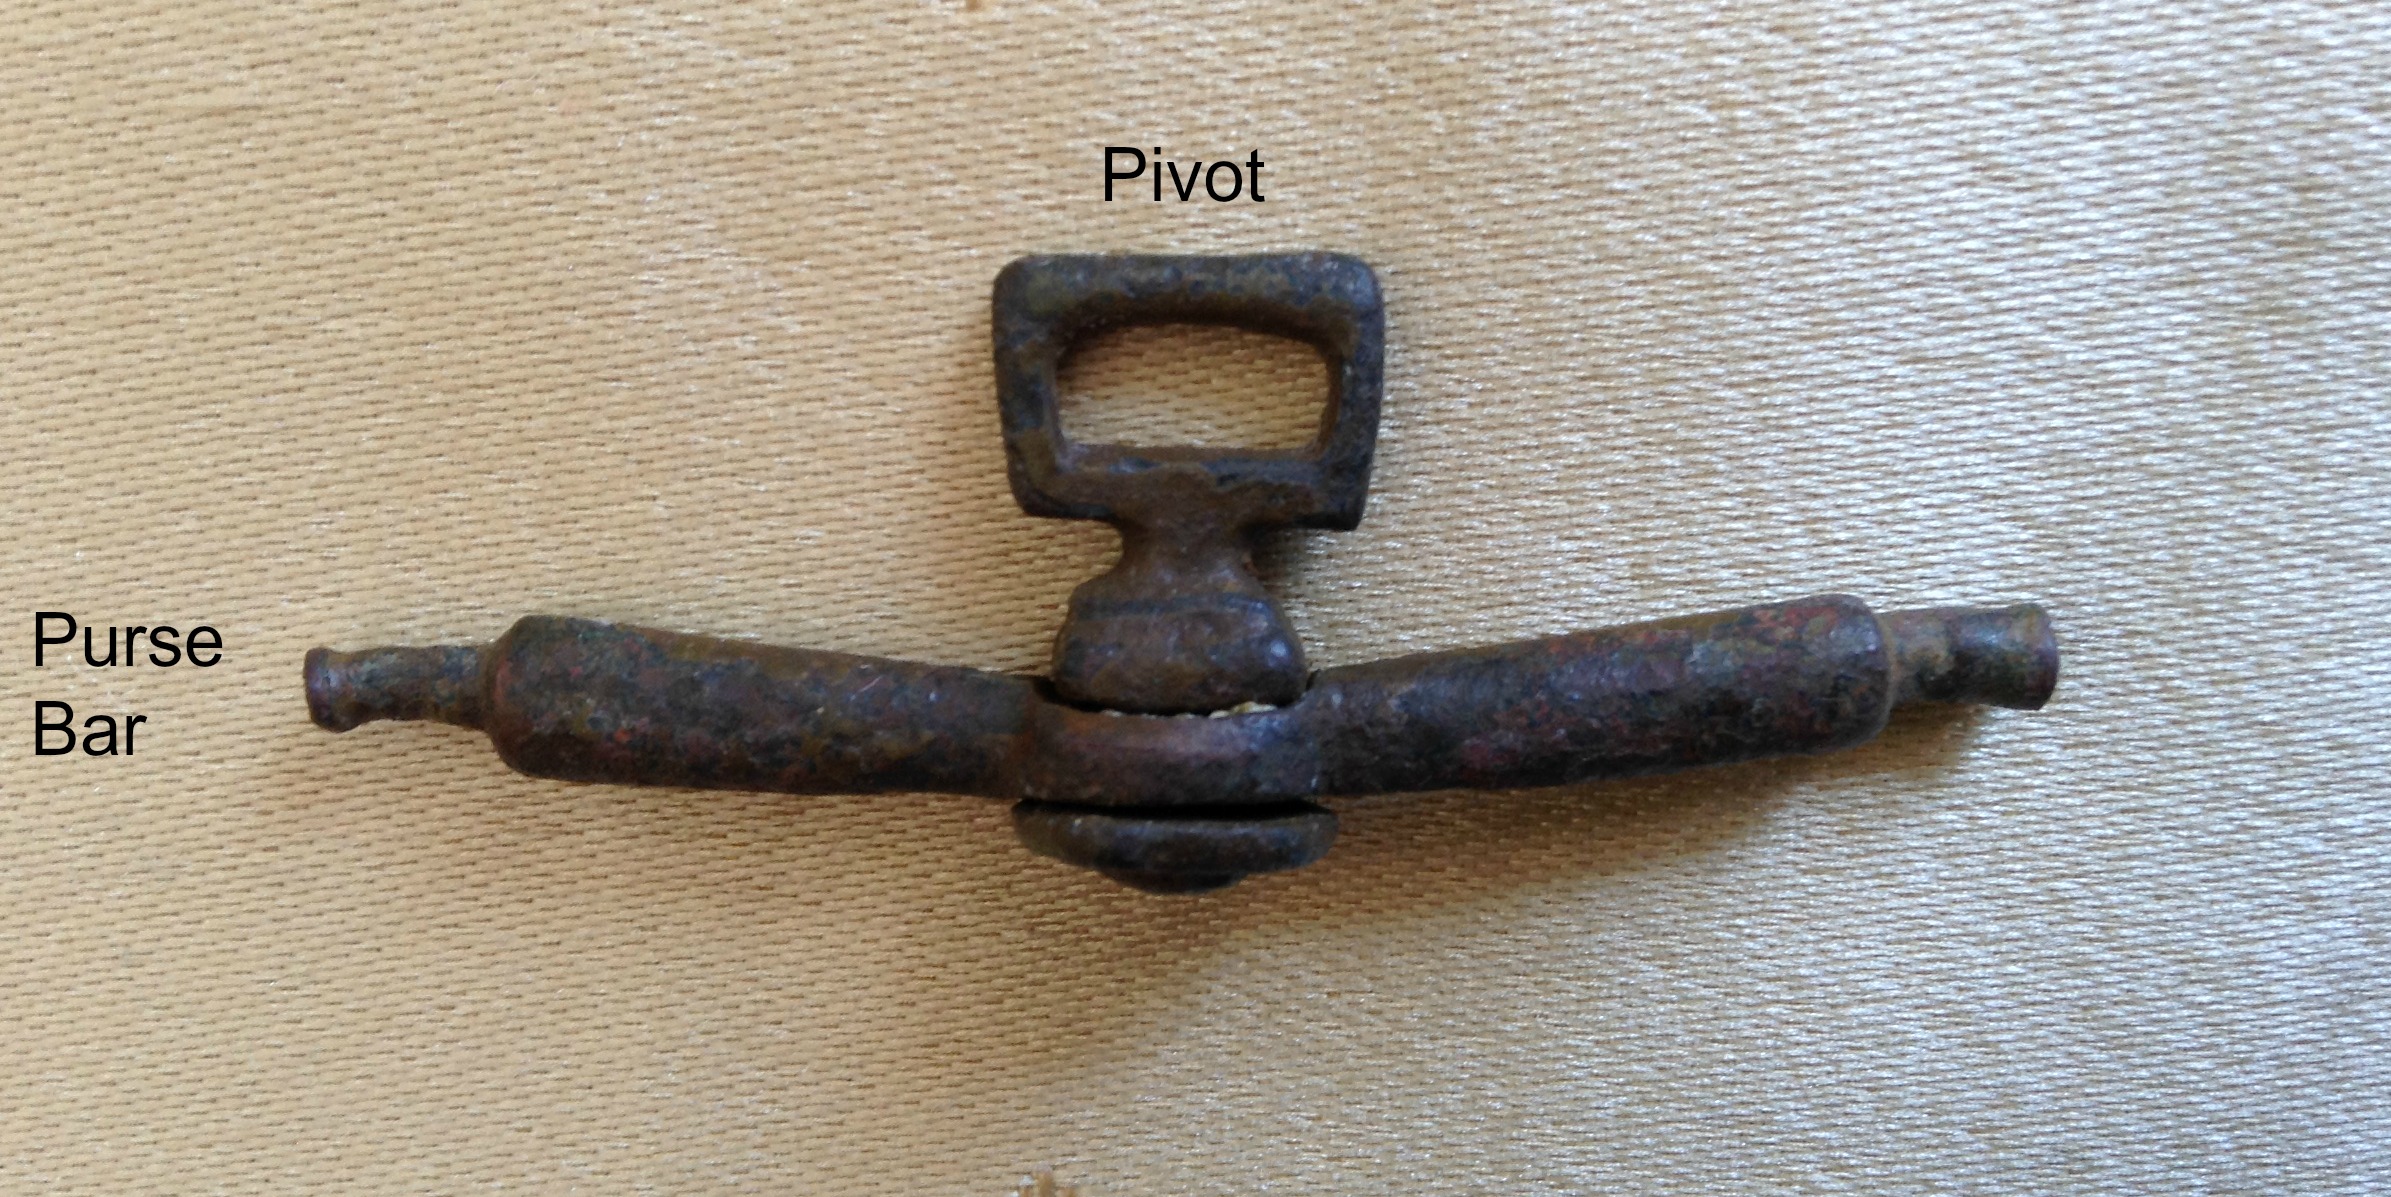
Last time I put together the purse frame bar and pivot, so now it is time to add the purse frame rings.

First a confession – I am cheating by using 8 gauge bronze wire. I have seen purse frames, usually the lowest quality ones, that use plain old wire rings. I was faced purely with a time issue. With all of the events that I am currently doing there was simply no time to be able to cast the type of “chevron” shaped ring that I wanted to use, so that project will happen in the future.

Why is the chevron shape important for better quality purse rings? The previous “L” or “chevron” shaped purse rings that we looked at used part of the “L” to provide a location for holes to sew the bag of the purse to. Although this is an important benefit, it is possible to simply wrap the material of the bag around the ring and sew it in place. So why is the shape so important? Strength. A plain round wire will bend much more easily, even if it has been hammered to make it harder. The basic structure of an “L” shape makes the ring much more stiff and less susceptible to bending.

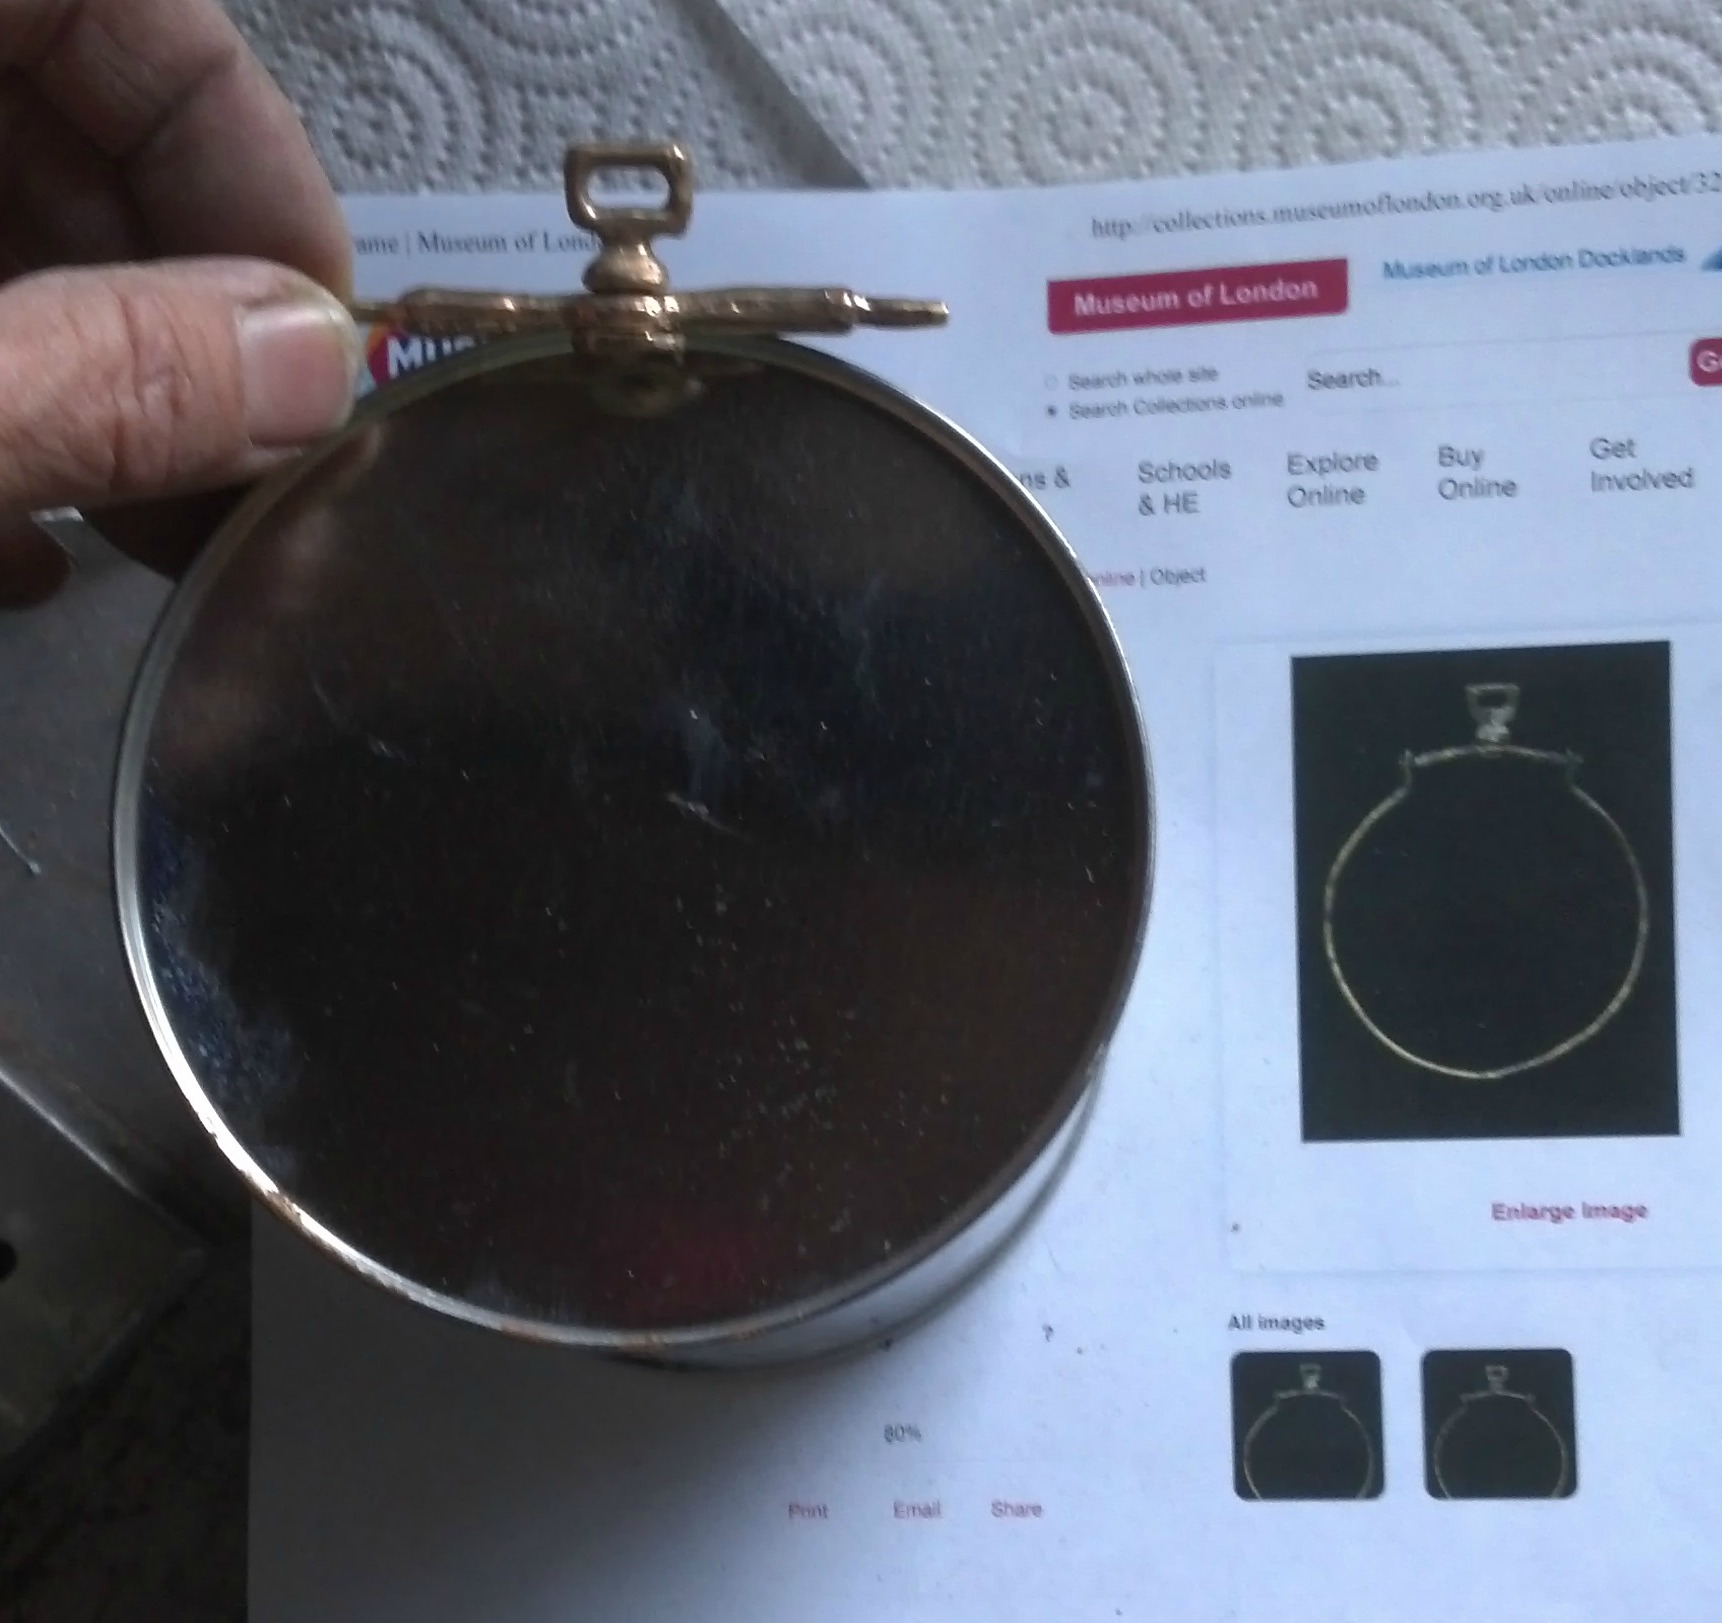
So back to my process. I looked at the purse frame from the Museum of London that had a surviving ring.

What I was looking for was the shape of the ring and the proportions of the ring to the purse bar. So I went in search of a round item that was the correct size. And here it is, a small paint can. The picture compares the can and purse bar to the picture of the purse frame at the Museum of London.

shaping the rings

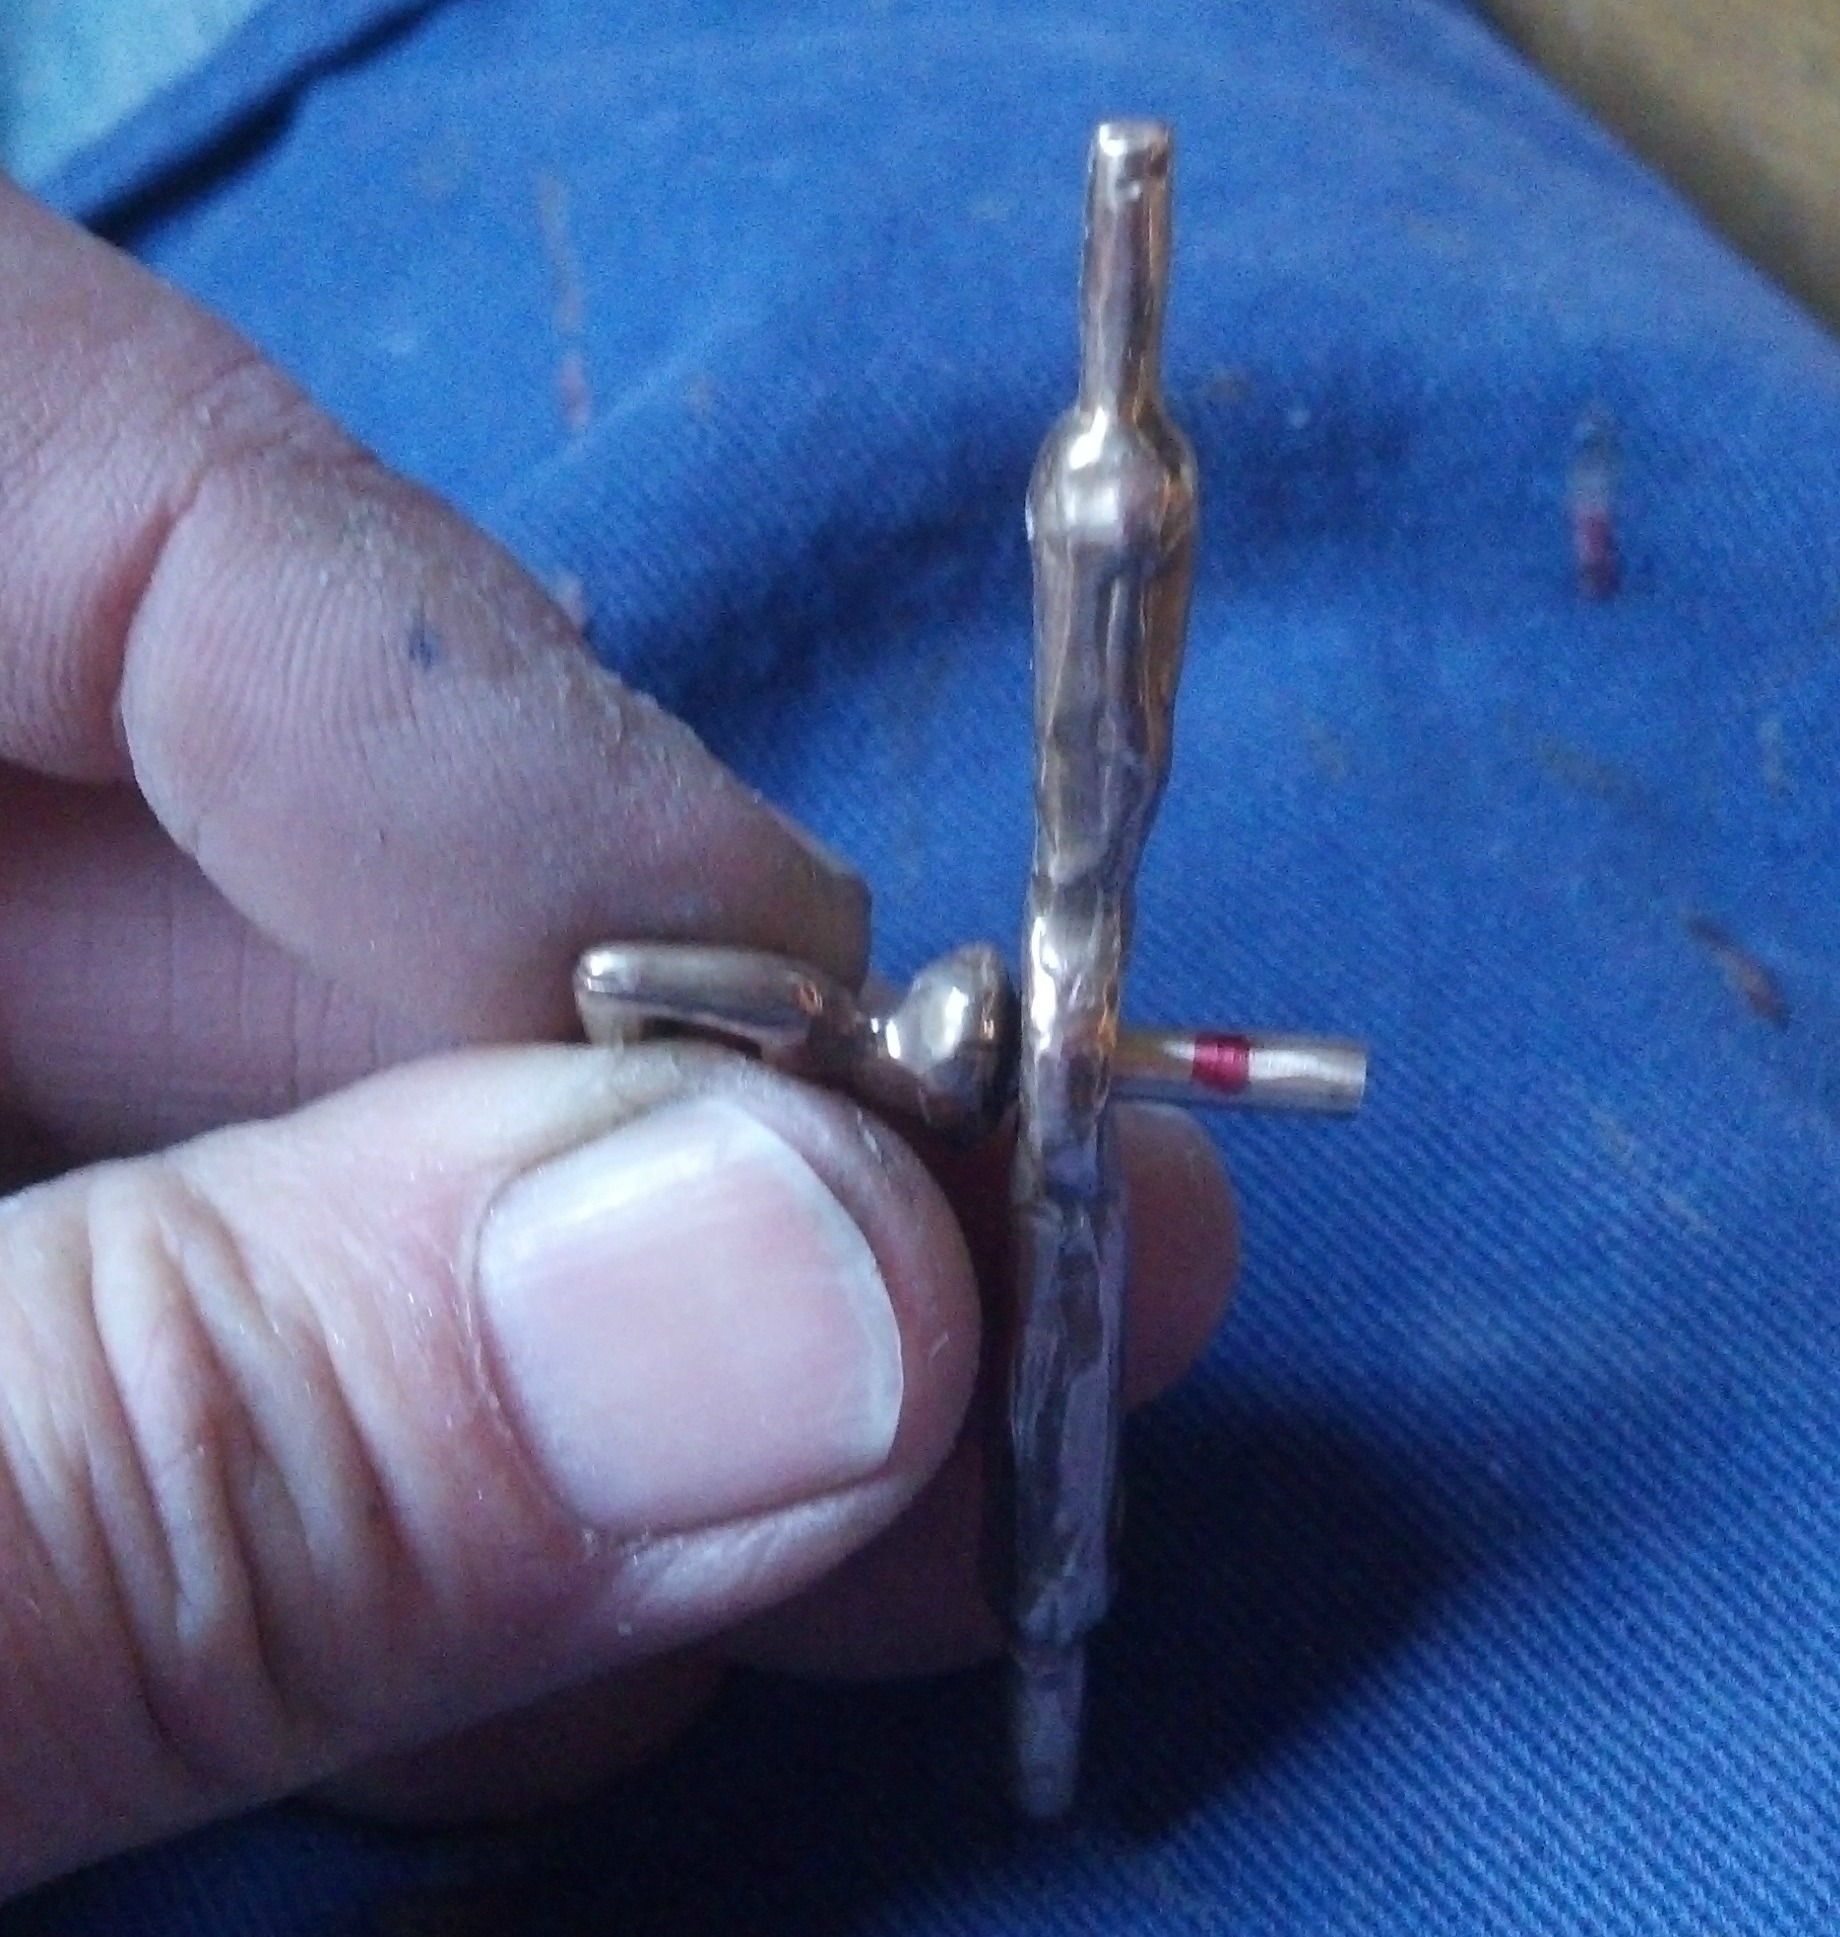
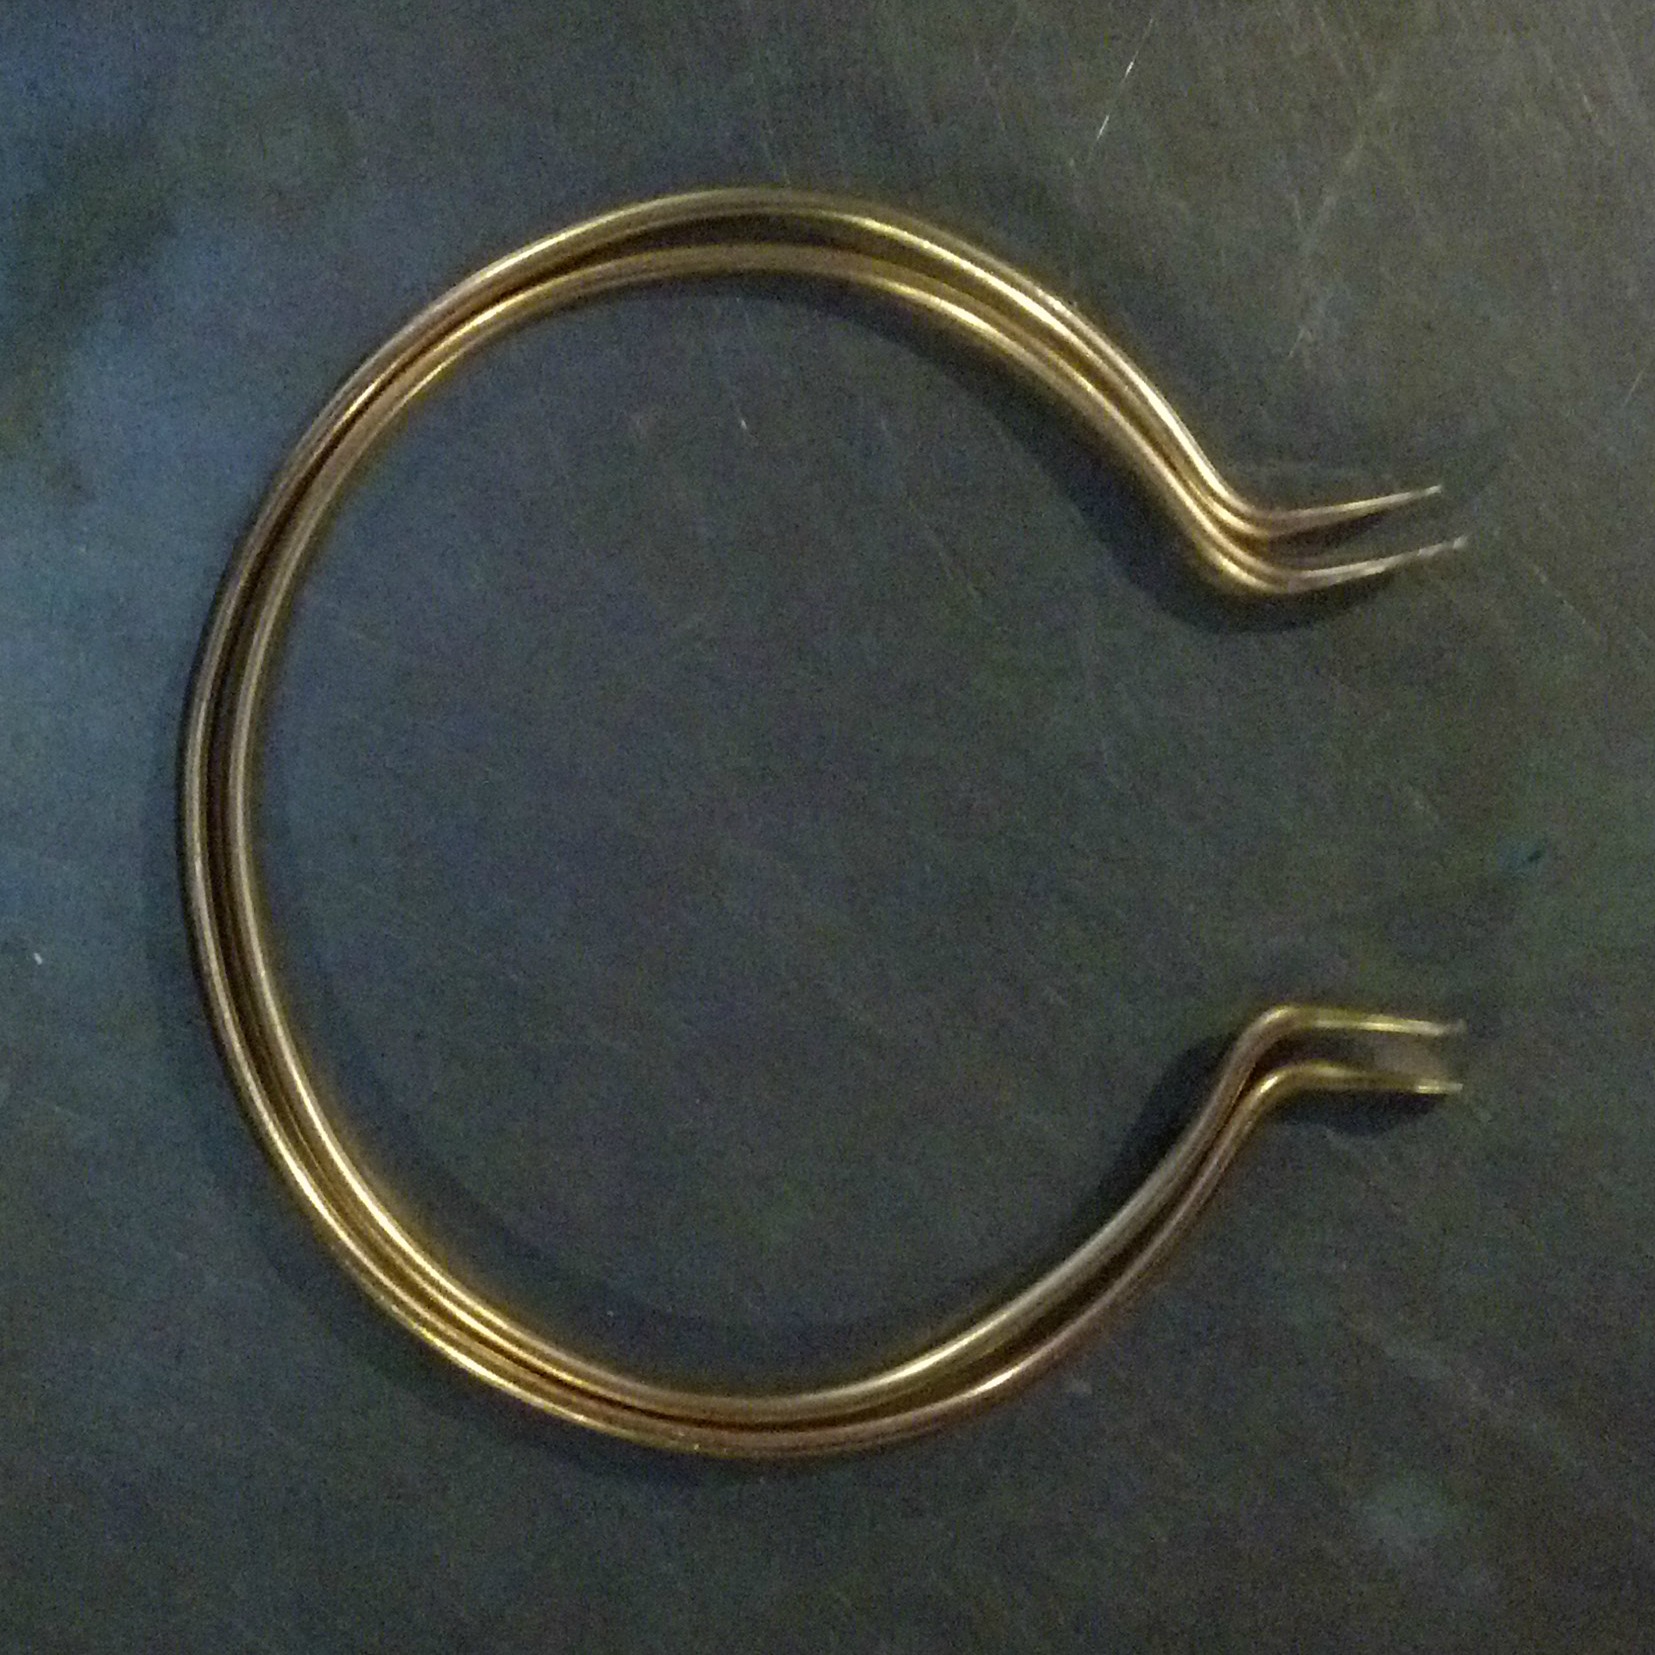
Pretty darn close. So I wrapped the 8 gauge wire around the can and started forming the tabs that will go up to the purse bar. Here they are, fresh off of the paint can with the purse frame .

freshly bent wire rings

So now it was time to adjust the rings so that they actually nest inside of one another and the tabs don’t interfere with one another. A little work with a pair of pliers accomplished that, and then it was time to flatten the ends of the wire rings. Here they are in progress.

ends of tabs


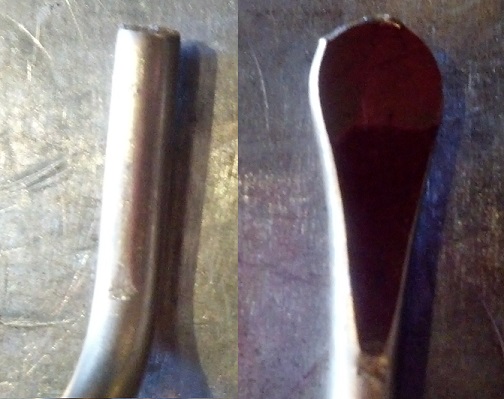
Once they were flat enough I cleaned off the rough spots with a file. And checked the fit of the rings one more time.

nested rings with tabs


Almost perfect! One of the tabs on the inner ring is a little too long, so I re-trimmed it and filed it again. Then it was time to create the holes that would allow the rings to fit onto the purse frame bar. Mark the location of the holes with a punch, so that the drill bit will not slide around. Then drill the holes and smooth off any burrs with a file.

And what do we get when we put it together?

first ring fit on frame

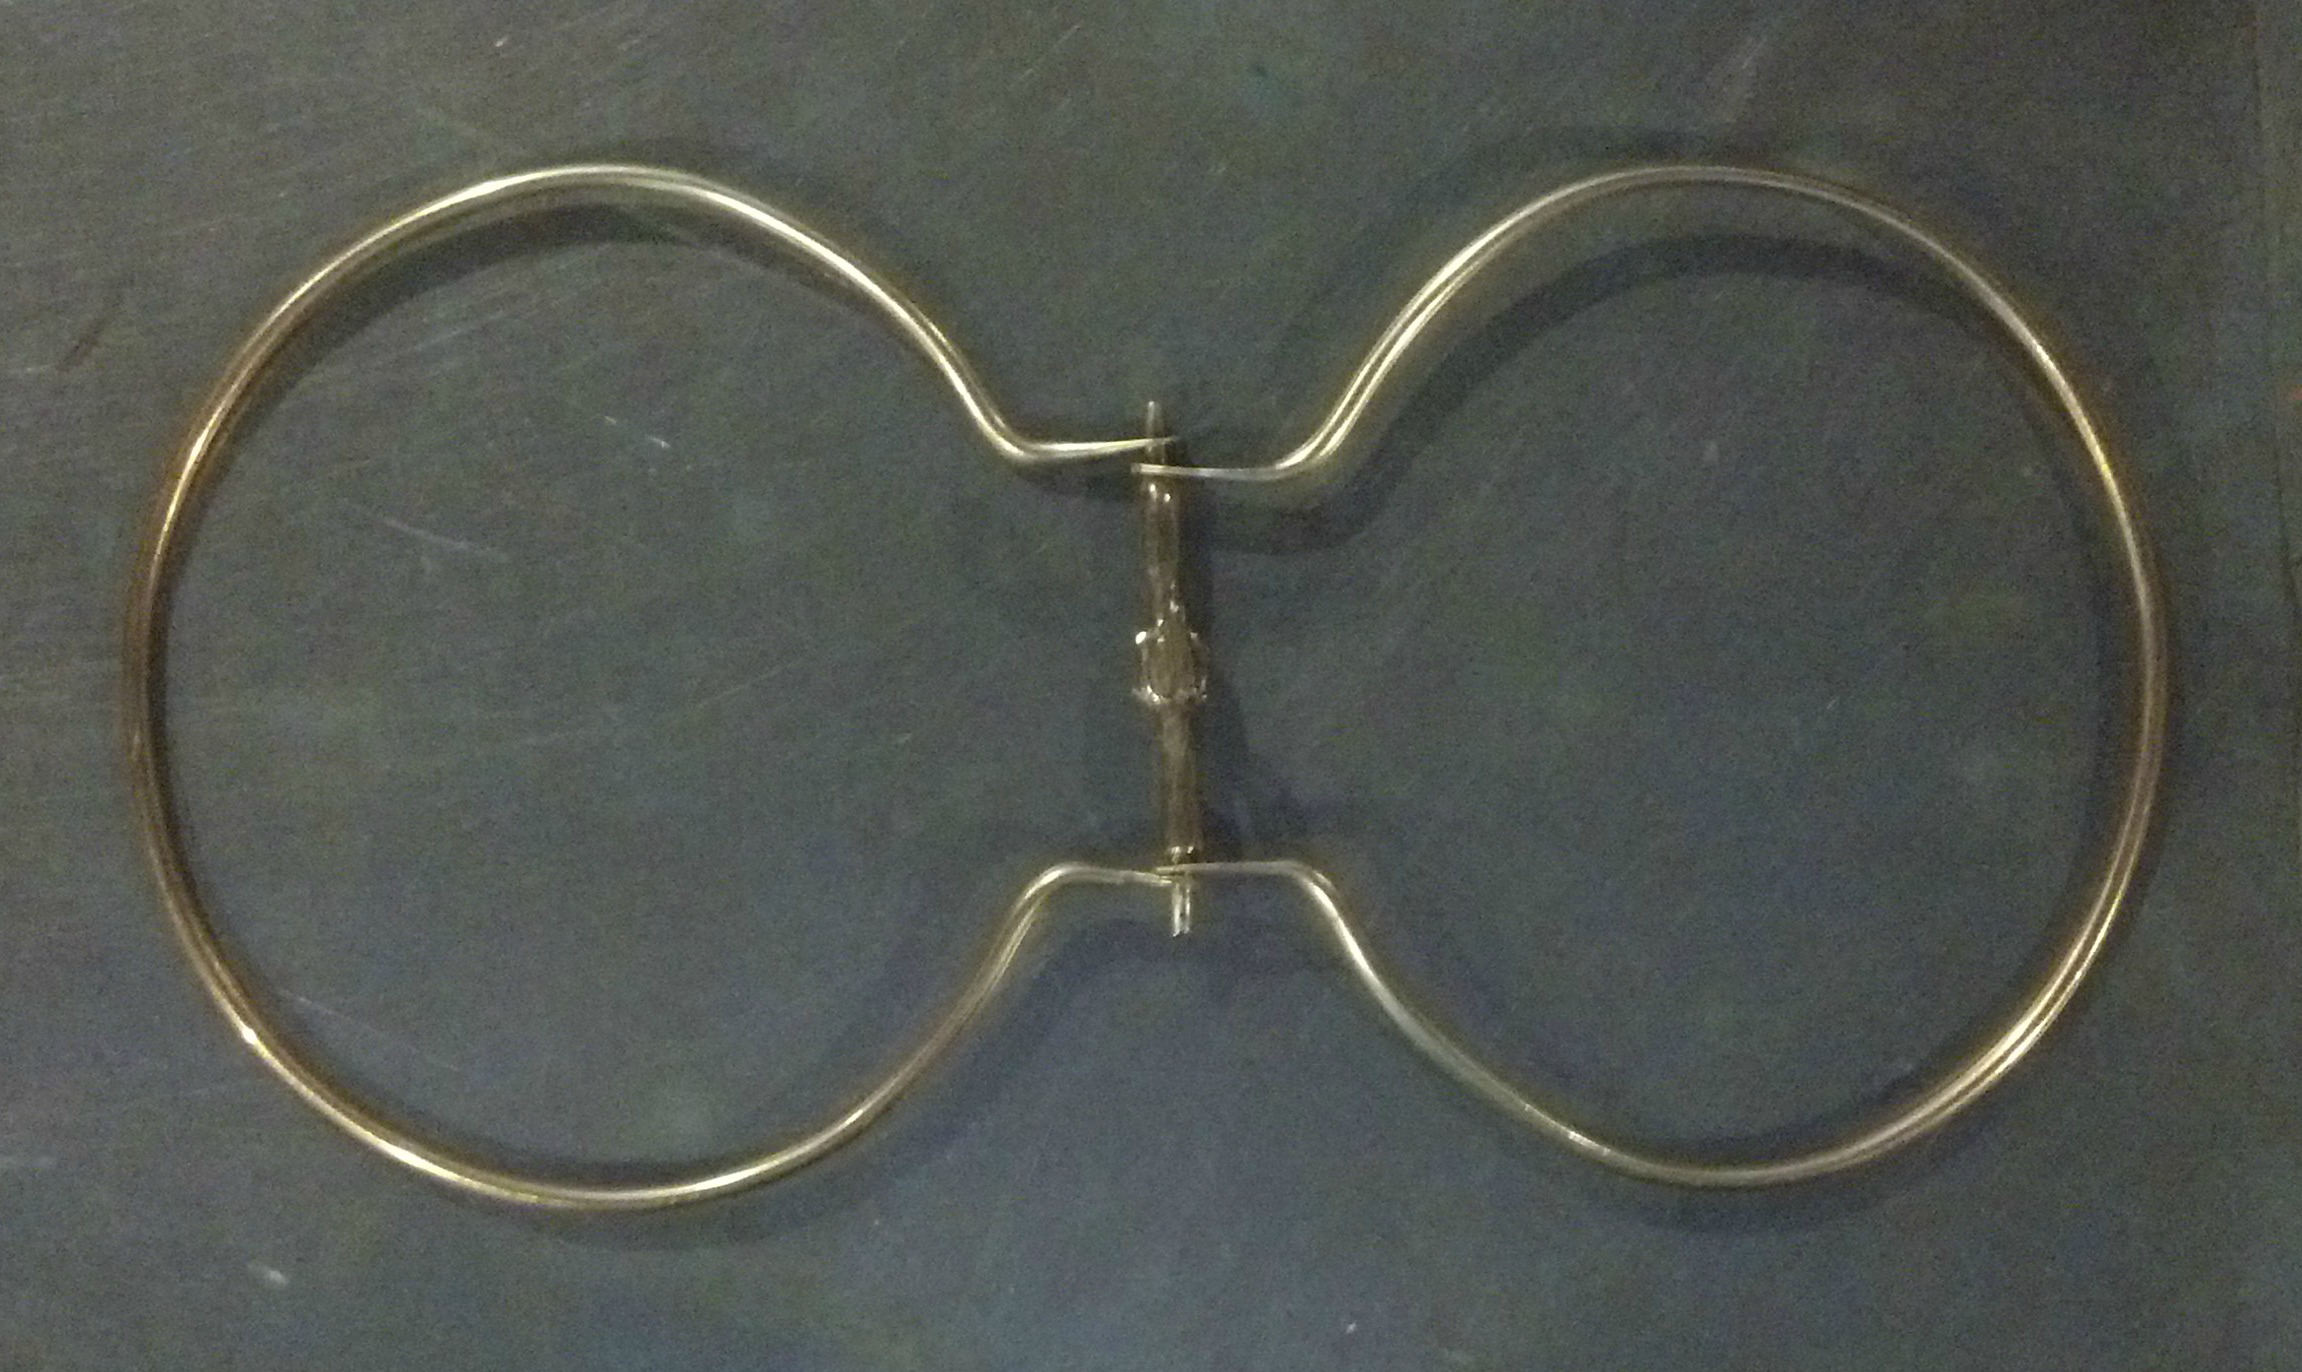
We get something that looks a lot like a purse frame with rings. The fit is pretty close, just a little work with a pair of pliers will make it perfect.

Next Time: Finishing up the Frame

Purses Part 9: Time For Metal!

Last time you saw the molds for making wax replicas of the purse pieces. Well the next obvious step is to turn those wax replicas into metal.

I cast metal (bronze, sterling silver, and pewter) on a fairly regular basis. Bronze and Sterling are what I think of as “hot” metals – they require temperatures of over 1700 degrees Fahrenheit in order to melt and become liquid. Pewter, on the other hand can be melted on a camp stove (500 to 600 degrees depending on the alloy).

The technique that I use for casting most of my “hot” metal is called Lost Wax Casting. A basic summary of how this works is that the waxes are anchored into a stainless steel flask, a plaster like substance, called investment, is poured into the flask and allowed to harden. The flask is then turned upside down and heated. The wax flows out, and in the later stages of heating (over 700 degrees), burns away completely. The investment is now the mold into which the molten metal will be poured. The image below shows the basic layout of the stainless steel flask, wax and investment. This flask is ready for the molten metal to be poured in.

Lost Wax Casting Flask


So, I put my waxes into flasks, invested, heated, and poured my metal. And the result? This picture shows the original artifact, and the newly cast, and cleaned up, bronze replicas.metal purse pieces

So what happens now? Well, I spent a bit of time filing and fitting the pieces together, and removing any rough spots. I wanted the pivot to spin easily, just like the original artifact does.

Once I had the pieces fitting together well, I needed to measure exactly how long the pin on the bottom of the pivot needed to be. If I cut it too short there will not be enough metal to peen over to hold the frame together, and if I cut it too long the fit of the frame will be super loose, and probably bend when I try to rivet the end. The fit on all of the period frames that I have seen is always fairly snug. So I marked the pin with a magic marker with the washer in place. This picture shows the marked pin with the washer off. I couldn’t find a smaller tipped marker (the Studio elves must have borrowed it again), so I knew that I needed to make the cut about half way across the ink mark.

purse frame pivot marked

I cut off the bottom of the pivot pin, smoothed the end, made sure that the end was at a right angle to the pivot pin, and reassembled the purse frame. The assembled purse frame was then put into a machinists’ vice and the end of the pivot pin was peened over with a hammer. And here is a picture of the result!

Riveted purse Frame

Next Time: Time for Purse Frame Rings

Purses Part 7: Back Down to Earth

Having looked at some of the truly amazing purse frames that were available as luxury goods in the Late Middle Ages in Europe, it is now time to come back down to earth and my original project to study and create replicas of original purse frames.

So, this is what I decided to start with.

My Purse frame with words

This is a picture of the actual artifact that I own. I have broken pieces of several purse frames, most of which are for considerably larger purses, but I decided to start small and simple. My goal with this purse was to replicate the actual frame of a real purse, without any of the preconceived notions or gaps in knowledge that I had on my last project. I also wanted to see if I could actually cast all of the pieces that they would have cast, instead of using a bunch of formed metal pieces. I wanted to create a purse frame that any middle class individual from western Europe would instantly recognize as a “normal” purse frame.

First let’s give a few facts about my purse frame. The frame was found by a metal detectorist in England. It is cast of bronze. The purse bar is 61 mm long (2 3/8 inches) and the pivot top is 13 mm across (about half an inch) and 22mm top to bottom (about 7/8 of an inch). It is a small purse, probably originally intended for coins. The pivot actually does spin around all the way on this purse frame. I am not certain what the advantage to this would be, but perhaps turning it with the front against you would make it more difficult for pick pockets to get into.

So how did I start on this project? First I spent quite a bit of time just looking at the frame. I wanted to understand how it was made.

Was it all cast? Yes, although it is possible that the washer at the bottom of the pivot was actually created from a heavy piece of plate bronze.

Were there any places that were soldered? How were the pieces held together? The answer to both of these questions is related. There is no detectable solder on the piece. The parts are all riveted together by peaning over the ends of the metal purse pieces.

How many pieces were there? What pieces appear to be missing? This is a difficult set of questions to answer. The surviving frame consists of three pieces: the purse bar, the pivot, and a washer on the bottom of the purse bar that helps keep the pivot in place while allowing the pivot to rotate. The bare ends of the purse bar show wear marks. There was originally at least one purse ring, and possibly two. There does not appear to have been a washer on the ends of the purse bar to help retain the purse frame rings, but it is possible that there was, and it didn’t leave a discernible mark.

Next Time: Where Do We Go From Here?