Camp Beds: Part 3 –Getting off of the Ground – Homemade & Crafted Solutions: Part 3 – Bolted Together Bed

When we started camping in period pavilions we asked our friends what sort of beds they were sleeping on. And this is the bed that we settled on. It is not period, but it is comfortable, sturdy and easy to break down and set up quickly.

M3361S-3034

When it is “dressed” it can look as plain or fancy as you want it to. It would also be simple to extend the top of the legs up to create a four poster bed. We always cover our pillows completely during the day to keep them clean.

M3361S-3034

So how do we start?

First decide how large a bed you are going to make. Measure the mattress and make the bed at least 1 inch larger in both directions. This gives you room for your covers to be tucked in around the mattress.

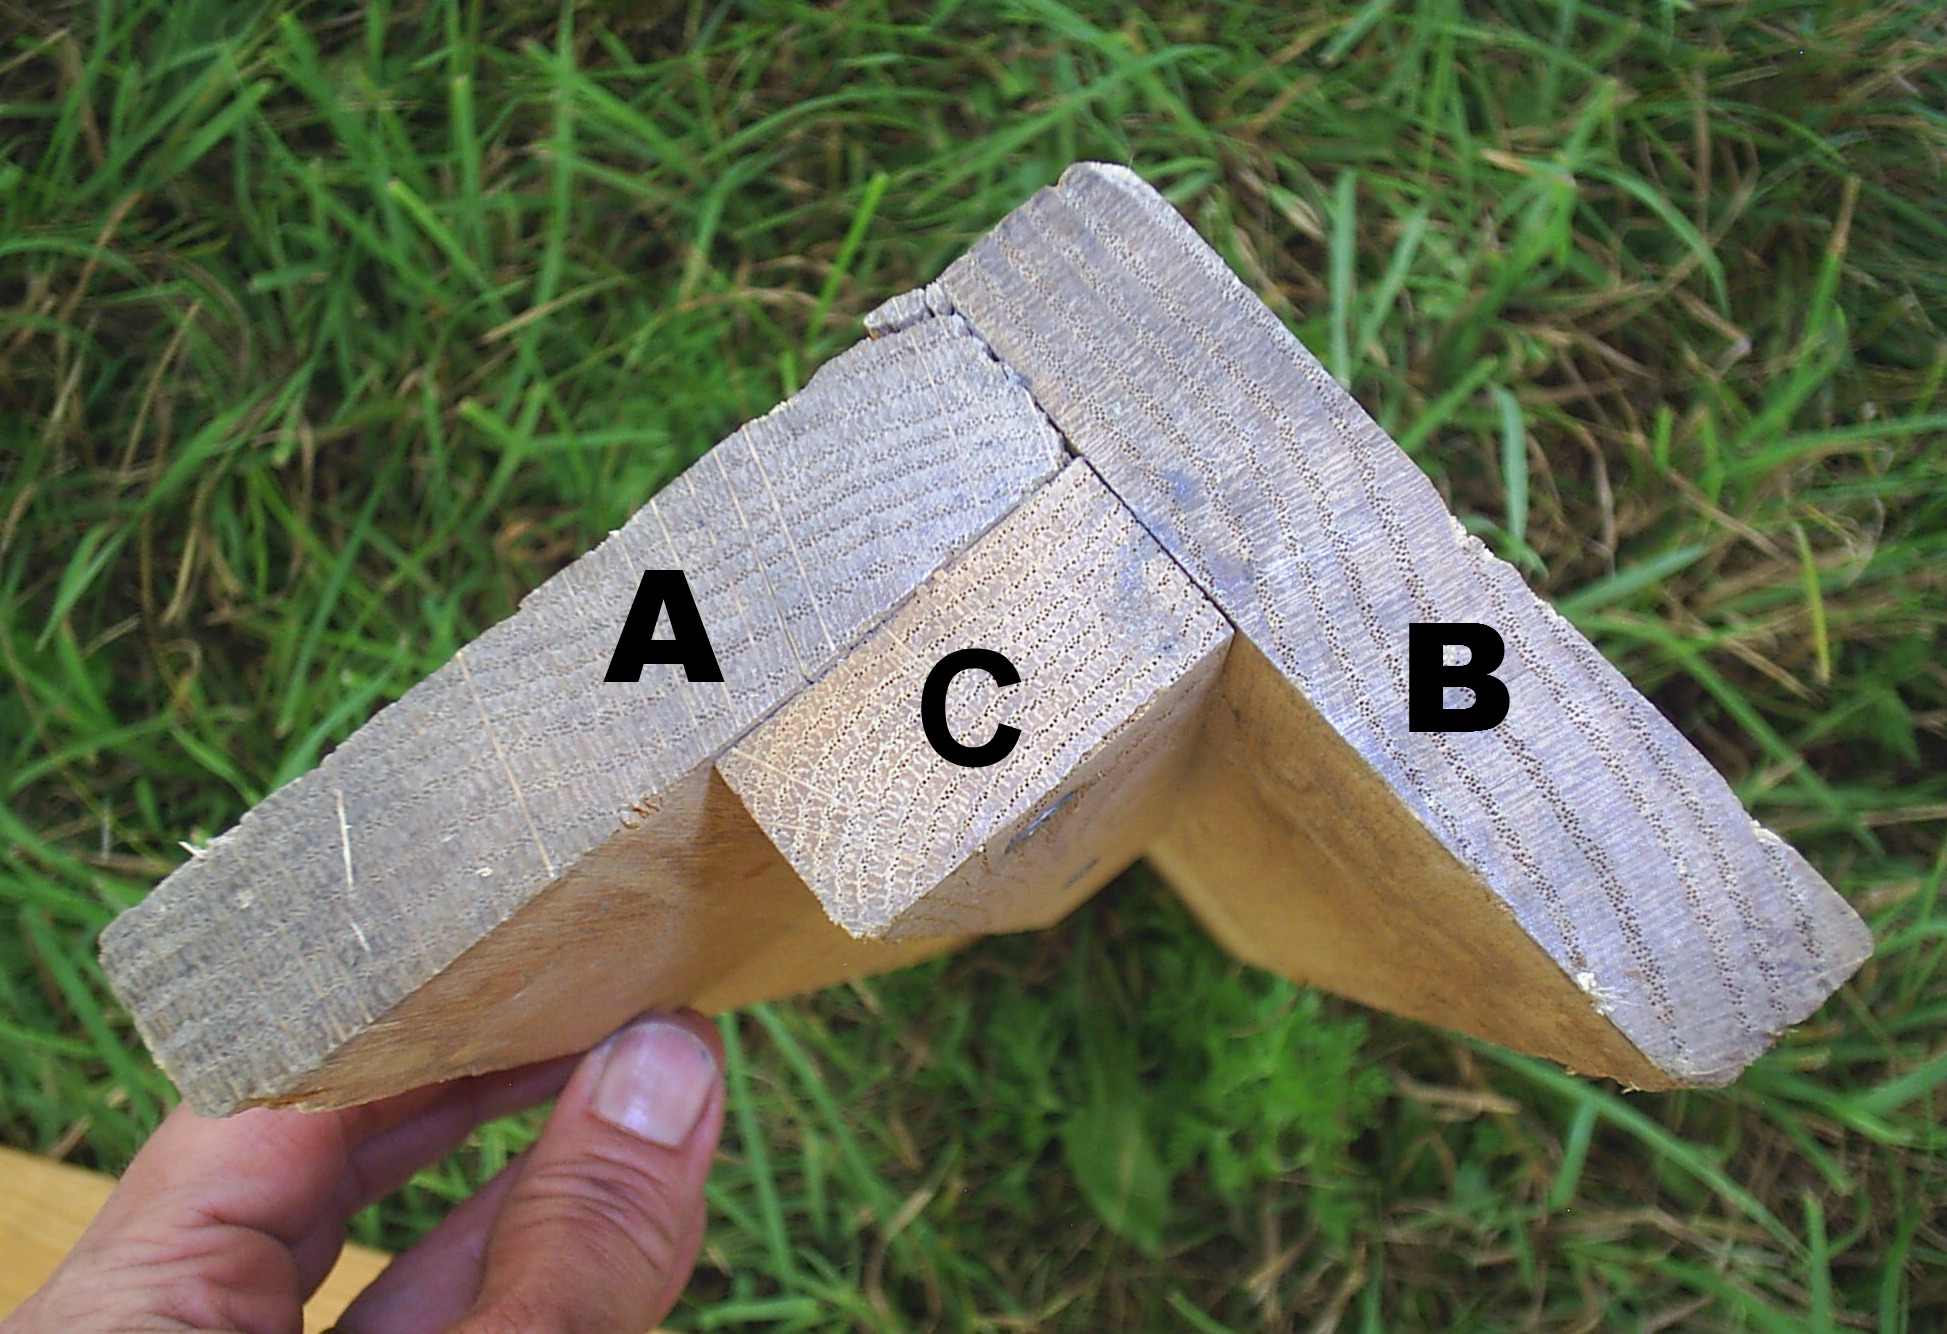
Here is a picture of the leg construction, from the bottom. The leg is made of two pieces of wood with a third piece acting as a stabilizer. All three pieces are glued and screwed together. A and B are the same height and C only goes up to the level of the side rails. The rails will actually rest on C when they are bolted in place. You need to decide how tall you want the legs to be. Ours are tall enough to allow us slide our storage tubs under the bed.

M3361S-3034This is the way the headboard and foot board of the bed are assembled.

M3361S-3034

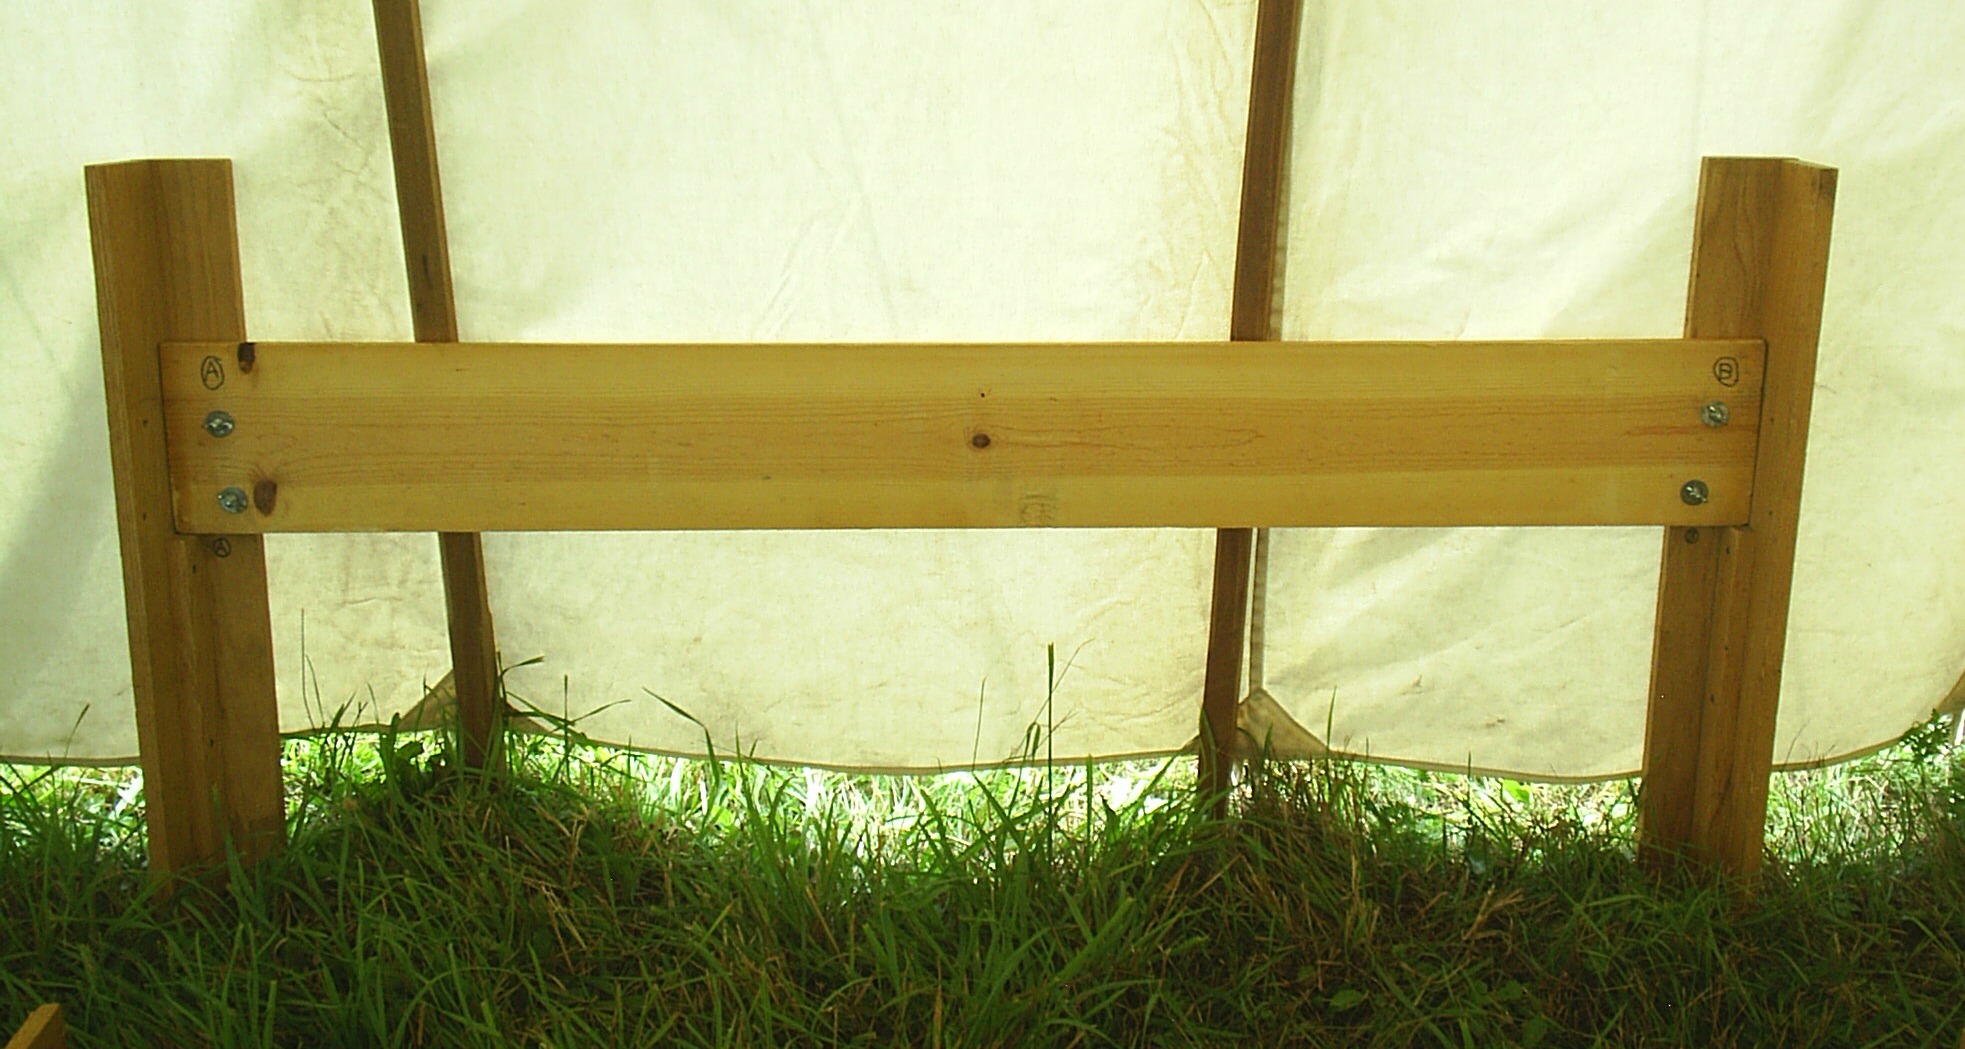
Four bolts, with washers and wing nuts hold the legs to the headboard.

The side rails of the bed are also made of several pieces of wood. C is the actual side rail, B is the shelf that the bed boards rest on, and A is a stabilizer for the bed board shelf and also stiffens the bed rail. When the side rail is in use board C is vertical.

M3361S-3034

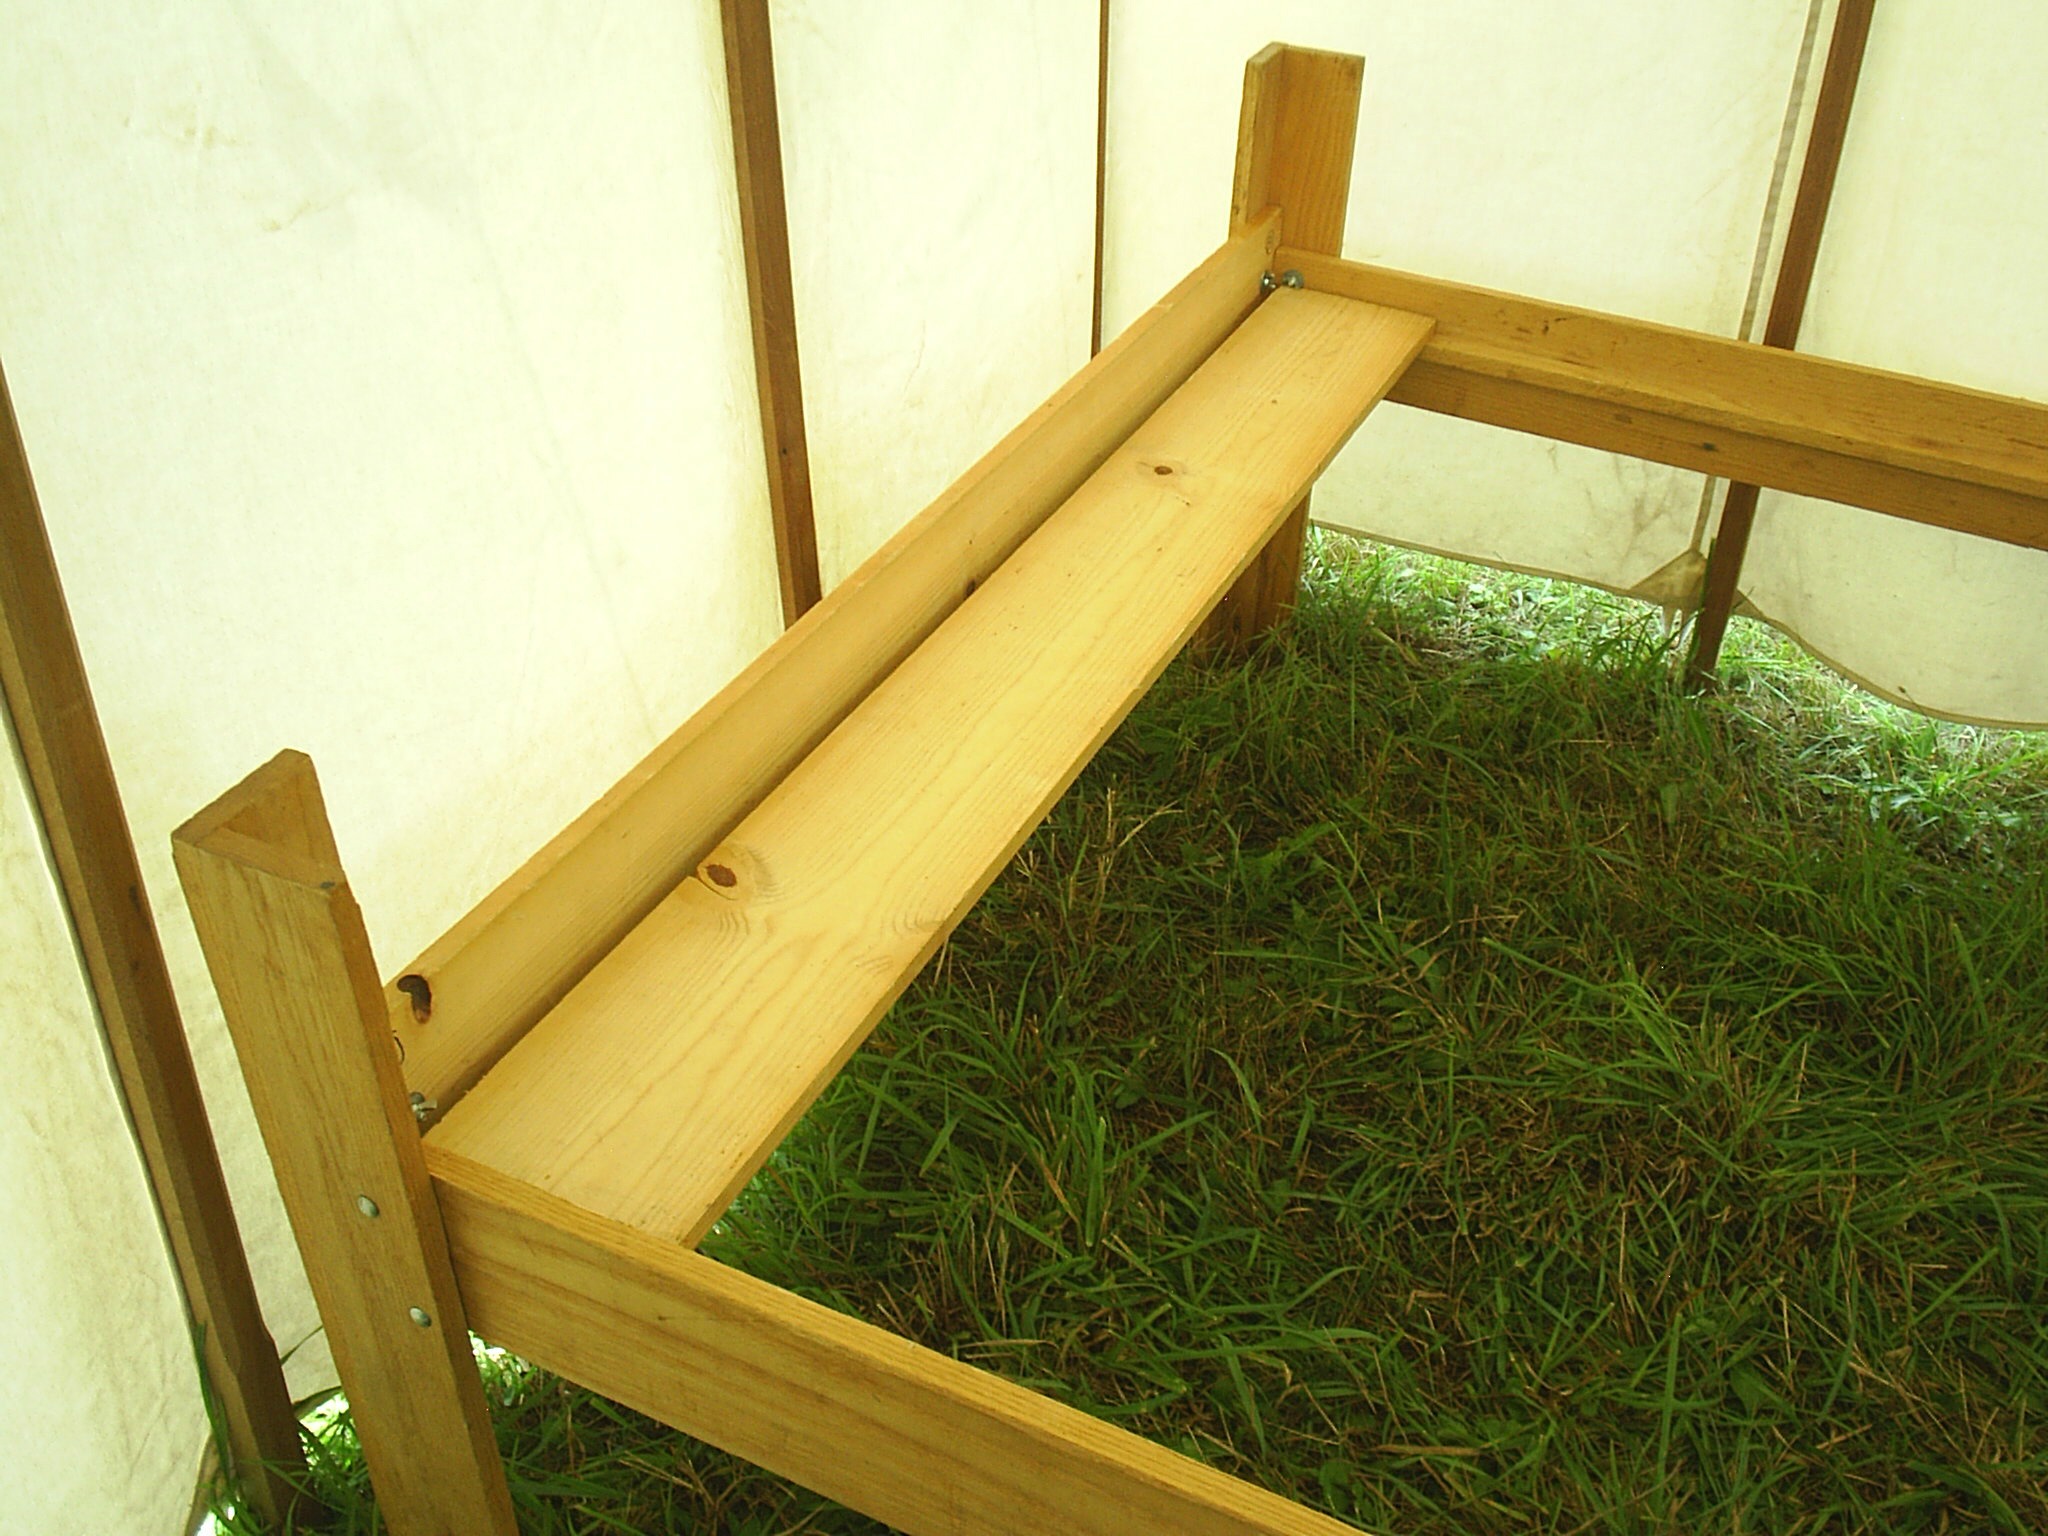
This next picture shows the side rail in place. You will notice that each one of the pieces is marked with the letter D. That makes it easy to find all of the pieces and assemble them quickly. No matter how careful you are about drilling your holes, each corner of the bed will be slightly different. Any system that allows you to keep the correct pieces together will work.

M3361S-3034

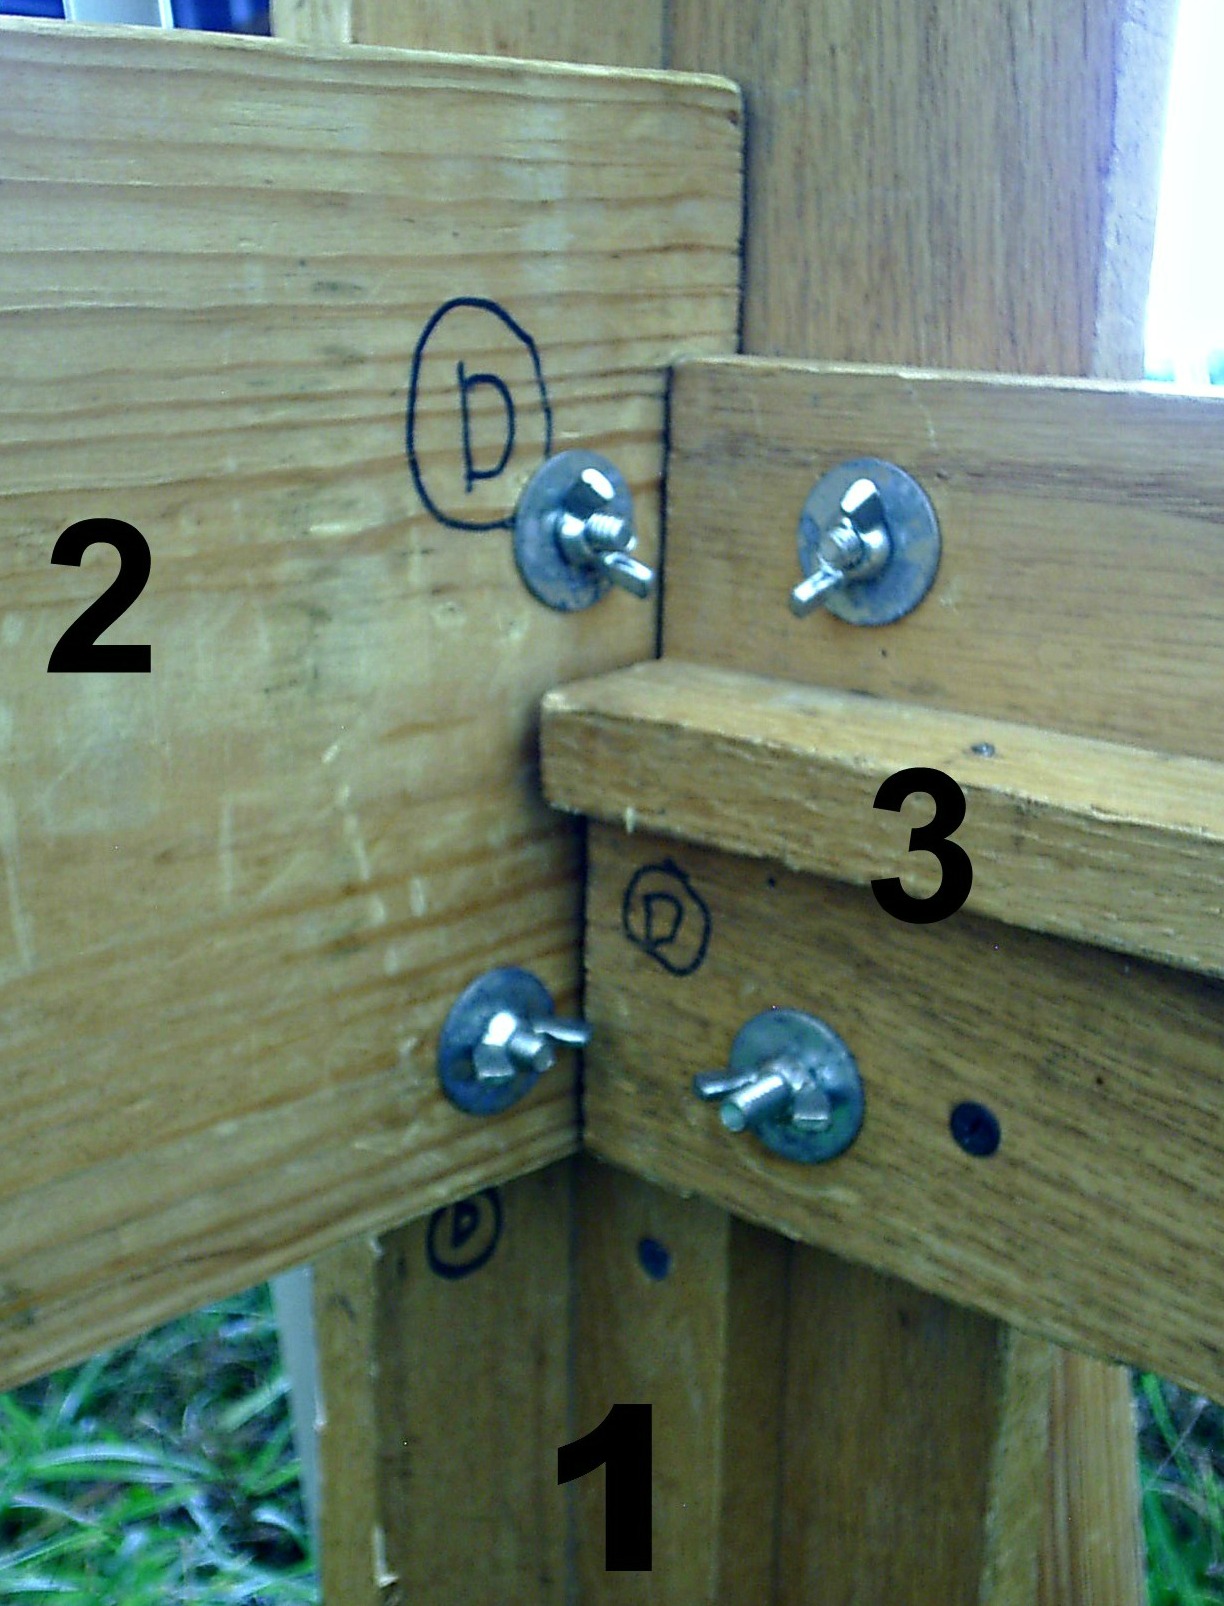
The distance from the bottom of boards 2 and 3 to the ground determines the height of the items that you can easily slide under the bed.

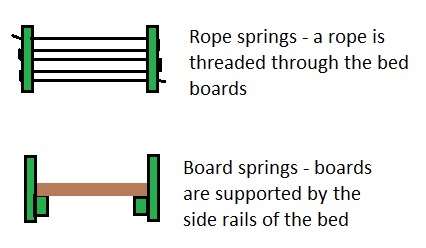
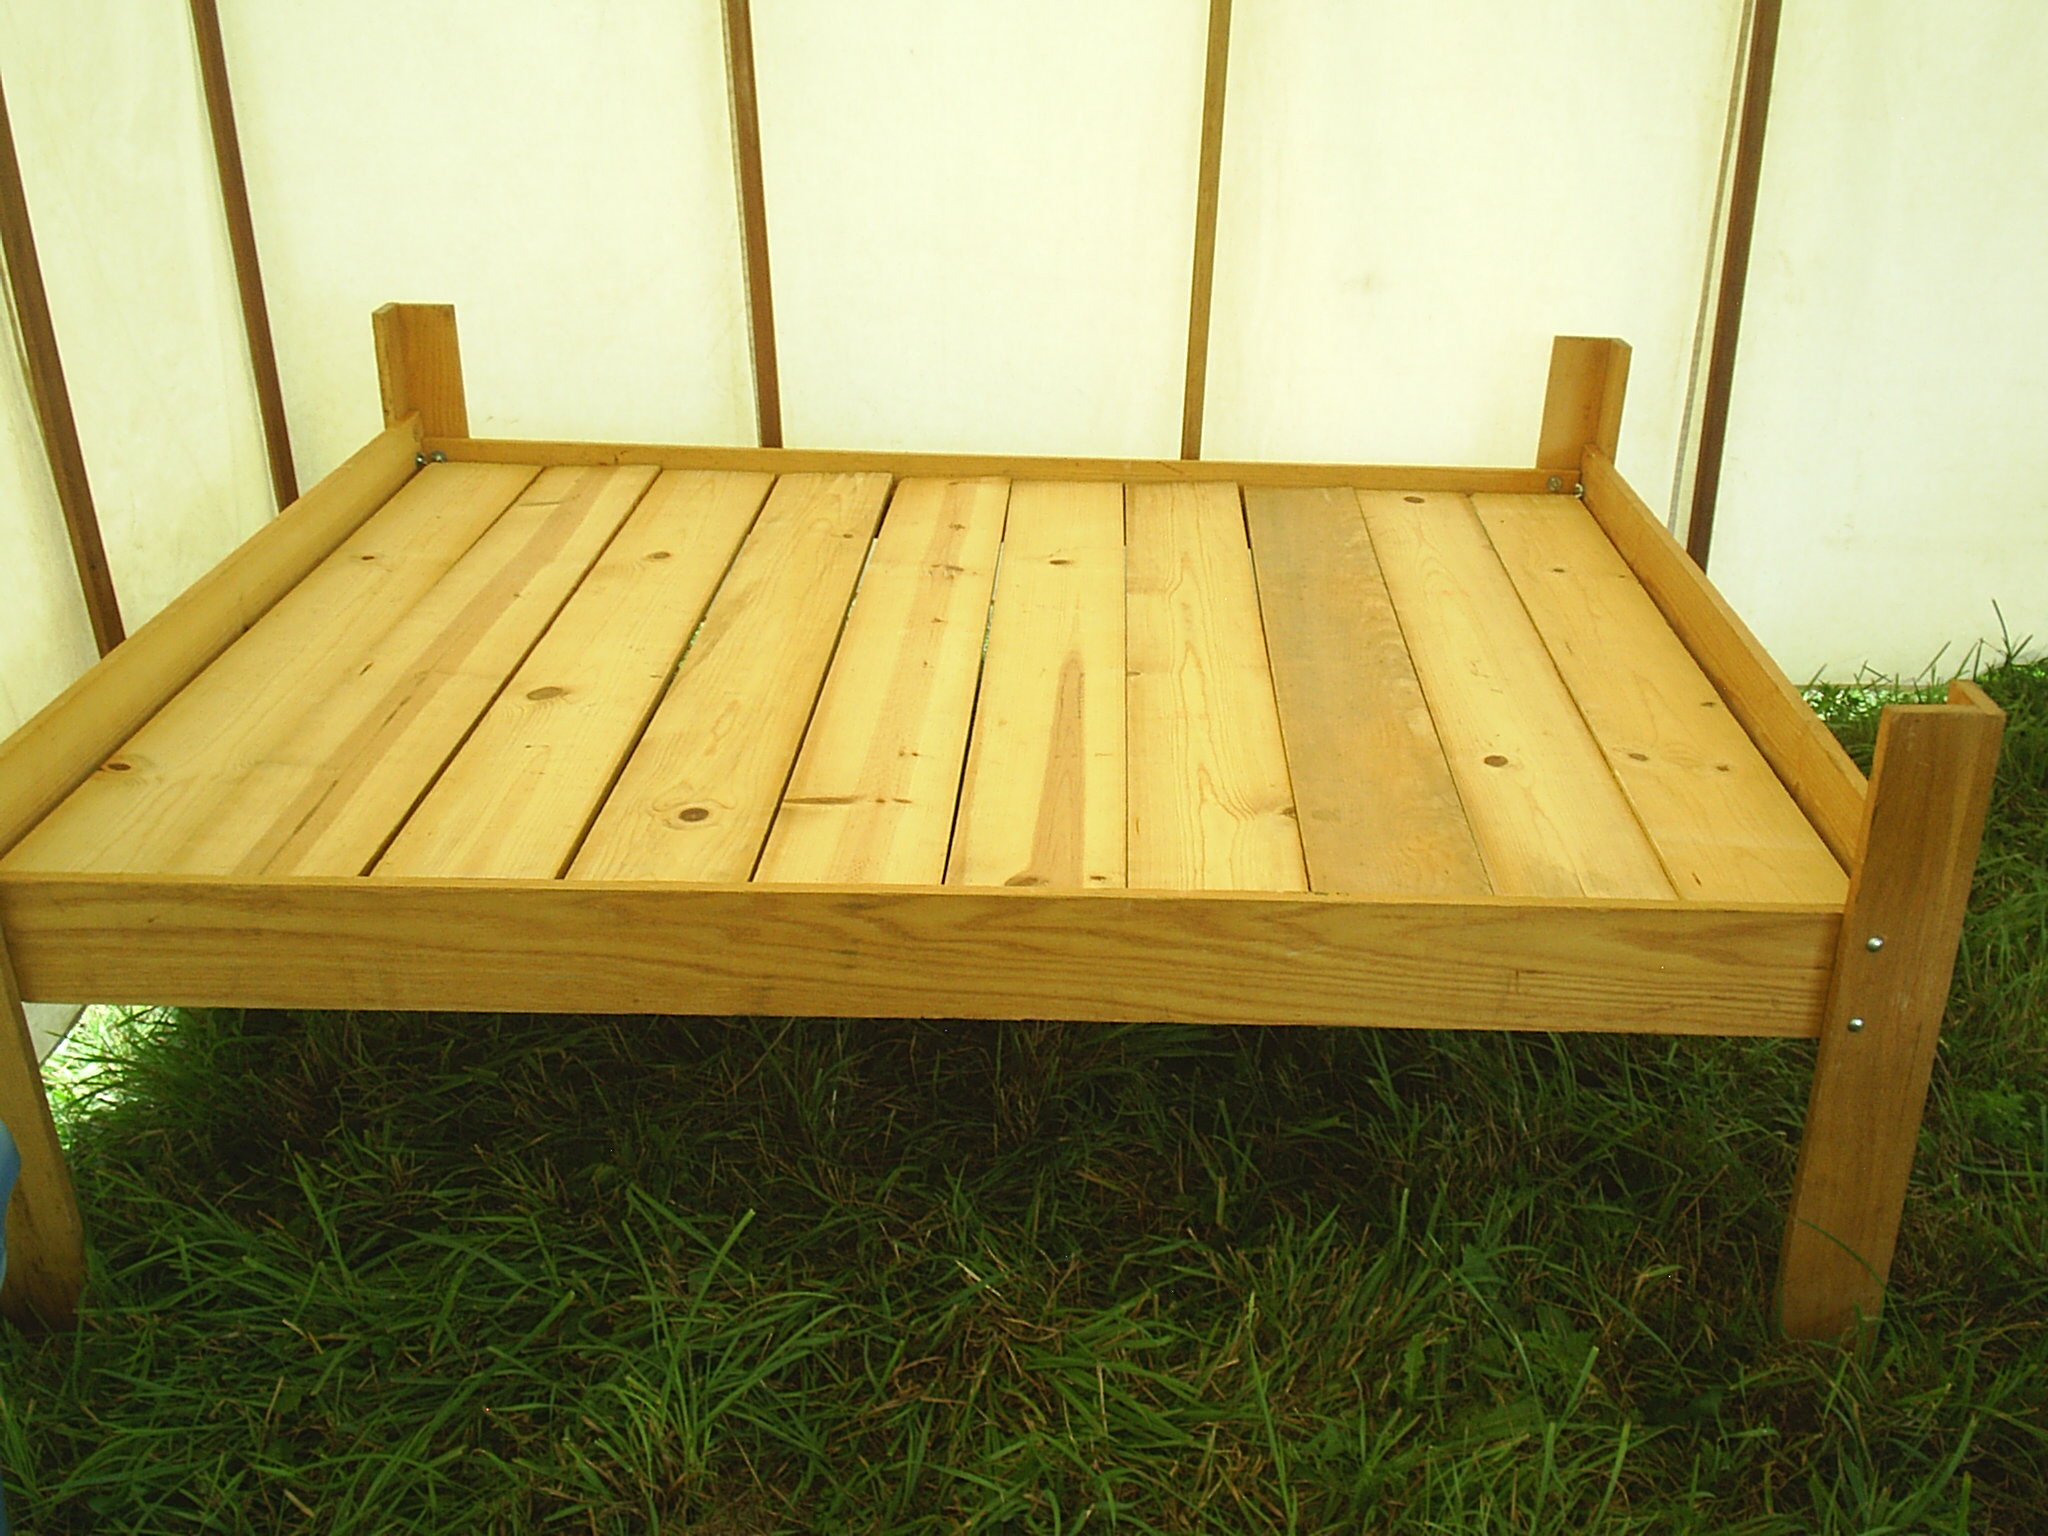
The next picture shows the bed frame with a single bed board in place. The mattress will rest on top of the boards when they are all in place. If you are using an air mattress I recommend that you put an old blanket or canvas tarp on top of the bed boards before you put the mattress in place. You will need to protect the air mattress from splinters and the bolts in the corner of the bed frame. If you are camping in cold weather placing a survival blanket under the mattress will help keep you warmer.

M3361S-3034

Once you have put all of the boards into the frame you can put the mattress in place. The mattress actually sits down into the frame, so that it does not slide off.

M3361S-3034

Now that you have seen the basic process, you or some other handy person can easily make one of these beds. There is another very important hint that you may be able to spot in the picture above.

M3361S-3034

The bed, if properly constructed, will be square and will work perfectly on level ground. But when was the last time that you camped on perfectly level ground? Save the cut off pieces of boards from your projects and always carry some with you. Whether you are on a slight hill, or you have a hole under a single leg, the boards will make your bed a much more comfortable place.

I hope this blog series has given you some good ideas about what you would like to do with your own camping bed arrangements.


Camp Beds – Part 3: – Getting off of the Ground – Homemade and Crafted Solutions: Part 2 – Springs and Assembly

One of the major goals when creating your camp bed is comfort. Your bed at home generally has a box spring, but what can you use in a home-made camp bed? The most common camp bed solutions are rope springs and boards. Both are historically accurate and functional. The boards are heavier, but the ropes need to be re-tensioned every few days, take longer to assemble and are more likely to break.  This graphic shows how both of these techniques work. The rope can actually be used as part of the structure of the bed – keeping the boards under tension, but this also means that a broken rope can mean a broken bed. If you maintain your ropes, watching for worn spots and making sure that the ropes are sturdy (no clothes line!) this should NOT be a problem. The boards are simply laid on supports on the side rails of the bed. Be sure that the boards fit fairly snugly between the side rails so that when they bend they do not slide off of the side rail supports.

Bed springs

So how do we put the wooden pieces of the bed together?

I have seen some amazingly complex and beautiful wooden beds – pegs, mortise and tenons, all sorts of creative and historically inspired furniture designs. I have to admit that when we made our bed it was put together with ¼ inch nuts and bolts. Why bolts? Simplicity, strength, and ease of construction. But more on that later… I should explain some of your options before I tell you how we do our beds.

Mortise and Tenon Joint

So what is a mortise and tenon? The blue represents the upright that has a hole, called a mortise, cut through it. The white piece that sticks through the mortise is called a tenon and the red piece is a peg which keeps the two pieces anchored firmly together.

If properly constructed this is a very sturdy joint and was a major technique for joining wood together for centuries. It has the advantage of being able to be taken apart easily for transportation.

This next version of the graphic shows the details of the upright and the beam as they would appear in a bed. If you think about the fact that you are cutting a hole through a vertical piece of wood and putting another piece of wood through the hole, you should be able to see some of the issues. The quality of both pieces of wood must be good. The most critical piece is actually the tenon since that beam is greatly reduced in size in order to fit through the mortise AND a hole is cut through the beam to accept the peg. If the quality of this piece of wood is not good, it will break. The upright, while important, can easily be made heavier – and that piece of wood is in compression – which makes it much less likely to break.

Mortise and tenon 2


Lots to think about and figure out! Next time we will discuss the bed design that we have used for the past 15 years.

Camp Beds – Part 3: Getting off of the Ground – Homemade and Crafted Solutions: Part 1 – Materials

A Homemade or Crafted Solution is a bed that either you or another person builds to your specifications, usually out of wood!

How difficult can building a bed be?

Most of the beds that you have slept on have had wooden frames right? Maybe not. Did you ever look closely to see if there was a steel frame inside that wooden frame? Many modern frames use a hidden steel frame on the “under the bed” section. Why should that matter? If you are modeling the bed that you are making after a lightweight wooden bed, with a hidden metal frame, you may find yourself crashing to the floor. Understanding materials is a very important part of building a wooden bed.

What is there to understand about wood? Have you ever loaded up a wooden bookshelf with books only to watch it sag in the middle? That is because the grain of the wood, or the plywood, is at a 90 degree angle to the force that is being applied by the weight of the books. The wood is not thick enough to resist the weight of the books. In order to have a comfortable and safe wooden bed you need to either use heavier pieces of wood, or you have to use the natural properties of the wood to their best advantage. Let me show you what I mean.

If we use a board that is 1 inch by 6 inches by 7 feet, and place it flat, and then place a 50 pound weight in the center of it, it will bend severely, or maybe even break. This board is in tension. Image A shows the board set up and bending from the weight (indicated by the arrow). The same exact board, placed so that the weight is pressing down on the widest dimension of the board will not bend easily and should not break.

wood deflection


Essentially you need to either use a piece of wood in compression, or use a larger dimension in the direction that the force is in.

wood strength


But why is this important? Well, first of all we don’t want our bed to break while we are in it, and second we generally want to be able to keep the weight of the bed as reasonable as possible.

Another VERY important issue is the type of wood that you use. Inexpensive pine boards, with knots, are easily available at home improvement stores. They are weak and often split after just one use. You want to buy the best quality wood that you can afford. Our larger beds (Full and Queen sized) have all been made from oak. My daughter’s single bed was made from pine and poplar (a less expensive hardwood) and has held up well, but we were still careful to choose boards without splits or knots.

Next time we will discuss options for springs, and options for assembling the boards into a bed.