Garden Defenses: Making Large Covers for your Garden – Part 2

Last time we ran through the basics of building a cage for your veggie bed using PVC pipe and chicken wire or hardware cloth. The bed cages that I built this year fell into two categories – beds that would essentially be left alone until next year and beds that would be harvested within a few weeks.

This year I wanted to add some more perennials to the garden, and I chose asparagus and rhubarb. I decided to create a new bed for the asparagus and convert an existing bed into a rhubarb patch. The asparagus bed would not require anything except occasional weeding until next year, and the rhubarb bed, which was actually rhubarb at one end and Swiss chard, onions and herbs at the other, would require weeding and the ability to harvest vegetables and herbs when needed.

Initially both beds were treated the same. A PVC frame was put in place and hardware cloth was wired into place on the frames. The irrigation for these beds was carefully put into place before the wire was closed up. In the case of the asparagus bed I used drip irrigation and the rhubarb bed is a wicking bed (think self watering planter with the reservoir underneath). Once the “arch” frame of the bed is completed you will need to close up both ends of the “cage”. I usually just measure a length of wire fencing that is about 6 inches longer than the widest portion of the “arch” and about 3 to 4 inches taller than the arch. The “end” of the cage is then trimmed to match the arch of the PVC pipe.

cage end


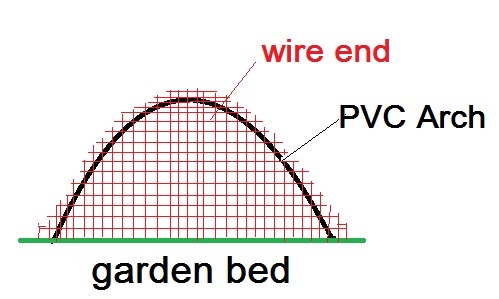
The “extra” wire is bent down to meet the wire fencing on the arch and then wired in place.

corner of cage

When you put the ends on the cage I recommend leaving extra wire at the bottom so that you can anchor it, either on the surface of the soil, or on the edge of the bed.

asparagus bed with bricks

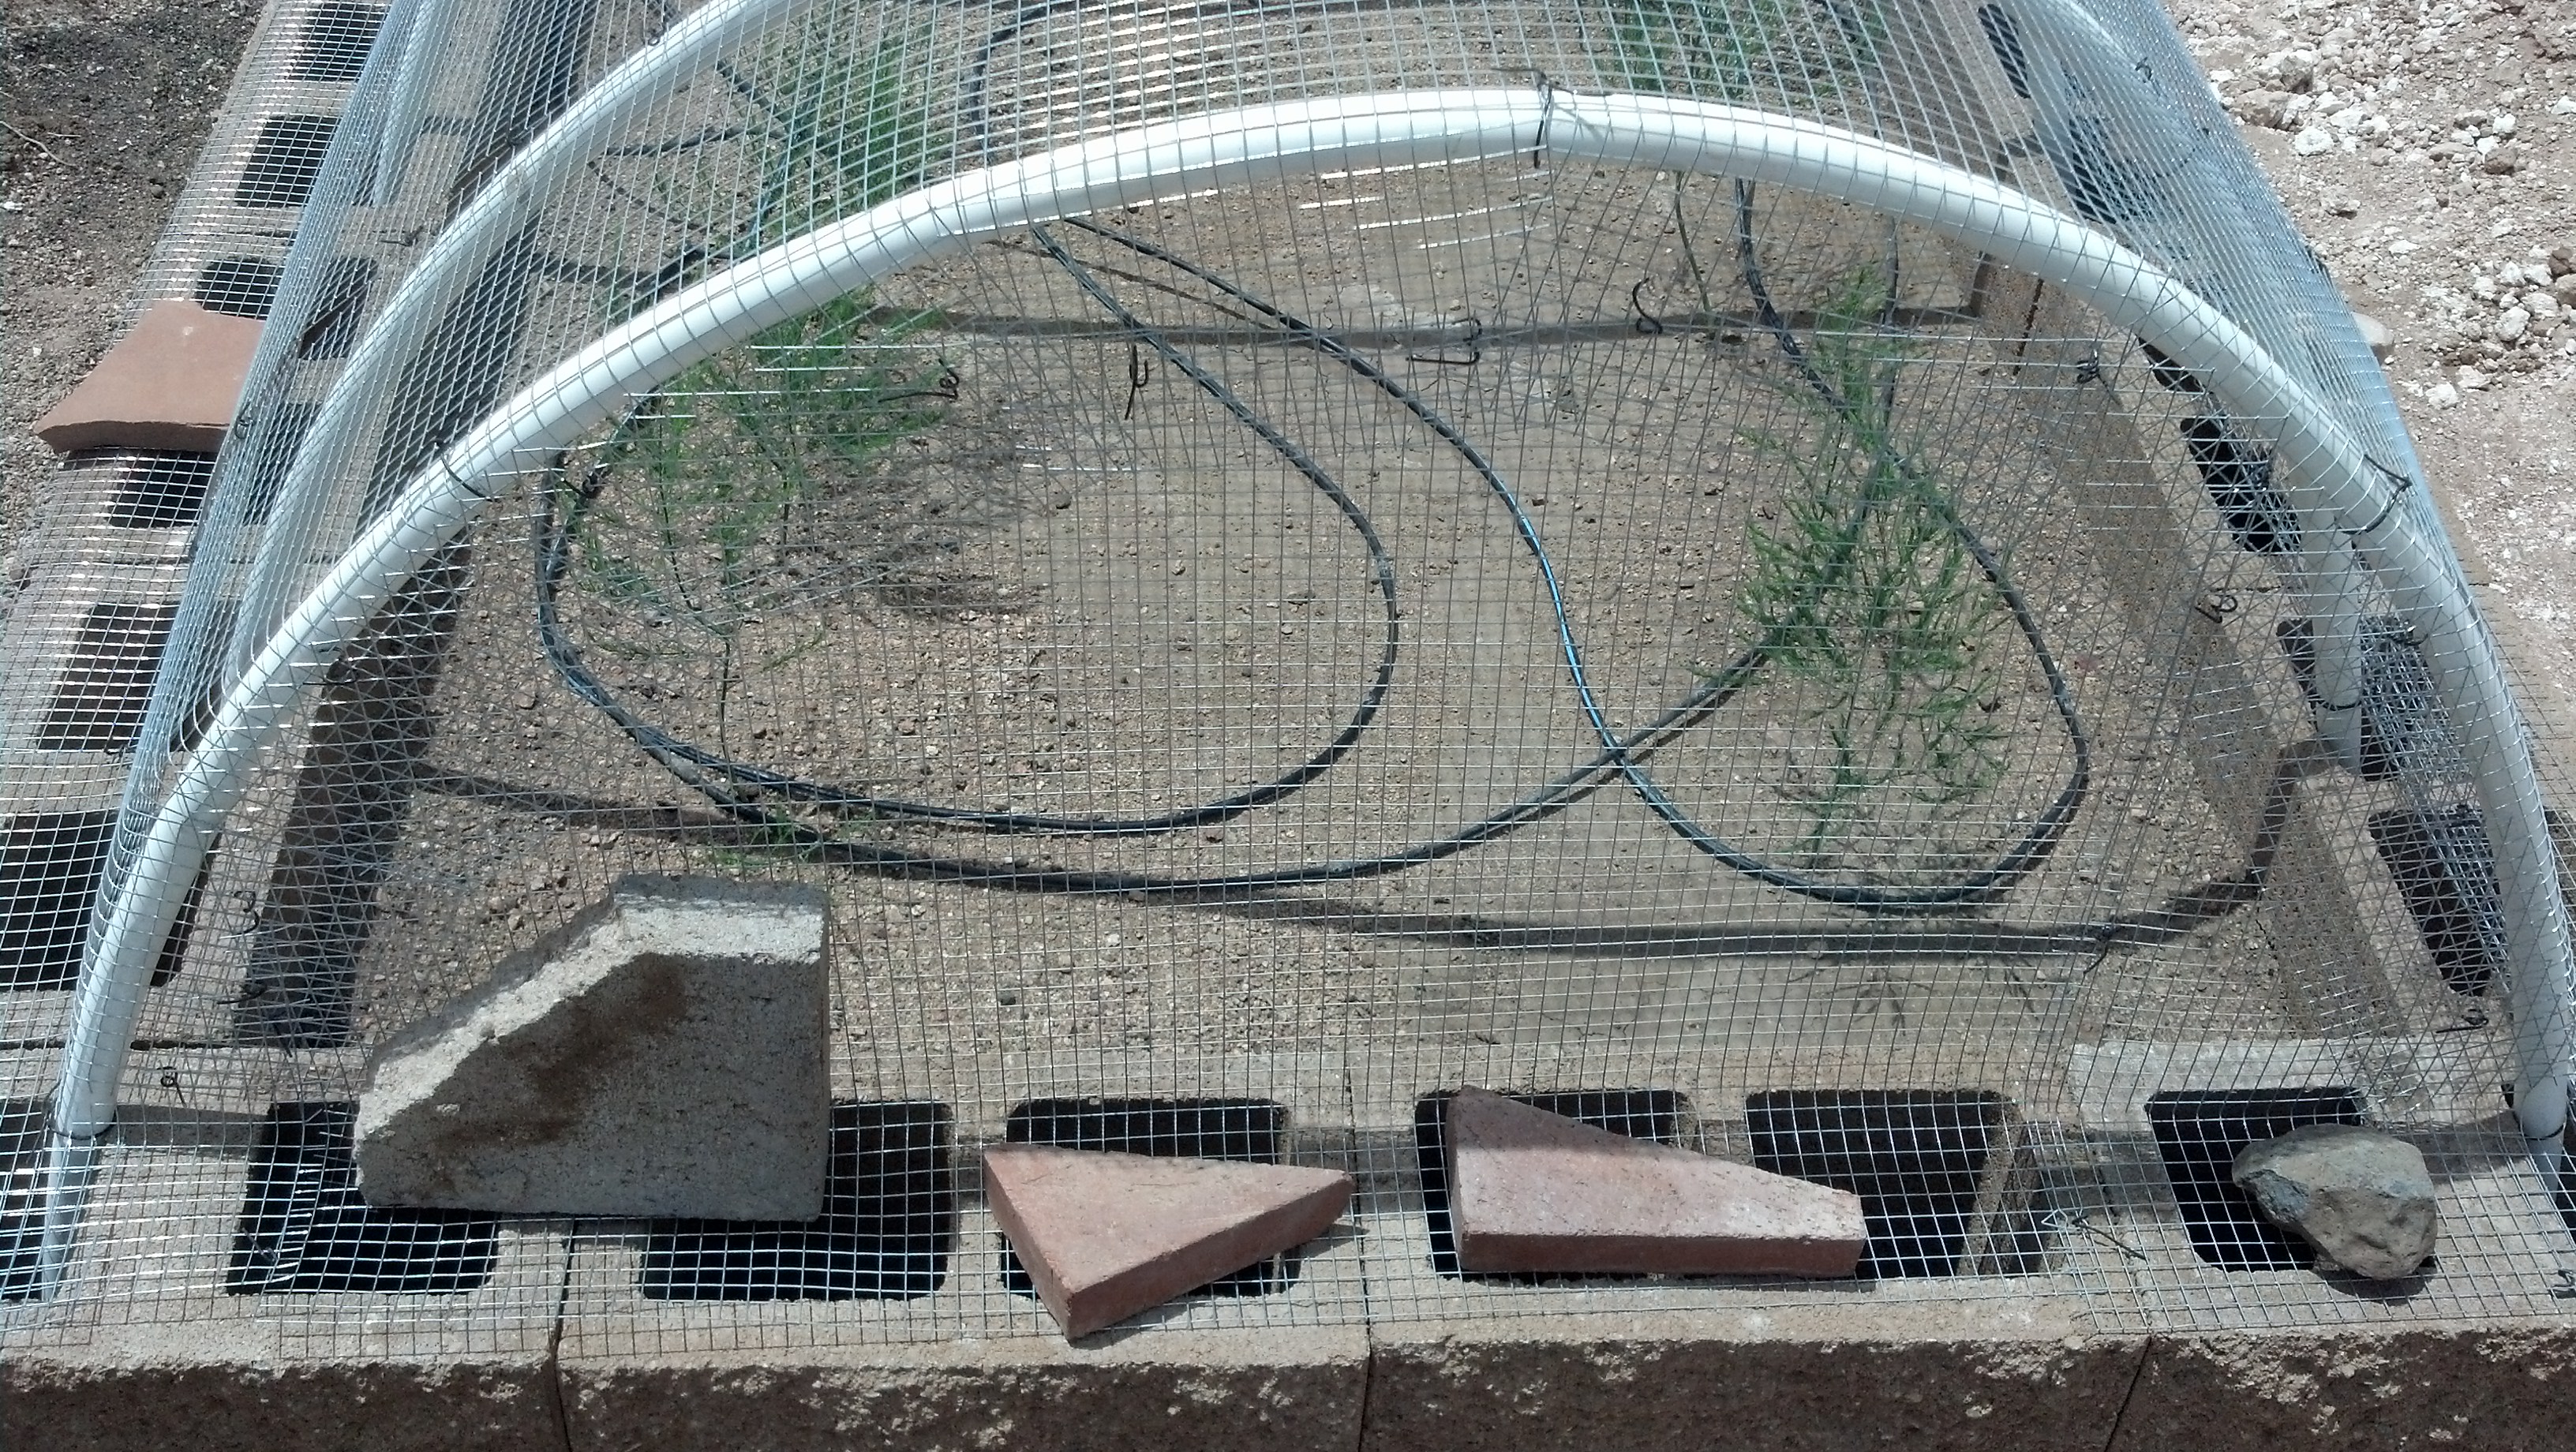
This picture shows how I bend the hardware cloth or chicken wire down and weigh it down on the top of the cement blocks that make up my beds. I leave at least an extra 4 to six inches of wire on all pieces of the wire, all around the bed.

OK, so now we have a closed cage. How do we get back in to weed and harvest? Doors! It is possible to open the actual pieces of wire fencing by unwiring them from the PVC pipes, and I have done that before for weeding, but for easy everyday access, you need to make doors.

cage with door open

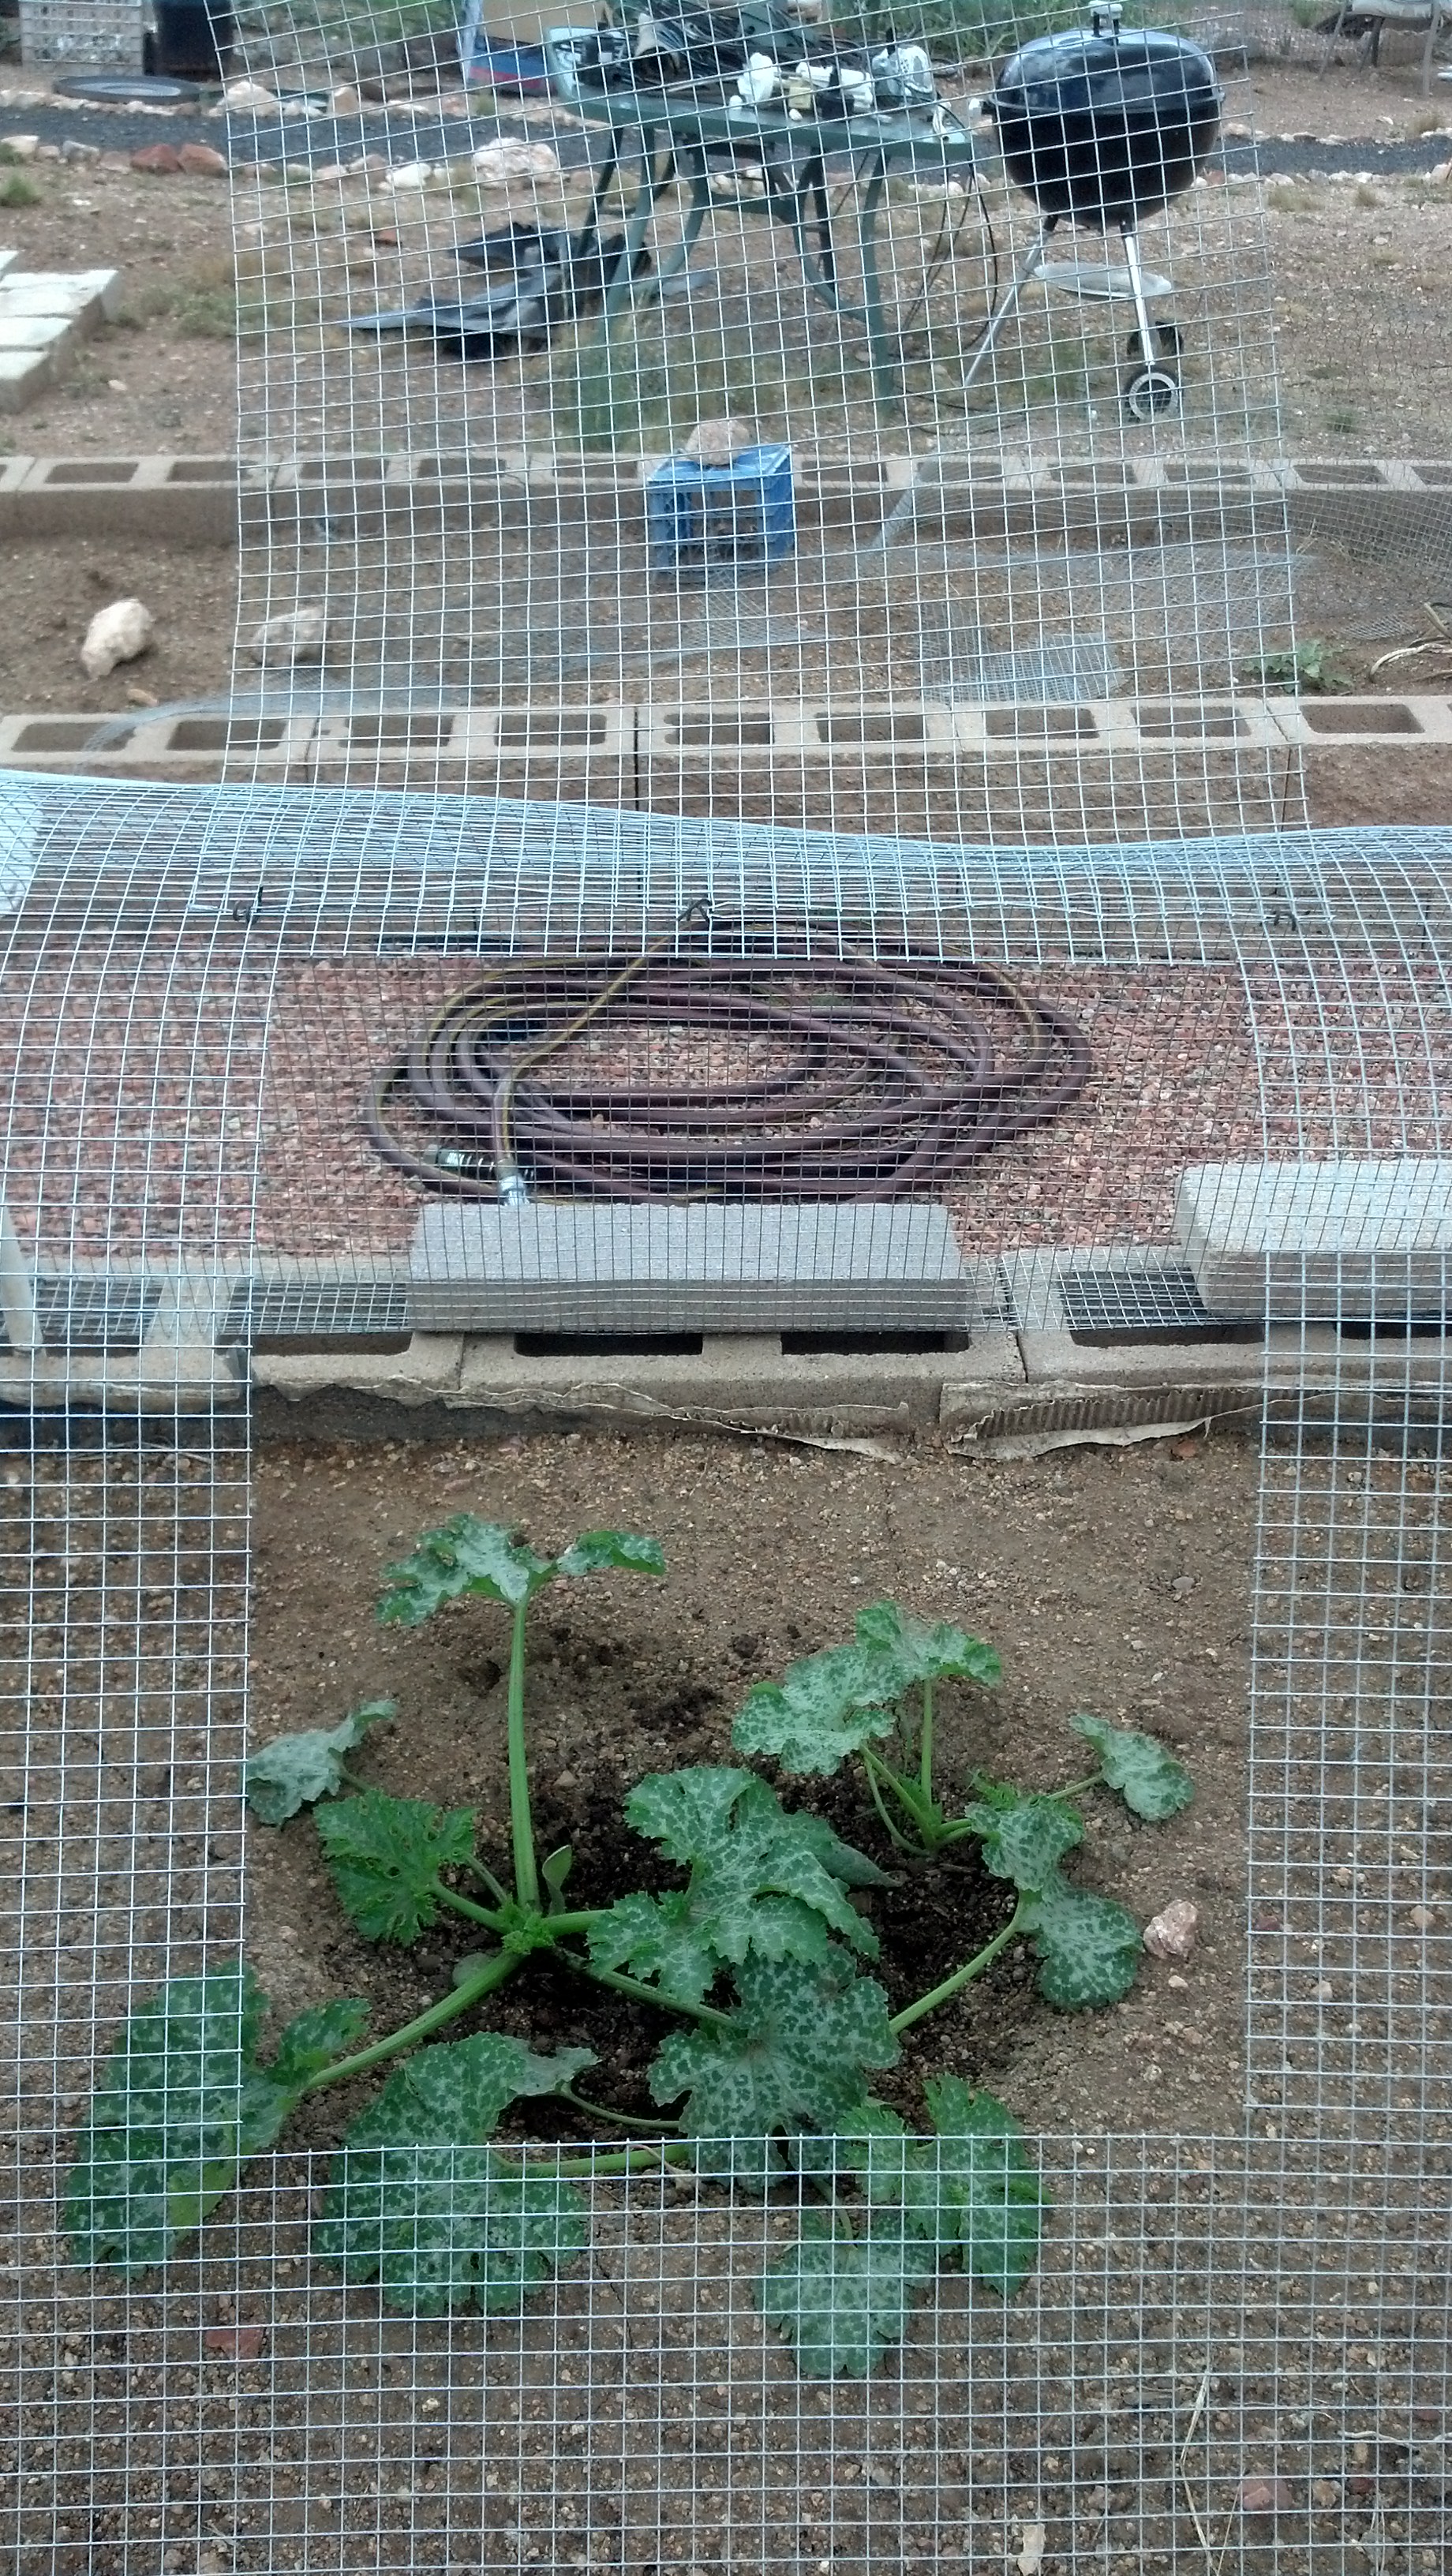
This picture shows the simple doors that I cut into the cages. I choose locations that will allow me to reach the most important areas easily. I cut the wire so that there are as few sharp points sticking out as possible. The hole must be big enough for good access. I cut a piece of wire, in this case hardware cloth, that is at least two inches larger, on each side, than the hole. The hinges are simple loops of wire at the top of the hole that allow the wire door to open and close. To keep the door closed when you are not using it, you can use binding wire or twist ties. Simple!

I hope that this series of blogs inspires you to develop your own custom cages to protect your plants.


Designing Displays for a Craft Show – The Most Important Component – You!

Last time we discussed the aesthetics of the booth. You, the booth owner, are a critical part of that aesthetic. We discussed the importance of your appearance, but there was one very important thing that I forgot to mention – Attitude! It is all about attitude.

Have you ever walked into a booth or store and been made to feel like you were annoying the person behind the counter just because you came in? Are they busy reading a book, or texting, or talking on their phone?

Engage the prospect or go out of business!

How do you respond when someone walks into your booth? Do you welcome them and offer assistance? Do you say “Good Morning!” or something else appropriate? I pay attention to how the person is behaving. If they seem to be in a good mood and are wearing something nice I may comment on what they are wearing. But BE REAL. People can often tell when you are just going through the motions.

I will sometimes ask how their event has been so far. People generally love to talk about themselves. It makes them feel good. And that is good for sales. If a person is obviously looking for something, I will ask what they are looking for. If I know someone who carries what they are looking for, I will tell them who has it. Why? Why not? If the person is looking for something that I do not carry they are not going to buy that thing from me anyway. People like the fact that I know what other merchants sell. They will often come back for something that I do carry, or bring their friends in to show them what I have. I care about people – I want them to find what they want and need, and I think that people can sense that caring.

I know a jeweler whose attitude is consistently terrible. She is usually quite terse when answering questions, if you can catch her attention. She is often too busy to talk to customers because she is chatting with her friends. I remember stopping by her booth to see what she had in stock. The two men who were watching her booth never even acknowledged my existence, despite the fact that I was actively looking at some of her earrings. I saw her the next day when she was walking to open her booth. I had already been open for an hour. She complained to me out loud about having to go open her booth at this crappy event. I just said “Good Luck!” And she walked off grumbling. Talk about a black cloud! (By the way, I did pretty well at that “crappy event”. To make it even sweeter, my customers were delighted with their purchases.)

I understand what it means to have a lousy event. But, one of the merchants that I know says that he never knows how he has done at an event until he drives away from the site. He makes a very important point. I have seen an event be horribly slow for days and then suddenly on the last day tons of people run in and say something like “I have gas and food money set aside for the trip home, and I am going to spend the rest of my money with YOU!” OK. I can deal with that. I am a professional.

As a jeweler a mediocre event can sometimes pay off weeks or even months later, but only if you make people want to do business with you.

Me Pennsic 2014

A Smile Goes a Long Way!

Designing Displays for a Craft Show – The Aesthetics

Booth aesthetics can make or break your show. There are actually two components to your booth (other than your product of course!) your booth design and you!

Many of the larger art shows will make information about previous years’ attendance available, including the median income of the attendees and the previous year’s sales. If that information is available, use it. I have known people who went to a glossy, glittery, women’s show and used old bed sheets as their table cloths. Their displays were cluttered and amateurish. Their booth appearance was impacted further because the bed sheets weren‘t even ironed. Needless to say, the show was a disaster for them. If people do not want to go into your booth, you will not have good sales.

Your goal should be to create a pleasing, inviting booth, with a good traffic pattern, and enough room for people to move safely between displays. I never make an aisle in a booth less than 3 feet wide, and 3 1/2 or four is better. People generally don’t like to feel cramped and there needs to be enough room for people to circulate in the booth. Even if you do sell knickknacks, you don’t want your booth to look like a garage sale!

Be aware of how lighting makes your product look – ambient lighting can be enhanced with task lighting. Is it too bright? If so, colors may “wash out”? Are there dark corners where product tends to be ignored? Light it up if it’s too dark!

You probably have table cloths, or other colored displays; consider how the color of the table cloths and/or displays makes your product look.

I always try to set up my booth layout beforehand. You can take this to what some might consider an extreme and do a run-through of where everything goes. After years of doing this, I have several standard layouts that I can use. I actually have “maps” of how the booth is laid out. This is MUST if you employ booth labor! It makes setup go much more quickly if you know exactly where your tables and other display items go, and you do not need to move them around. Don’t underestimate the value of having a written plan when “things” are going wrong.

M3361S-3034

This is part of my booth layout for one of the Medieval events that I do. The table cloth designs were chosen to give a Medieval feel to the booth.

Do you dress for failure? I recently saw a picture of a friend that was taken at an outdoor event. To be blunt, she looked very unprofessional and sloppy. Casual is OK, as long as it suits the environment. I know that there have been times when the temperature was up around 100 degrees and I was soaked to the skin. But my hair was still combed and you could see that I had made an effort to dress nicely to start with. People are generally very forgiving of the affects of extreme weather.

If you are in a building it is particularly important to look good. Choose your clothes based on the theme of what you sell, or the theme of the event. If the event is Western for instance, showing up in a coat and tails is going to be just plain weird.

It is OK to look “artsy” if you are an artist, but generally the burned out hippie artist look is not a good idea. Consider your clientele and ask yourself “If I belonged to that social group, would I want to buy from someone who looked like me?” Your goal should be to make your potential customer feel comfortable with you, as a person and an artist, so that they will want to buy from you.

I hope that this blog gives you many helpful hints that you can use to either design a new booth, or improve and existing one.