Hot! Hot! Hot! Part 2

Well, last time I wrote my blog on the fly on my iPad. I had just finished packing up and leaving from Great Western War in Bakersfield, CA, and I was totally psyched about the very cool, and very hot, activities that I had participated in. It was the sort of experience that makes you genuinely excited about your craft and reminds you why you got involved in all of this in the first place.

Thanks to the miracle of the internet I now have more information to share about the people and things that were going on. The bead furnace at GWW was made by Thea Northernridge, Maeve Douglass, and crew, from the Kingdom of Caid. I have seen several bead furnaces over the years, most courtesy of Keeley the Tinker (Kingdom of the Midrealm), who has been researching and experimenting with pre-1600 glass bead furnaces for a considerable number of years. The GWW bead furnace is based on Keeley’s work and the plans that she made available to the group. The plans produce a furnace that can be completed quickly and used quickly. While not completely period it gives the impression of a period furnace, and it does work well enough to allow people to make beads. Not all experimental furnaces actually function.

I am not using any formal titles for any of the folks who are involved with this project. Several people have several titles, some people’s titles that have changed since older documents were published, and to be honest, my goal is to give as much credit as I can to the folks who did the work. I have several titles and names. My favorite one to answer to? Eirny.

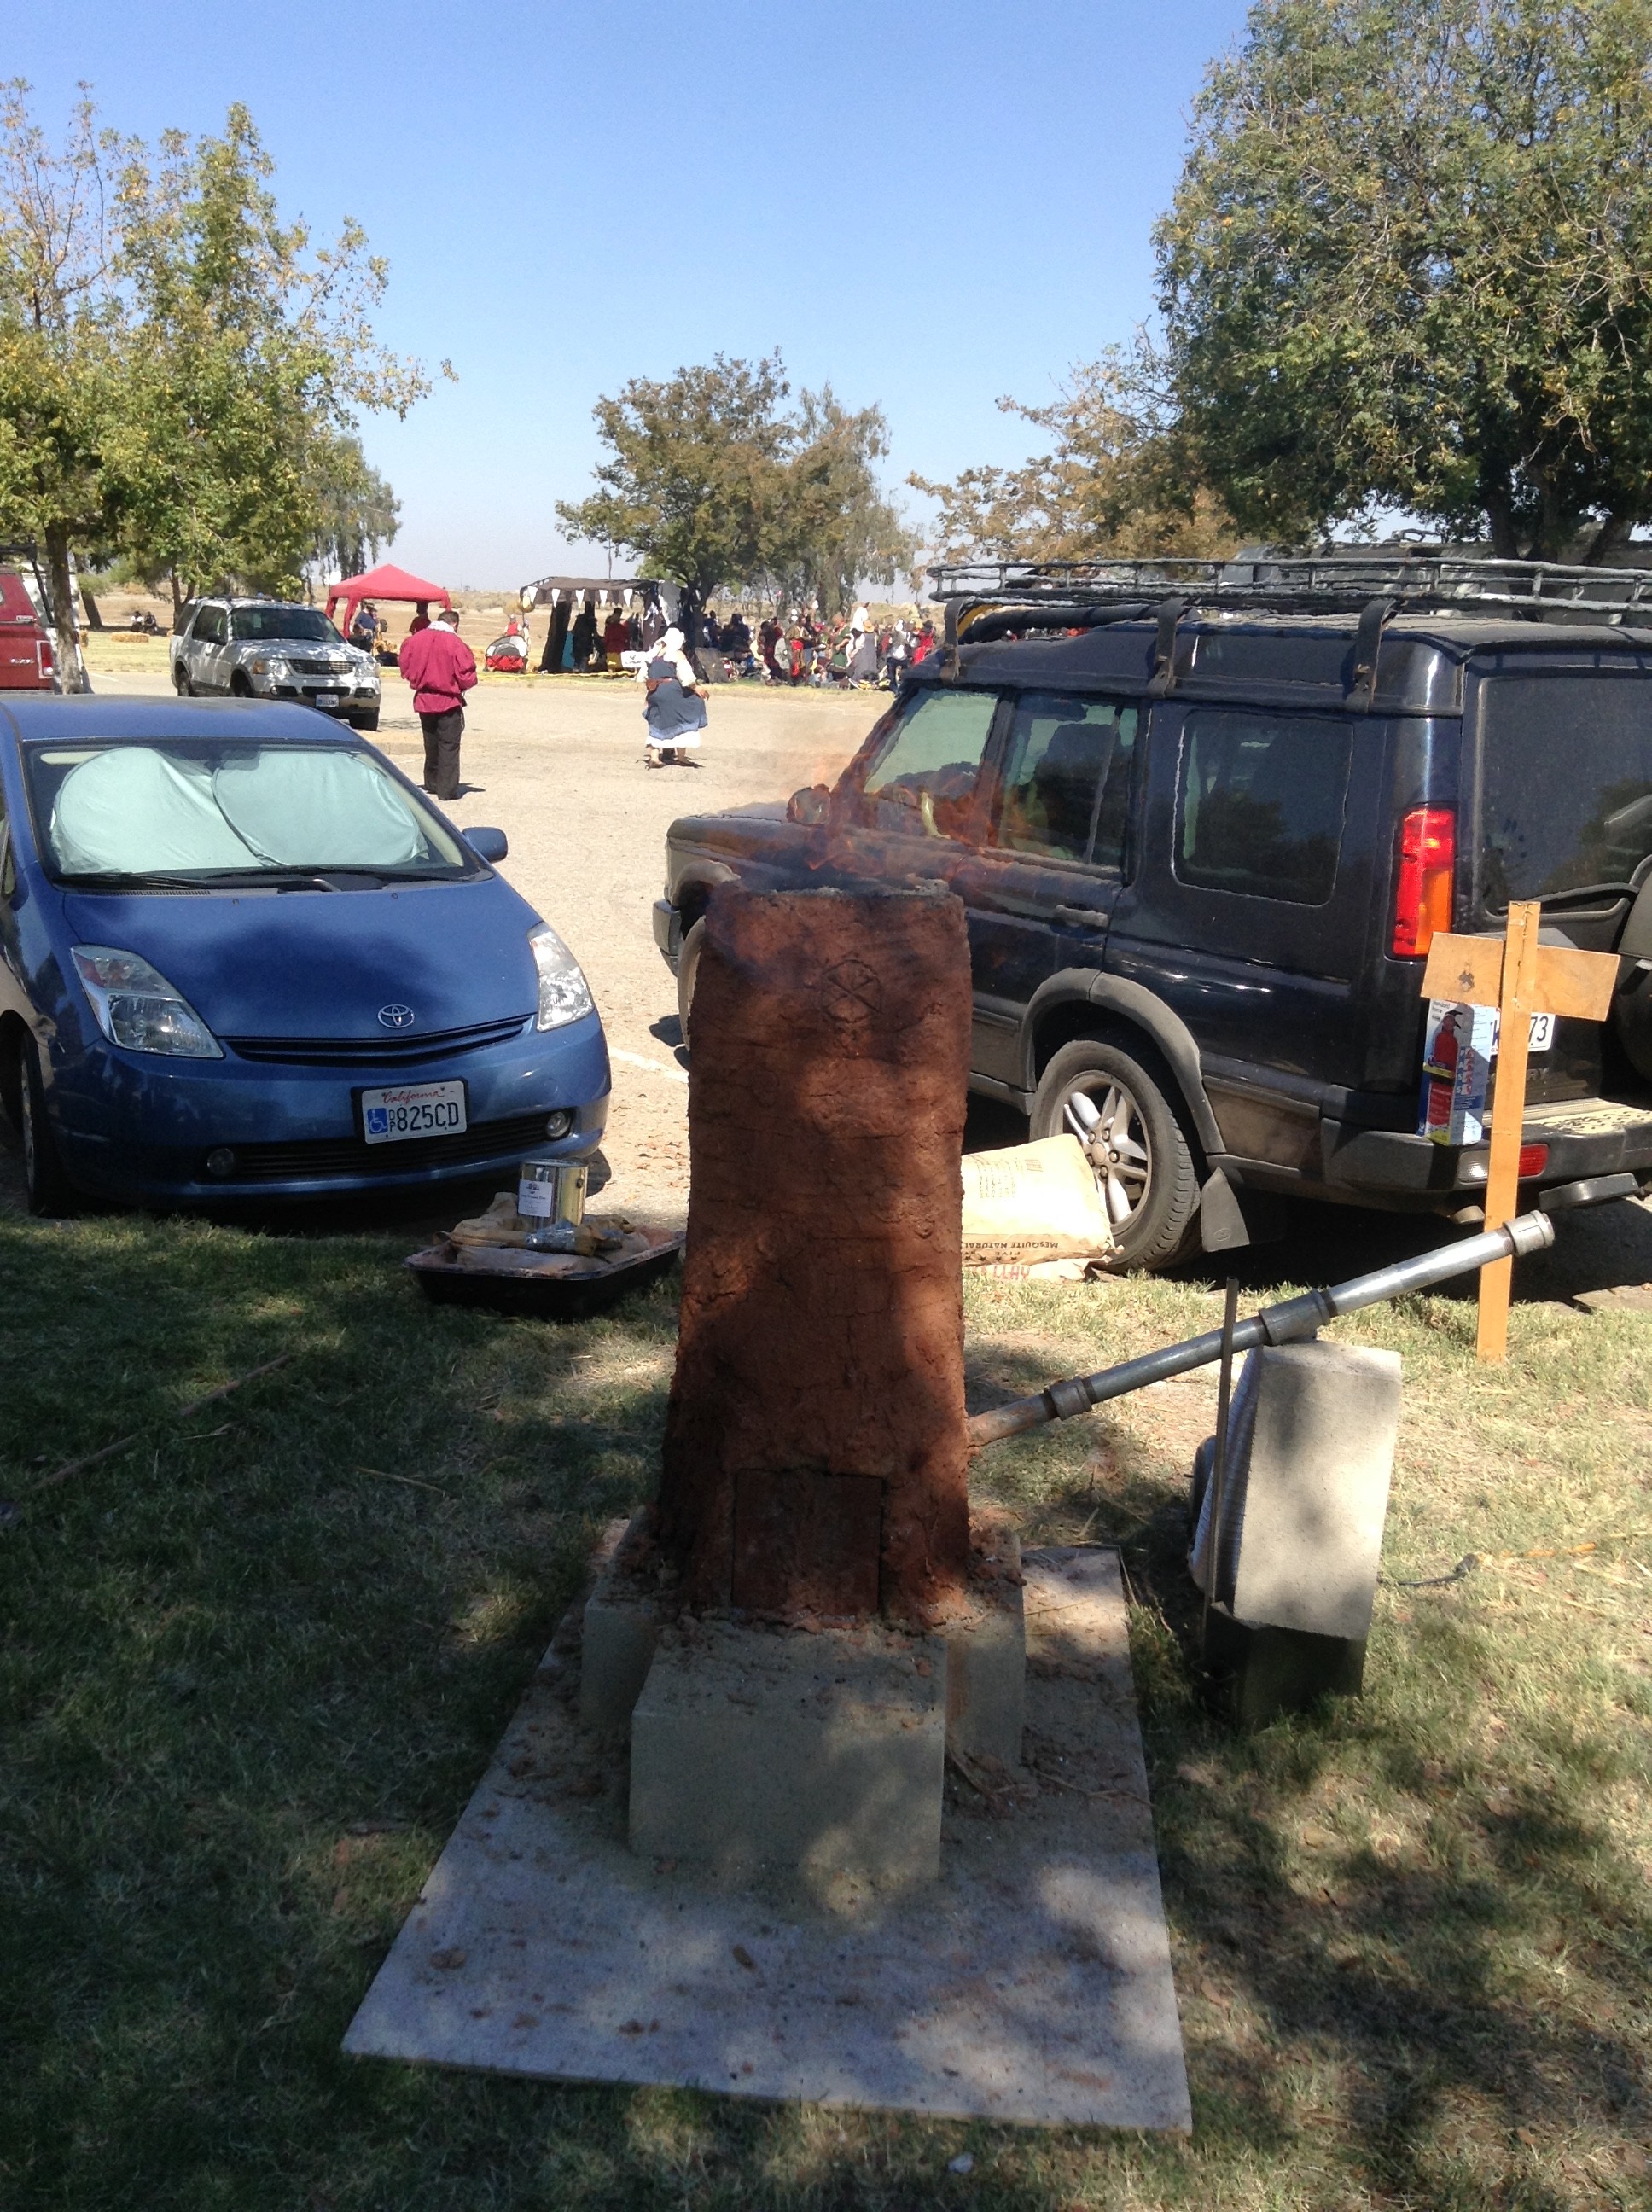
Like many things that happen at events, this bead furnace project became a cooperative project. Through a series of mishaps people who had planned to help could not attend, but another group, who were planning to build an iron-smelting furnace, pitched in. And the rest is history. A pseudo-historic bead furnace and an iron smelting furnace were both built down at the end of merchants’ row, right next to the blacksmith shop. Great piles of red clay and charcoal became baked receptacles for glass and iron ore. And to be blunt, it was just plain exciting. I stopped by as often as I could to watch the progress of the construction and firing of the bead furnace and the smelting furnace. Great lengths were taken to make sure that water and fire extinguishers were at hand and that everyone was safe. Here is a picture of the iron smelting furnace, complete with some fire.

Iron Smelting Furnace

I realize that not everyone has seen a bead furnace in person, and many people may not have even seen glass beads being made. I went in search of a good video that would show how Viking style glass bead furnaces actually work. This is probably one of my favorite videos about ancient glass beadmaking. It shows the building of the furnace, the firing of the furnace, and then the furnace being used to make glass beads. The video was made at the Viking Center outside of Ribe, Denmark, so the commentary is in Danish, but the pictures tell the story very well. I was impressed by the skill of both the clay worker who built the kiln and the glassworker who was making beads. No one knows for sure what a real Viking Age bead furnace looks like, so this is just one of many types that have been made.

Next time: More Glass Bead Furnace and Bead Making

Hot! Hot! Hot!

Yes, I admit to stealing the words to a song! But it was just too tempting not to. We just finished up attending an SCA event known as Great Western War in the Bakersfield area of California. And yes, the weather turned out to be hotter than we would have preferred. But the thing that was really hot was a couple of the activities that were going on – a reproduction bead furnace, and an iron ore smelting furnace.

Now, these things may not sound totally exciting to the average person. But even people who are not usually into crafty things were pretty entranced by the process. I confess that I do not know the names of the people who managed to accomplish these cool projects, but I was fortunate enough to participate in one, and observe the other. This post will be a bit more brief than usual, and you will have to wait until next time for some of the details. I am working on an iPad mini with very little connectivity, and I am also a bit fried from having been at an event for a week.

A lady came by my shop in the market, and noticing that I had hand made period reproduction glass beads in my shop, she started telling me about the bead furnace project. Ironically the plans were actually put on the Internet by a friend of mine who lives in the Middle Kingdom. These folks used her years of hard work and experimentation to accomplish a very successful bead making session. And it was really awesome.

The original period furnace would probably have used a bellows system to provide the needed draft for the furnace, but we cheated and used an air mattress inflator. The furnace itself was built with clay and chopped straw, allowed to dry partially, and then baked by heating it with a small charcoal fire.

The next day a charcoal fire was lit in the furnace, the air mattress inflator was cranked up, and glass rods became beads. Much experimentation occurred and many people were able to make their very own glass beads to take home. For a craft junky it doesn’t get much better than that!

Here is a picture of the bead kiln in action! I am actually thinking about making a kiln of my own when I get home.

image


Next time – where to find the plans for the furnace and other results and adventures.

The Treasury 2nd Opinion Poll & Giveaway!

Back at the end of July we did our first opinion poll and reproduction artifact giveaway at The Treasury. We all had so much fun talking about the artifacts and what people would like to see happen that we decided to do it again. But this time it will be even bigger. So here are the rules.

  1. Take a look at the eight pictures and descriptions below.
  2. Choose two items: your first choice and your second choice for the items that you would like to see reproduced and available in the shop at The Treasury.
  3. Send me an email at eirny@eirny.com with the number of the two items that you want. Make it obvious which is which by saying something like first: # and   second: #
  4. The poll will remain open until October 31st. At that time I will count up all of the entries from the shop and from email, and your votes will have chosen two items. A winner will be drawn from each group of people who voted for the winning items. That winner will receive a reproduction of the original artifact for FREE.

And here are pictures and brief descriptions of the artifacts. If you have specific questions about any of the items, please contact me at eirny@eirny.com

item # 1. A Bronze Dice. About 14 mm on a side.

Dice 1


item #2. A Roman Lunula. About an inch wide by an inch tall. This artifact has been repaired, which is why it is a bit crooked. But I will fix that before I cast it.

Roman Lunula 2


item #3. Celtic Toggle. About 1 1/2 inches long. The round part of the toggle is about 1 1/8 inches in diameter. The toggle is about 1/2 inch high.

Celtic Toggle 3


item #4. Tudor Dress Hook. About 1 1/4 inches wide and  a little less than 5/8 inches tall. This is a sharp hook and is not meant to be used with an eye.

Tudor Dress Hook 4


item #5. Roman Horse Brooch. About 1 1/2 inches wide and 1/2 inch tall , and 1/2 inch thick.

Roman Horse Brooch 5


item #6. A Roman Amulet. About 1 5/8 inches long and 3/8 in diameter at its widest. The horn like projections at the top are actually a broken loop. I will repair the loop in the cast piece so that it can be hung the way it was intended to be.

Roman Amulet 6


item #7. A Roman Amulet. About 2 1/8 inches long, 1 3/16 inches wide, and 1/16 inches thick. This would make an excellent strap end.

Roman amulet 7


item #8. An Enameled Tudor Button. About 5/8 inches in diameter. The light patches on the flower are actually white enamel. The shank on the back of the original button is broken, but I will repair that in the casting.

Tudor enameled button 8


Don’t forget to vote! Two of these items will be cast in bronze, in my shop in November, and two people will win a FREE reproduction artifact.