The pre-1600 hooks that are different from our modern hooks and eyes can be broken down into two main classes, sharp and blunt. The blunt hooks were designed to either be used with a large eye hook, or with some other kind of loop or hole. Any of these hooks can either be cast, or cut from metal sheet or wire. They can be plain or decorated with stampings, engraving, glass gems, enamel, rivets, or any combination of these techniques. These hooks can be made of tin, lead, bronze, or silver (or a gazillion other in-between alloys). They were sometimes tinned, silver plated, or gilded to make them appear to be more valuable. We usually only see solid gold items used in jewelry.
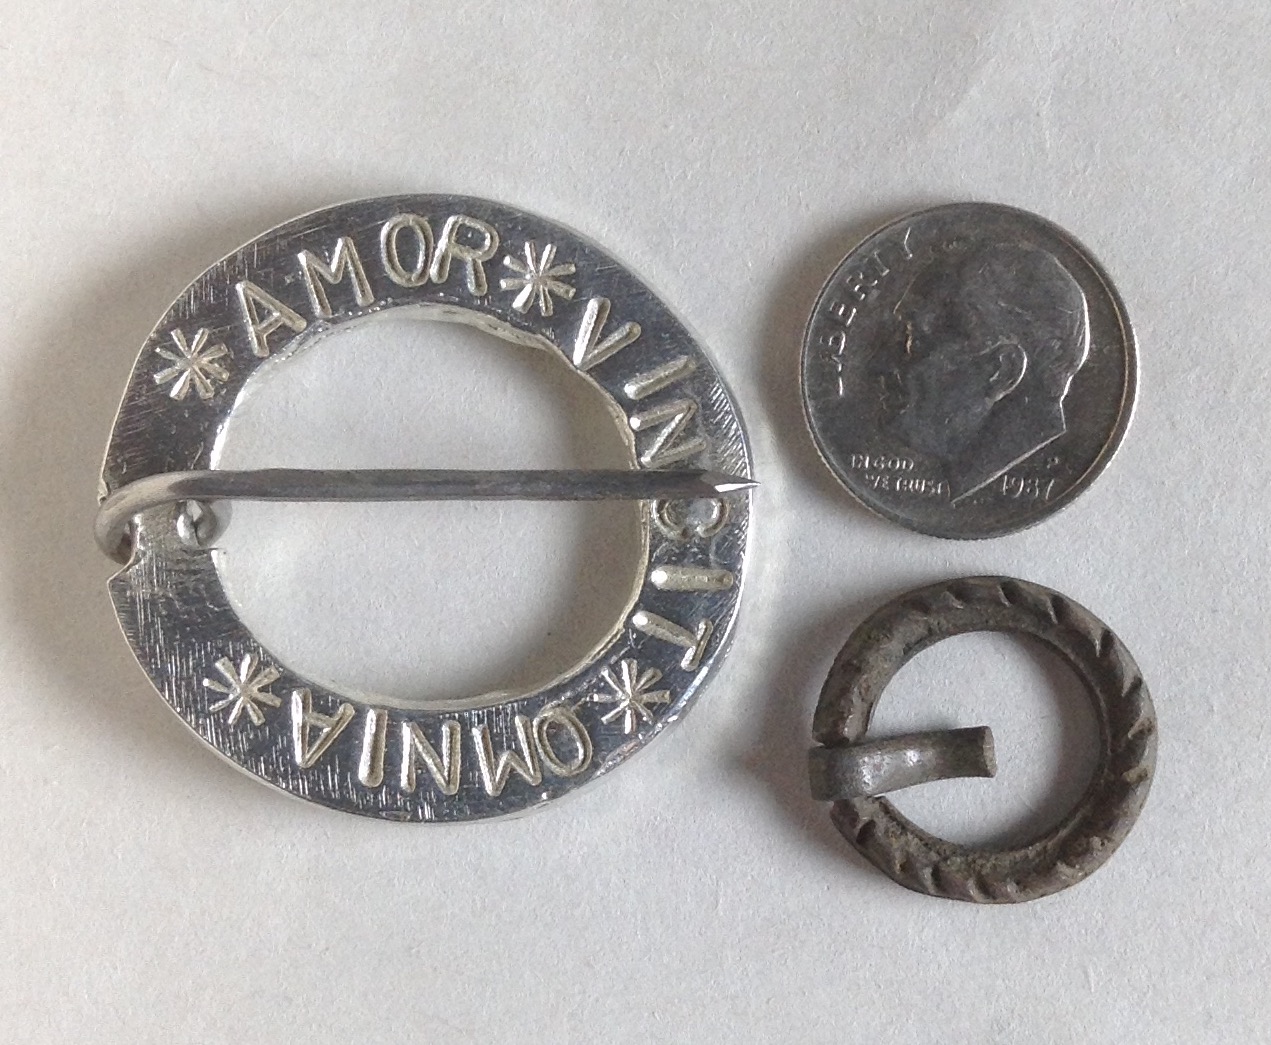
Blunt hooks were frequently used in jewelry to close necklaces, bracelets, and torques. A blunt hook could also be used to hold a belt closed (we may think of them as buckles, but technically a flat plate with a hook on the underside or the end, is a hook). They could also be used to close pouches and bags. They were often very decorative, and we have an example of a surviving jacket with large versions of these all the way down the front. Most of these hooks only have one hook. The wrist clasps that were used by both Anglo Saxons and Vikings are a form of blunt hook and eye. Some of the Anglo Saxon wrist clasps were riveted onto a leather band, but most wrist clasps were probably sewn in place.
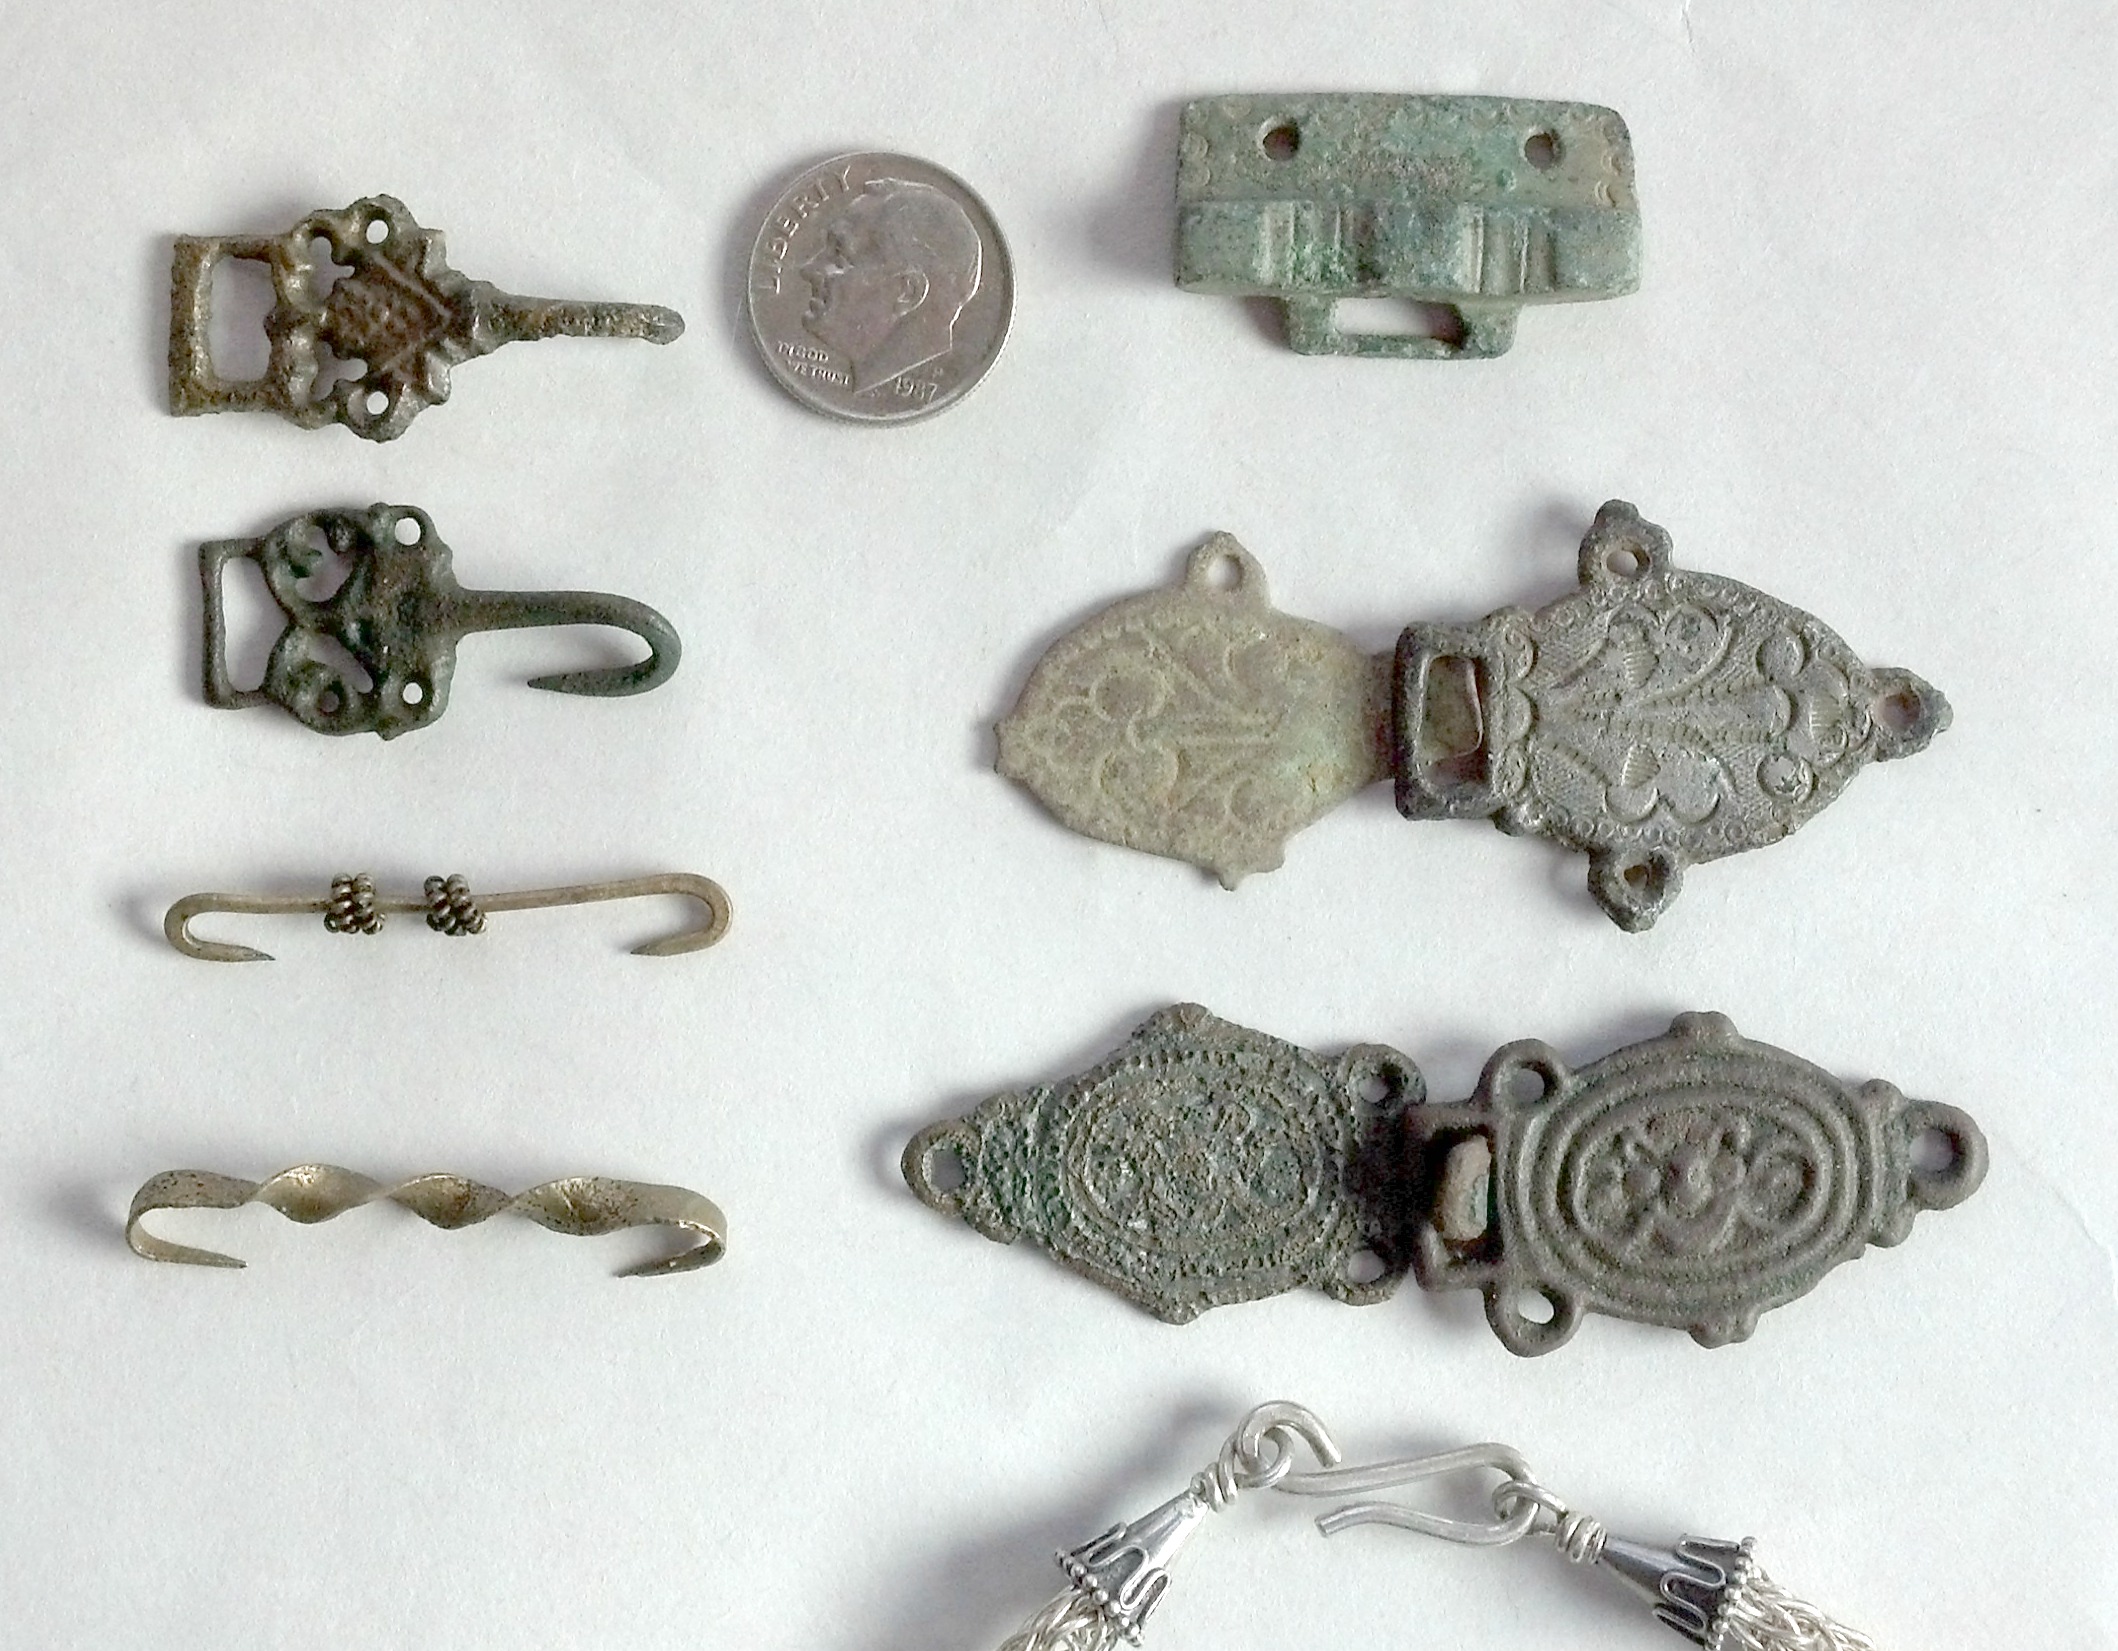 A selection of hooks. All of the hooks in the picture, with exception of the jewelry hook, are real artifacts. The hooks in the left column are all sharp. The top two are dress hooks from England (the hook on the bottom one is squashed sideways, but the top hook is just as sharp), and the two hooks at the bottom are from Germany. The right column is all blunt hooks. The blunt hooks start at the top with the eye side of a wrist clasp, then two dress hook and eye sets, and then at the bottom a simple jewelry clasp.
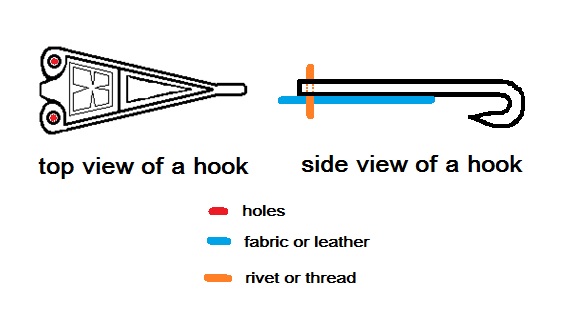
The sharp hooks come in many configurations. I am aware of hooks with one hook, two hooks, three hooks (evenly spaced in a circle), and four hooks (two on each end). To be honest, we are uncertain of all of the uses for these hooks. They are usually found as “occasional finds” by metal detectorists. That means they were probably lost while in use, or the fabric or other organic material that they were attached to has disintegrated and they are found in a context that would determine or explain their use.
How were sharp hooks attached? Some were probably sewn in place, and others, especially those attached to leather, were often riveted in place. A single point hook could be used to close leg wraps, clothing, and purses. Two pronged hooks (one on each end – see picture above) could be used to close the neck of a lightweight cape or cloak, and so can a four pronged hook with two hooks on each end. These were not sewn in place – they relied on the hooks to keep them in place. A three pronged hook could also be used to support the back of a ladies skirts to keep them clean.
 How big are these hooks? The ones that I have seen range from an inch long (not counting the portion of the hook that is underneath the hook), to about an inch and 3/4 long. The really large hook and eye sets (either cast or sheet work) can be as large as four inches from end to end. They all suffer from the same problems – they can open if they are not kept under at least a minimum amount of tension. The really large blunt hooks often have enough length to the hook that they are unlikely to unhook, but they are also several inches long, as a set. The large blunt hook sets can also be fairly bulky, and are usually only used on the outside of a garment.
Next time: Buttons and Toggles