Metal Techniques Part 4: Drawing Wire

“Drawing wire – what the heck is that?”

This question was echoed by several people. So, I decided to write a blog about the process of drawing wire. They didn’t understood the concept, how you would do it, or why you would do it – I can fix that!

Today we can purchase wire in any size that we want. Craftspeople often just buy the size of wire that they need because it’s easy and convenient. But once in a while you may find yourself in a position of needing to finish a piece of jewelry and you simply don’t have the correct size of wire – but you have a larger size.

What to do?

Draw down the wire!

BUT FIRST: There’s no more important rule than to wear safety equipment including glasses when drawing wire.

It does take a little muscle, and some tools. The process is not too difficult, but it takes some skill and knowledge. Most wire is sold “half hard”, which means that it is not super soft, but it is still very flexible. We exploit this fact during the drawing process.

The two most important specialty tools that you will need are a draw plate and draw tongs. A draw plate is simply a piece of tool steel that has holes of progressively smaller sizes drilled in it. The sides of the holes on one side of the drawer plate are often tapered to make the process easier and eliminate marks on the wire.

Draw plates

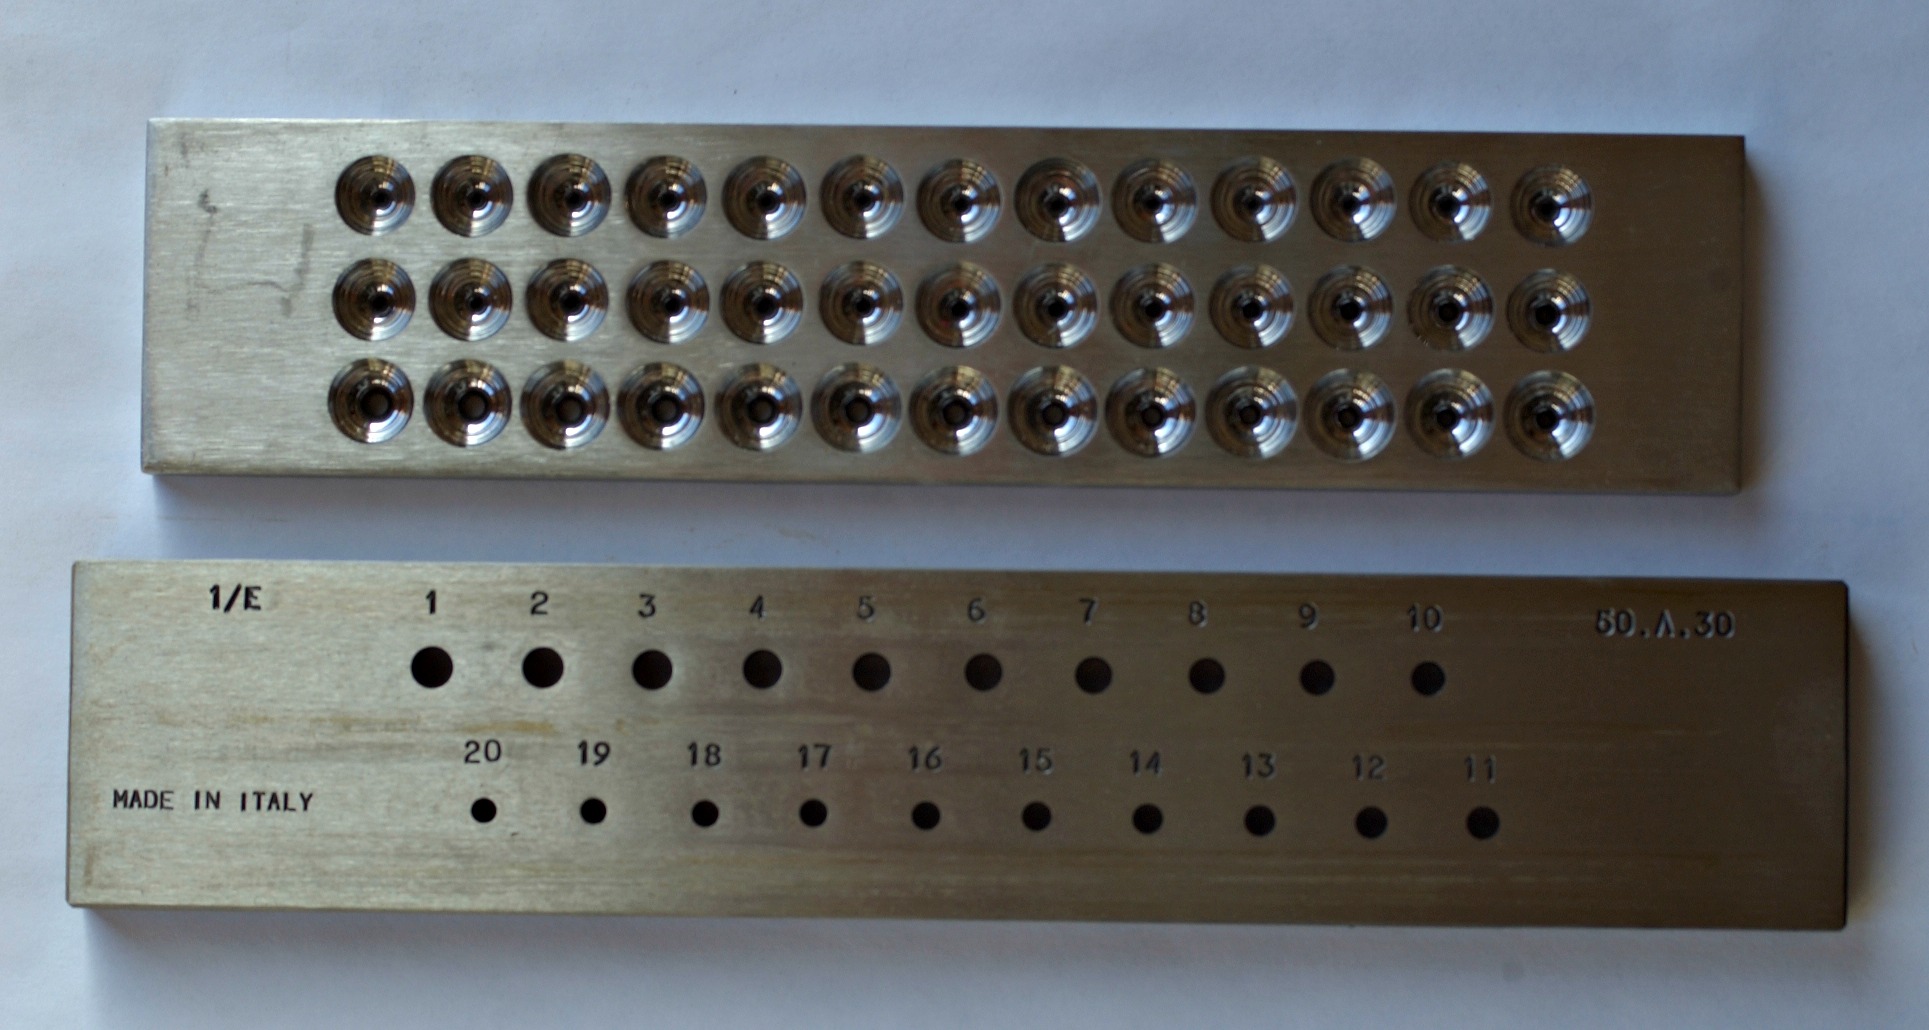
This picture shows two different styles of draw plate. The bottom plate simply has holes drilled through it, while the other has a regular hole on one side and a tapered hole on the other side. The wire is put through the draw plate from the tapered side of the hole.

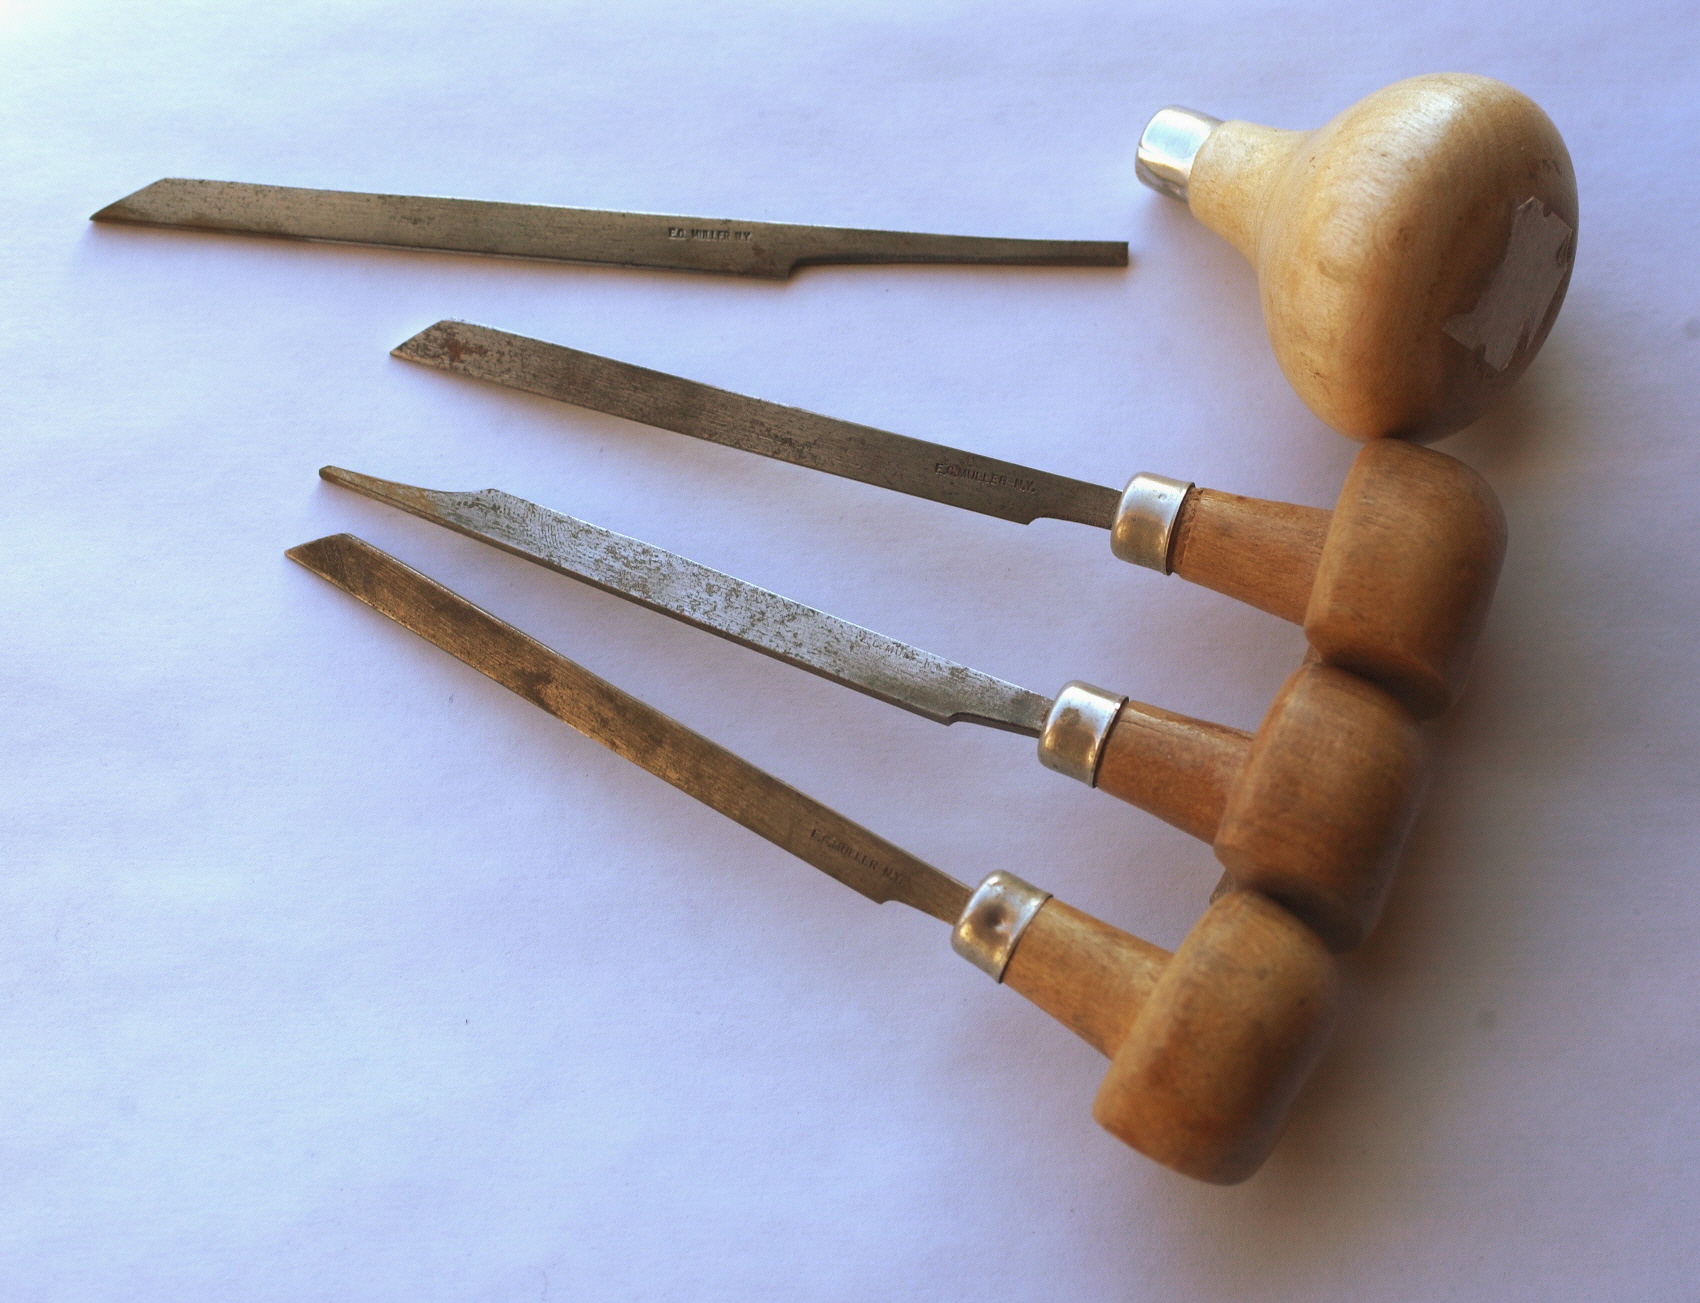
Draw tongs are not a necessity, but they definitely make the process a lot easier. They are large, heavy, sturdy pliers, often with a hook on one or both of the handles. This hook allows you to have a better grip on the pliers so that you can pull the metal through the draw plate more easily. The following picture shows both common styles of draw tongs.

draw tongs

So how do we actually draw down a piece of wire?

The process starts by using a file to taper the end of the wire. Tapering the wire is essential so that it will go through the hole in the draw plate and extend at least ½ inch on the other side. Having a decent sized piece of wire to grab with the tongs is very important. A shorter piece will sometimes slip out of the tongs or break off.

The draw plate should be securely anchored in a vise before you try to draw down the wire. Make certain that the vise is held down securely. Start with a hole just slightly smaller than the wire diameter. Put the tapered wire through the draw plate, grab it with the tongs and pull! Be careful to watch out for the end of the wire. When the end of the piece of wire comes through the draw plate it usually does so suddenly, and a flying piece of wire can be dangerous. Wear safety glasses!

Personally, I had very little experience with drawing wire apart from the occasional need for a smaller diameter than I had on hand. That all changed when I needed wire to be harder for a specific project. And that brings us to another reason why you might draw down wire.

I now make several things for my shop that require the wire to be springy and fairly hard. You can harden wire by hammering it, but for large quantities of wire, the easiest way to harden it is by drawing it down. Every time you draw the wire down it will become harder and springier, and more difficult to pull through the draw plate.

Repeated trips through a draw plate using smaller holes is hard work. It’s amazing how much effort each pull requires. This is a skill that can be learned, but it takes practice – and sweat! The entire process makes me really appreciate how easy modern artisans have it in comparison to artisans living hundreds of years ago. Imagine having to draw ALL of your wire!!!

Next Time: Etching

Metal Techniques Part 3: Engraving

Engraving is the process of cutting lines and designs into the surface of a piece of metal. The technique can be used either to create decorations and monograms, or to create a picture on a metal plate, which can then be used for printing. If you wonder what a picture that is printed from an engraved metal plate looks like, take a look at any dollar bill.

engraved initials

This is a picture of an engraved monogram on a tray that belonged to my grandmother. This piece would definitely have been engraved by hand. If you look closely you can see where each cut starts and ends and how multiple cuts are used to form each portion of a letter.

I’ll be focusing on the traditional engraving techniques. Modernly there are machines, some controlled by computers, that can do engraving all by themselves and an assortment of semi-automated pieces of equipment for use by individuals.

In traditional engraving, the tool that is used is called a graver or burin. The graver is made of hardened tool steel and has a long shank that fits into a wooden handle. The length of this shank is actually cut to fit the hand of the individual engraver. The graver is basically a very sharp, tiny knife-edged cutter, with a specially shaped wooden handle. This handle allows extreme control over the amount of pressure that you use and the direction of the cut. The handle is NOT hammered on, but rather is held in the palm of the hand. The variation in the size and shape of the cuts is accomplished by a combination of the shape of the graver cutting edge and the position in which the graver is held. The graver actually removes tiny curls of metal from the metal plate.

how a graver cutsThis picture demonstrates the difference in the shapes of just a few gravers, and even the differences in handle shapes. The top graver shows what it looks like before it is cut down and set into a handle.

gravers

Gravers must be sharpened on a regular basis. There are special holders available to assure that the graver is held at a very specific angle when it is sharpened. A dull graver, like a dull knife, is dangerous. It makes you push harder in order to cut and it is much more difficult to control the tool if you are pushing hard.

The piece of metal that is being engraved must be held very securely so that the graver doesn’t slip and mar the surface. The traditional technique for holding the metal is to stick it to the top of a handle with a small platform called a shellac stick. The piece is heated gently, along with the shellac, and then they are pressed together. Modernly there are new thermo-plastic materials that can be used to do the same job without leaving a residue on the piece that needs to be cleaned off. Thermo-plastic is a material which becomes moldable like clay when it is placed in hot water.  It can be re-used virtually indefinitely.

If the metal is three dimensional, such as a ring, it may also be put into some sort of vise that will not mar the surface of the piece. Obviously this will only work for small pieces. Larger pieces can be placed into a metal gravers’ ball. These are heavy steel spheres with built in vice jaws on top and a donut shaped pad. This pad allows the sphere to be rotated to any angle for working.

Pieces that are too large for any of the previously mentioned holding techniques can be held with padded jaw vises, or other padded hold downs.

Learning to engrave with traditional tools takes MANY hours of practice and a very steady hand. I hope that this brief summary gives you some insight into the complexity of the process.

Next time: Drawing Wire


Enhanced by Zemanta

Metal Techniques Part 2: Chasing and Repousse

Lately I have run across several instances of people having no idea how a technical word should be pronounced. First let’s learn how to say these words correctly. Chasing is said just the way it looks – the dog is chasing the cat. But the second is a french word: repousse is pronounced ray – poo – say.

The process of chasing and repousse almost looks like stamping, until you look closely. When we use stamps on metal, the metal sheet is placed on another hard metal surface and the stamp literally crushes itself down into the surface of the metal sheet. The metal sheet remains mostly flat with only a tiny ridge of metal around the stamped design.

Chasing and Repousse uses tiny stamps, usually in simple shapes, to form the metal.The metal sheet is backed with a flexible substance, and the metal becomes three dimensional.

Here is an example of the sort of simple tools that are used to do chasing and repousse.

Chasing Tools

So what EXACTLY do these words mean? Repousse is hammering the metal sheet from the back to raise the surface of the metal and chasing is lightly stamping the raised design from the front to add more detail and refine the raised shape.

These techniques were developed a couple of thousand years ago and were most famously used on gold sheet by groups that included the Scythians, Greeks, Romans, Celts and Franks.

Here is an example of what chasing and repousse can look like.This is a 16th century gilt copper piece from Tibet.

Gilt copper repoussé from Tibet, 16th Century.

How can you hammer on a piece of metal from the back and allow the metal to stretch and become three dimensional? Pitch! Pitch is a flexible substance, which becomes semi-liquid when heated. It is melted and placed into a special heavy metal bowl. The metal is placed into the surface and allowed to stick there. If you place the metal face down in the pitch you can then shape and hammer it from the back to create your design. The pitch bowl is heavy and very stable – so you have both hands free to hold your tools. When the design is completed, the pitch is reheated and the metal is removed and cleaned. The metal can then be flipped over and re-anchored in the pitch for the chasing portion of the work.

Here are two pictures which show the before and after of a chasing project. The black substance in the background is pitch. The artist has taken a simple silver spoon, set it into pitch, drawn the design on the spoon and then used the chasing tools to form the metal.

 Skull-Spoon Chased 1Skull-Spoon Chased 2

There is no repousse involved in this project because the artist is using the already domed bowl of the spoon for that part of the project.

Here is another example of chasing without the repousse. The artisan is simply hammering the metal down into pitch the create a low relief design.

Chasing Workshop in the Grand Bazaar - 2

It is also possible to do simple chasing and repousse on a sand bag, which is exactly what it sounds like – a leather bag loosely filled with fine sand. This system is less stable and is generally not used for extremely detailed small pieces because of the difficulty of holding the pieces while working on them.

I hope this brief account of the technique of chasing and repousse gives you a better understanding of the complexity of the process and the amount of work involved. It may sound simple, but it really is quite time consuming and requires a LOT of attention to detail.

Next Time: Engraving