Prayer Beads Revisited – The Basics

Over a year ago I wrote a blog on Prayer Beads. Chatting with people in my shop over the past year has consistently brought up some specific questions. The majority of my customers who are looking for prayer beads have European personas, they know that they should be “using” prayer beads as an accessory, and they do NOT know what the prayer beads should look like.

The first important thing to realize, if you are familiar with modern rosaries, is that most of the standardization of rosaries for the general public has occurred in the last 100 years. Prior to that time geographic regions, various religious orders, and personal preference and wealth were all very important considerations.

So, you want a set of prayer beads, but you do not have a “totally focused” persona from a very specific town? If you are male – get a tenner, and if you are female get a three decade rosary.

Now what does that mean? Let’s discuss the geography of a rosary. The standard number of Ave beads in a decade is 10. An Ave, or Hail Mary, bead is used to say the prayer that begins, Hail Mary full of grace… But remember, no matter what your native tongue, if you were a regular Roman Catholic in Europe, you said your rosary in Latin during the Middle Ages, so that would have been Ave Maria Gratia Plena. The decades in a rosary are separated by a Paternoster, or Our Father, bead – this is where the Our father who are in heaven prayer goes… in Latin of course (that is what Paternoster means).

Medieval rosaries were usually ended, or decorated, with either a tassel or a cross, the use of a crucifix on a rosary is extremely rare prior to 1600, but becomes more common after that date. And the difference, in case you are not sure, between a cross and a crucifix, is the presence of a representation of the crucified Christ, hence the name, crucifix. Crosses could be one piece or made of several beads.

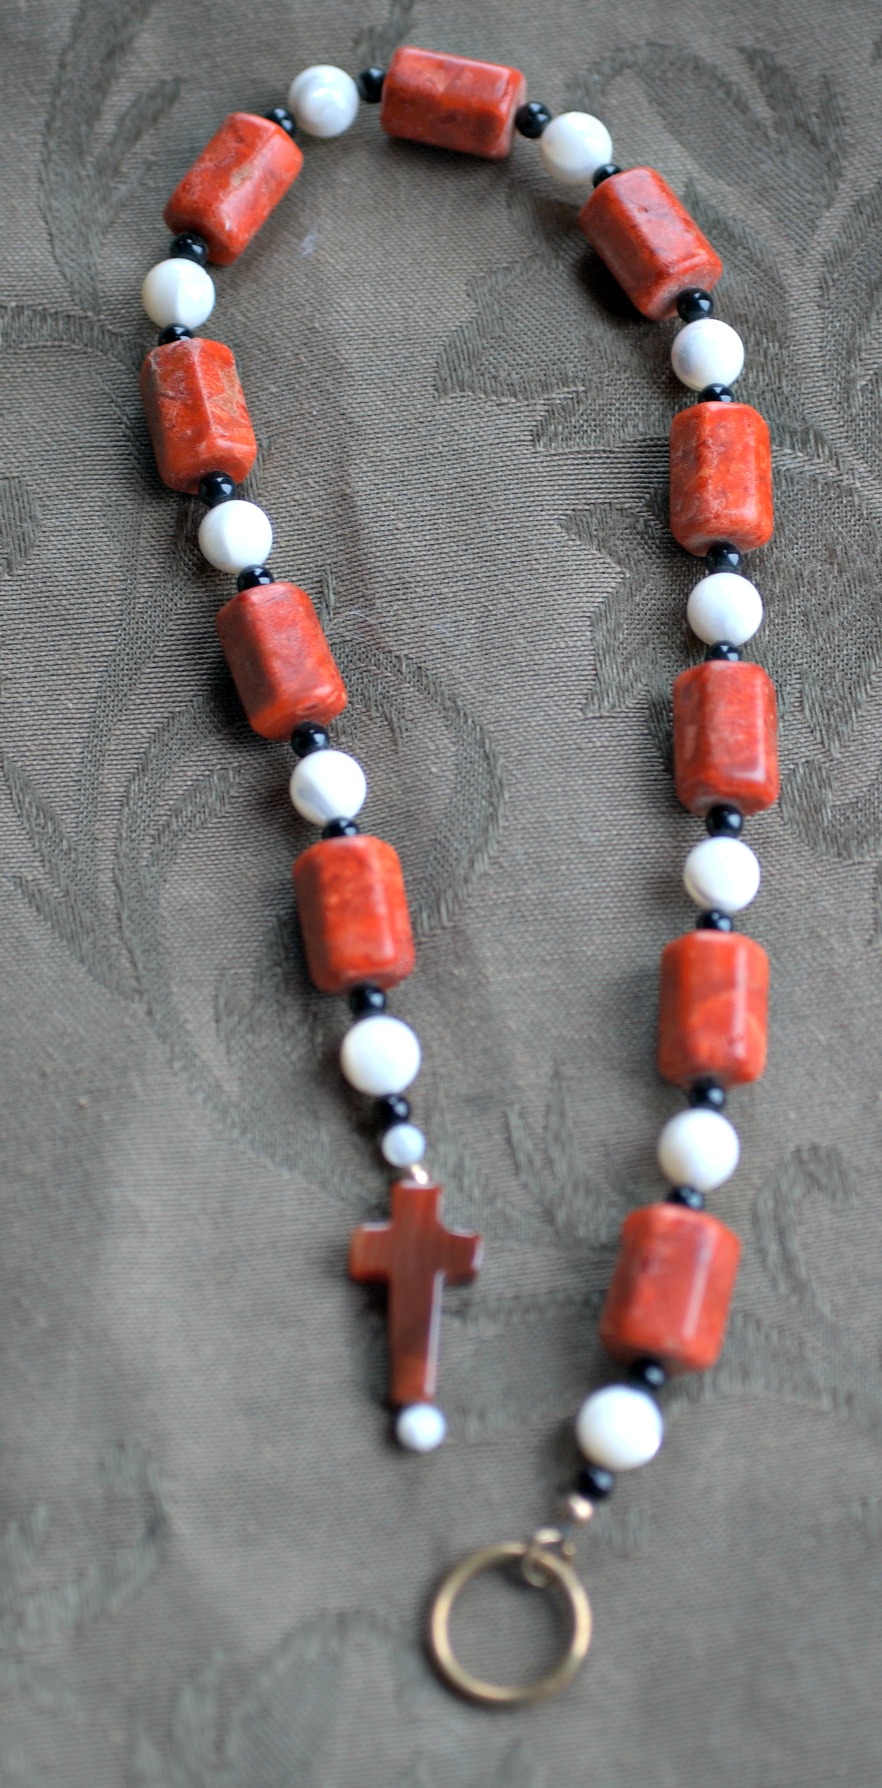
So back to my persona recommendations! A tenner is simply a string of ten Ave beads with an end bead, known as a gaude, or a cross, or a ring, or sometimes a tassel, or a combination of those things. If you are in a German speaking area, it will be called a Zehner – you guessed it – a tenner. Women use them too, but they are definitely the most popular form that we find for men. This picture shows a tenner with coral Aves (the black and white beads are just spacers), a carnelian cross at one end, and a ring at the other end. The ring can be used for hanging the rosary off of a belt, or if it is large enough, it can be placed on a finger to make it easy to carry and use the rosary at all times.

Etsy 125

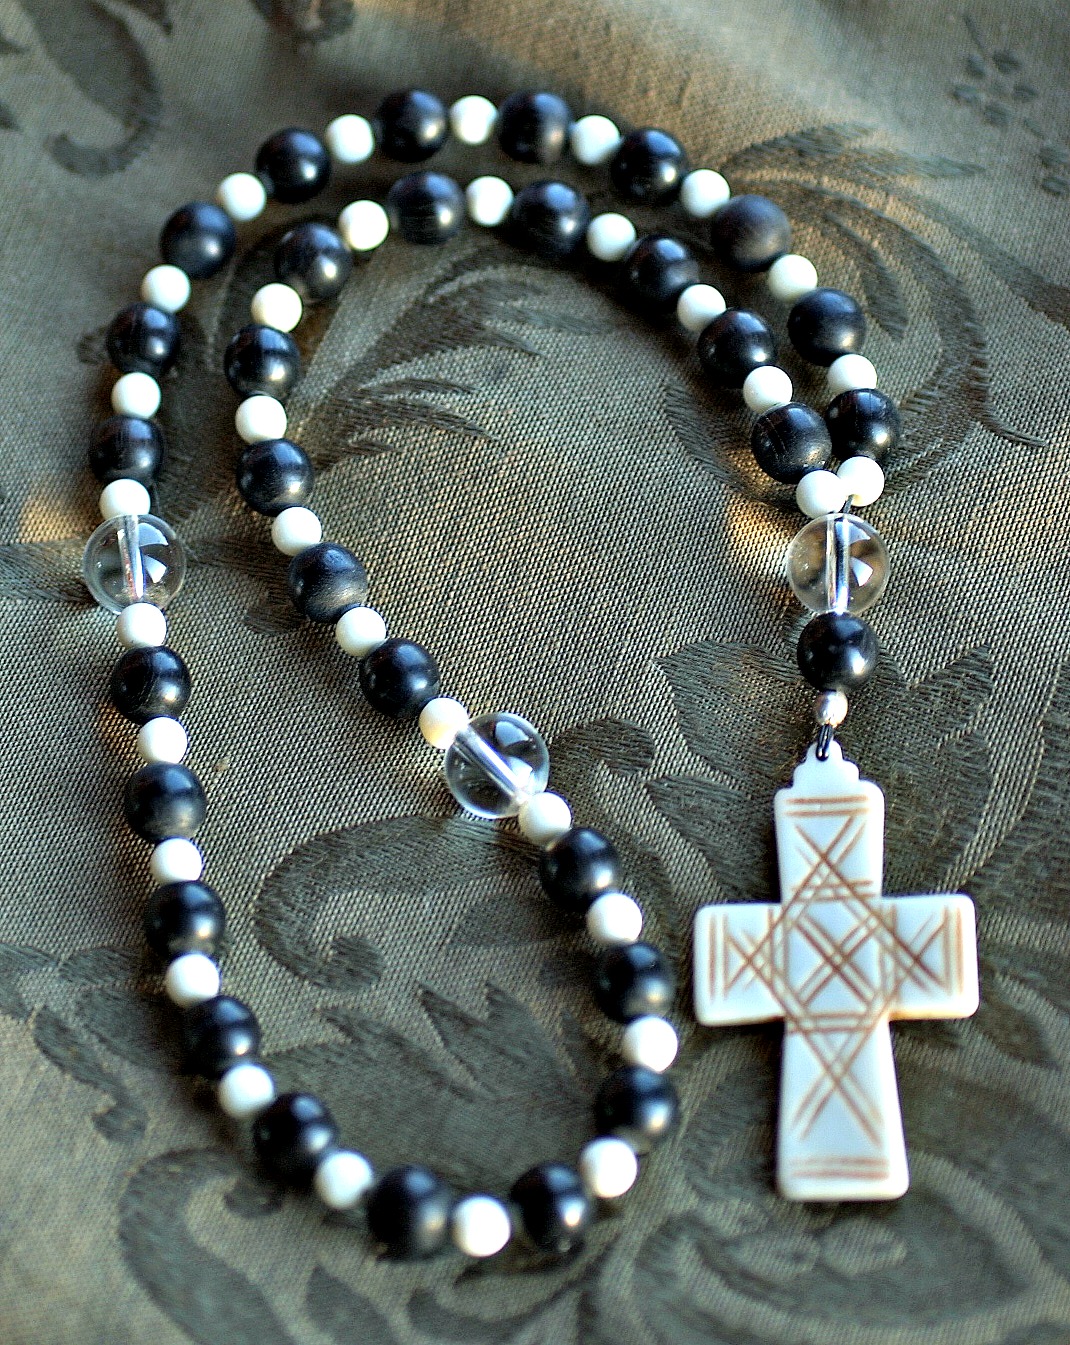
And what about the three decade rosary for women? This form is usually made into a loop, for easier carrying. So we have three sets of ten Ave beads with a larger Crystal Paternoster bead separating them, and a tassel or cross at the end – like this.

Etsy 126


I hope that this brief blog helps to demystify what sort of rosary your persona should be carrying. Next time I will discuss the details of bead choices, tassels and crosses.

Enhanced by Zemanta

Making a Garment Bag from a Table Cloth

One of the challenges that we deal with all the time is how to safely transport long gowns and tunics to events. I remembered that when my children used to compete in major figure skating competitions a lot of the skaters had custom garment bags. A single outfit, and all of the accessories that went with it, would go into a specially designed bag. That seemed like an excellent solution, so I went to the internet to see if I could locate some general directions for garment bag construction. I wanted one without zippers that would take into consideration the sheer volume of the fabric that I was trying to transport. And there it was – a web page with instructions on how to build a custom garment bag that is designed to handle bulky or long items.

Now I understood how someone else was making a successful garment bag, and I actually have bought some good quality ticking to make some custom bags, but I was looking at another issue at the same time – what to do with an old, completely intact, but stained on one end, Christmas table cloth. The stain simply would NOT come out. But it felt like a waste to just toss it out. And then the two projects merged in my brain and here it is. I laid the table cloth out on my bed – it was the only cat and dog free location that was big enough. I recommend using large rectangular table cloths – thrift store finds are perfect, and cheap.

Center the hangers that you plan to use, with the clothing that you plan to hang on them on the short side of the table cloth so that the longest part of the table cloth will be way longer than the clothes that you want to protect.

garment bag 1Then carefully fold over one side of the table cloth so that it goes more than half way across the clothes. Do not make it tight against the clothes – leave at least three inches at the shoulder. Make sure that you keep the top edges of the table cloth even and straight. Use a couple of sewing pins if you need to to keep things from sliding.

garment bag 1st fold

Then fold over the other half of the table cloth, lining up the top edges again and pinning them to keep them from slipping.

garmentbag fold 2

You now have a big cloth burrito with clothes hangers sticking out of the top. So now it is time to shape the top. Carefully fold down the top corners of the table cloth to shape the bag and pin it. Be sure to catch all of the layers of the table cloth in the pins and NONE of the clothing. You can choose to place the folds to the front or the back, hide them inside, trim them off – it is up to you. You will need to sew the shoulder seams. I recommend leaving about 2-3 inches open for the hanger hooks.

garmentbag top

Once you have the top pinned, or sewed, go to the bottom of the soon-to-be-bag and figure out how long it needs to be. The easiest way to do this is peek inside. I recommend leaving at least an extra 4-6 inches at the bottom before you seam it. I usually leave a little bit more so that I can throw a pair of shoes and socks in the bottom of the bag.

garmentbag finding bottom

Once you have decided the length of the “bag” you can cut it, sew it, fold it, whatever you want. I decided to fold mine and then whip stitch it in place. I view the bag as a work in progress and I wanted the option to able to change things later.

garmentbag bottom

To take clothes in and out of the bag, just open the flap. If you are concerned about the flap opening you can add a tie or two to keep it closed.

garmentbag open

Here is my final version, hanging in the laundry room.

garmentbag done


Eating Well When You Camp – Canning a Cake

I am sure that some of you are probably sitting there blinking right now, but canning a cake is one of the coolest, handiest and easiest things ever. I discovered it several years ago while reading one of those country living sort of magazines. We use the technique on a regular basis in order to have a shelf-stable, but yummy, dessert on no notice. Canning a cake allows us to have just a couple of portions for each person and then be done with it. No overeating and no stale cake. But it is also a great way to take a cake to a camping event. No smushed cakes, and just in case you don’t actually eat it all (unlikely) nothing wasted.

So how does one accomplish this not so modern miracle? Canning supplies and a good recipe. My very favorite is an old-fashioned pound cake. I have had mixed results with things like banana bread, but once you have had success with a basic pound cake you should experiment to find other options that you like. Be sure to read the instructions ALL THE WAY THROUGH before you make this so that you can have all of the equipment that you will need ready to go.

Canned Pound Cake Recipe

3 cups of sifted flour

1 tsp salt

1/2 cup shortening

1 cup butter

3 cups sugar

1 tsp vanilla extract

6 large eggs

1 cup of milk

7- 1 pint Freezer/Canning Jars

A note about using the correct canning jars: Freezer Jars are wide mouth jars that are smaller at the bottom than at the top. Do NOT use regular canning jars that have an opening smaller than the largest part of the jar – the cake will NOT come out in one piece. This picture shows the shape jar that you want to use.

front of new pint & half jar

front of new pint & half jar (Photo credit: Marisa | Food in Jars)

Clean and grease your jars (I use shortening on a paper towel). Preheat the oven to 350°F. Sift the flour and the salt together and set aside. Cream the shortening, sugar and butter together. Add the eggs to the shortening mixture – one at a time, beating in between. Add the vanilla and the milk to the shortening mixture, beating to incorporate. Slowly add in the flour mixture, while beating. Scrape the bowl thoroughly and then mix for an additional 2 to 3 minutes. Fill the jars 1/2 full. Be careful to clean the top rims of the jars. Place the jars on a baking sheet in the oven and bake for 45 minutes. Test with a toothpick to make sure they are done.

While the cake is cooking, clean and heat the jar lids in hot water and have your rings ready to use. Place a large cookie cooling rack, or a cutting board covered with a towel on the counter next to the oven and have a couple of good quality oven mitts or pot holders ready. You will need to be able to handle the hot jars and lids quickly and safely when the cakes are done. You can also use a canning jar lifter to remove the jars from the oven. Remember the jars are 350°F.

When the cakes are done, turn off the oven. Keep the oven closed. Quickly dry a hot jar lid with a piece of clean paper towel. Take the jars out ONE AT A TIME. Check the top of the jar to make sure that it is clean, place the lid on the jar, screw on the band, turn the jar upside down and allow it to cool on the rack or towel. Repeat until all of your jars are sealed. Once the jars are completely cooled, check the seal of each jar. If the jar has not sealed use the cake within a week. If the jar is sealed properly, label and store the jar in a cool dark location. I am not really sure how long they will last, because we have always eaten them within 3 months, but they should last at least 6 months.

To serve, open the jar, dump out the cake, and slice it. Our favorite dessert when camping is this cake with canned peaches in a bowl. Yum! Use your imagination, and remember – when canning cleanliness is above godliness – clean hands, clean counter, clean equipment and clean fresh paper towels are your friends. Enjoy!

Enhanced by Zemanta