Choosing Which Metal To Use

I often hear conflicting complaints from historic re-enactors and SCA folks alike:  “the problem with my group is too many authenticity Nazis” and “why can’t people at least make a more accurate attempt at their clothes?”

As a professional jeweler and merchant at SCA events, I frequently wrestle with the disparity of these sentiments. Some of the choices are difficult, but some are easy from my perspective. I make many of my items using a copper alloy known as bronze. Some merchants choose any old copper alloy without regard to what would have been used historically. But using true bronze gives my pieces the look and feel of the originals that they are patterned after.

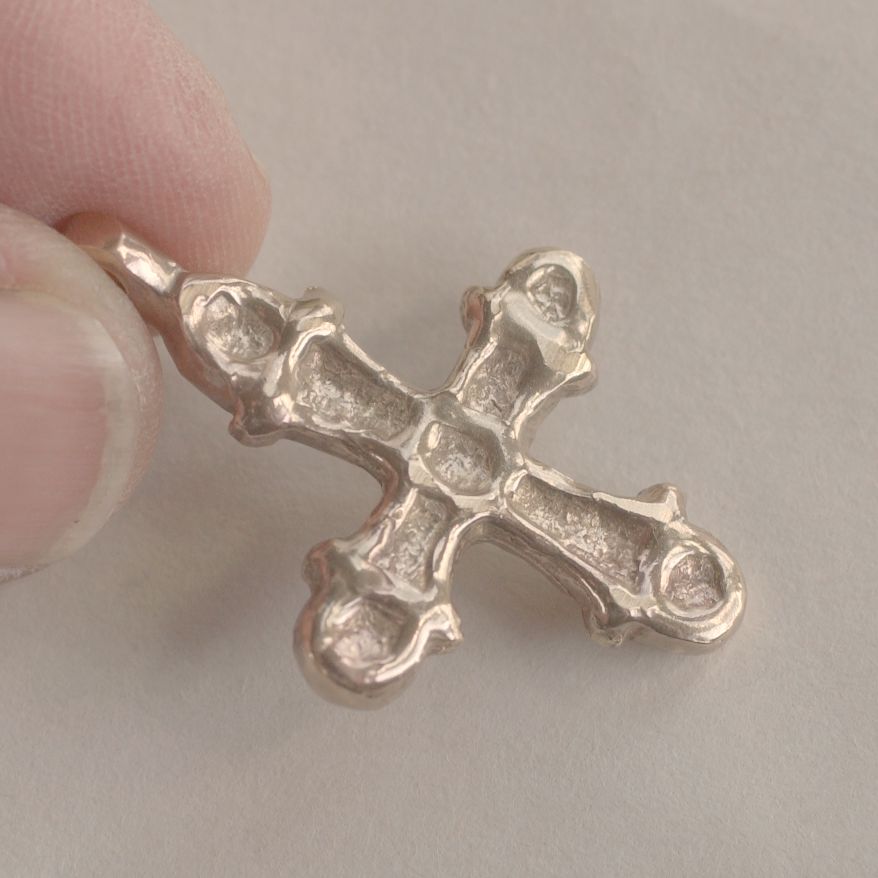
Bronze was used to make weapons, armor, knives, brooches, hooks, crosses, and many, many, other items. It’s a ubiquitous material throughout Medieval history, and much earlier. Bronze is a remarkable alloy with multiple formulations. The first bronze included copper and arsenic (yes arsenic). Fortunately for real sticklers for accuracy, arsenic bronze was largely replaced by a tin and copper formulation that we recognize today as true bronze. A bit of good news for authenticity fans – true bronze became the primary bronze from the 3rd millennium BC.

There are very few places on the earth where copper and tin are found together (one site each in Thailand and Iran), so true bronze is reliant on trade. Great Britain was the major source of tin in Europe, which can explain some of the unusual trade goods found in Britain.

Copper alloys are truly remarkable. They can be harder than wrought iron, be sharpened for cutting edges, and the alloying process is comparatively easy. Depending on the alloy (tin, zinc, lead, silver and other additives) the metal can take on many different hues. Each formulation has unique characteristics, and in our modern society they have very specific names – brass, yellow brass, and nickel silver, to name a few. Some alloys are malleable, others are hard and brittle, and still others have differing degrees of chemical resistance.

Are there any other practical reasons for me to want to use true bronze instead of some other bronze alloy? Yes. True bronze can be enameled. Now some of the other alloys can be enameled, too. But the problems with enamels changing color because of the zinc in brass, for example, can be difficult to overcome. True enamel is a form of ground glass that is melted and fused to the metal. If you are interested in more detail about enamel and enameling, just visit my enamel blog.

Handled ewer. Copper alloy with champlevé enam...

Handled ewer. Copper alloy with champlevé enamel, Late Roman work. (Photo credit: Wikipedia)


Today we know that iron replaced bronze for knives, weapons, and many other larger items, as iron working skills matured. Iron could maintain a sharp edge longer, withstand greater bending forces, and eventually could be made into steel. The transition to iron seems to have been encouraged along by a tin shortage. Around 1200 BC the shipment of tin around the Mediterranean plummeted – coincident with population migration. There’s no definitive proof of the link between migration and the tin shortage, but some archaeologists believe that there is a causal relationship between the two.

But are there any other metal choices that we need to make for period reproductions? We’ll talk about that next time.

A Pennsic Pottery Kiln Interlude

I am not sure how many years they have been building a pottery kiln at Pennsic, on Long Way between Fosse Way and Wroxeter road (across the street from N31). Our household has been in its current location (N30) for over twelve years. I walk past it every year and I don’t remember it not being there. Every year I watch for the arrival of “the tarp”, and I try to get at least a couple of pictures of the process of building and using the kiln. This year my hubby took a bunch of pictures, too, so between the two of us, we have a fairly decent chronicle of the building and use of the kiln. I have never had the opportunity to actually participate in the firing process. But I am none-the-less fascinated by the kiln and I wanted to share it with all of those who may never have seen it, in the hopes that others may consider creating a similar endeavor at other locations.

This is the view of the kiln area from the street.

IMG_0134

But when the process starts, this is what the area looks like.

IMG_0123

The kiln is right along the edge of a small stream and takes advantage of the naturally occurring clay in that area. One of the first things that has to happen is the digging clay and the air tunnel.

IMG_0126

Once the air tunnel that provides a solid draft for the kiln is dug, a clay liner is created for the kiln.

IMG_0131

Here the fresh liner of gray clay has been surrounded by a combination of dirt and pieces of baked clay that are left over from previous kilns (the reddish chunks and lumps). The air tunnel is also covered with clay and then dirt and baked clay lumps, and it winds up looking like this.

IMG_0128

The kiln after the first firing. You can see that the liner is now completely dry. The dried pottery and tiles will be stacked inside this area for firing.

IMG_0149

After the first firing the kiln is ready to be loaded and fired up for a considerable number of hours. I had hoped to get a picture of the kiln in full firing glory this year, but they fire it overnight, and I fell asleep.

According to the description in the Pennsic gatebook, this is an English style pottery kiln. The number of firings that they manage to accomplish during Pennsic depends largely on the weather. According to the Pennsic Independent, in 2011 there were at least three firings during the war. Master Simon de Okewood teaches a class on kiln construction and then follows it up with a class on firing in a Medieval Pottery Kiln. The tiles and pottery from the children’s pottery classes are sometimes fired in this kiln, too. Allowing folks to actually take home finished pieces that they have made at Pennsic creates one of the coolest souvenirs that I can possibly think of.

Hmmmm. I guess I am going to have to move this set of classes much further up my list of things to do at Pennsic for next year. Taking a closer look at the process has made me want to take the classes even more!

My Casting Process Up Close – No It Is Not Instant! Part 3

Last time we ran through some of the basic techniques that I use to process my lost wax cast pieces. And we asked the question : Are We Done Yet?

Well, almost. I use essentially the same process for both bronze and silver. The biggest differences in the way pieces are processed depends on the shape of the piece. Flat pieces, like regalia medals, often require a lot less sanding and polishing than three dimensional pieces, like buttons, or pendants. The Raven Viking Pendant, for instance, has more than one sprue connection that needs to be cut and polished off for each piece (three to be exact).

If the piece needs to be drilled, this is when it happens. I use my little drill press to drill holes in the regalia medals and make sure that any other holes, whether they are in dress hooks, pendants, or anything else, are the size that they are supposed to be.

drill press

This is also when any pieces that do not have carved maker’s marks can acquire stamped marks, if appropriate.

makers mark

I then use the Cratex wheels to remove any rough spots from pieces that were drilled.  Assuming that everything has gone well up to this point, the pieces go into a rotary tumbler with stainless steel shot to burnish.

Jewlery in TUmbler

Here is a picture of the rotary tumbler barrel, with stainless steel shot and a collection of dress hooks. You can see how much cleaner the castings are. The stainless shot will make the pieces a lot shinier. After they have tumbled for about 20 minutes, a quick check will reveal if they need more cleaning or not. Some pieces just need a little more help. And that help usually comes from the magnetic tumbler.

Magnetic Tumbler

And this is a view inside of the magnetic tumbler. Those tiny little hairy things are pieces of stainless steel which are about 1.5 mm in diameter and 5 mm long. The machine uses magnetism to fling the tiny pieces of steel in a vortex at about a gazillion miles an hour. It is great for getting into nooks and crannies and cleaning them out.

Once the piece is clean and polished enough, it is rinsed and then put in the dryer. The dryer? Yes. I have a vibratory tumbler filled with ground corn cob. The cob absorbs all of the moisture and prevents the piece from developing water spots.

vib tumbler dryer

And this is what a piece looks like after it comes out of the dryer.

Etsy 61 hand held

Shiny! Of course at this point the pieces are once again examined in a bright light and checked for imperfections.  Scuffs or dirty spots will send them back into the process for touch-up.

I hope that this picture-rich blog gives you at least an idea of the process that every single piece of cast metal goes through in my shop. There are lots of other systems and techniques that can be used to accomplish the same end results, but no matter what system is used, there is nothing instant about the process!