A Viking Antler Comb – an A&S Project and a Learning Experience

antler combother side

Antler combs are one of the most commonly found Viking artifacts. Antler was preferred over bone because of its greater strength and ability to withstand bending without breaking teeth. For my project I used Red Deer antler, purchased at the Pennsic War. Red Deer Antlers, are known to be one of the most commonly used types of antler for comb making. Most of the combs found in Viking age sites are single sided. The historic combs were riveted together using iron or copper alloy rivets. My comb was riveted together using handmade yellow brass (copper alloy) rivets.

Comb production was widespread during the Viking age. In some areas, such as Jorvik (York, England) the production appears to have been by nonspecialized workers, and varied greatly in quality, while in other areas, such as Ribe, Denmark, the comb-makers appear to be professional craftsmen, producing beautiful combs of great uniformity and quality. I have had the good fortune to personally see many combs at the York City Museum, The Ashmolean Museum in Oxford, and the Museum of London. Seeing these combs inspired me to try to actually make one myself. Some of my favorite combs, stylistically speaking, were in York.

The most common forms of carved decoration found on combs are geometric patterns of lines and circles. The style of the comb that I made is characteristic of those commonly found in York. Many York combs have wider protective teeth on their outside edge. Most of the combs from York are decorated with geometric line patterns, so I decorated my comb with patterns of lines

My comb was made using the techniques detailed in several archaeological resources. The basic process is: cut the antler into sheets, cut the sheets into plates for teeth and the comb back, shape the comb back, insert the teeth plates in the comb back, drill and rivet the comb together, saw the comb teeth, shape the comb teeth, decorate the comb, and polish the comb.

slices of antler

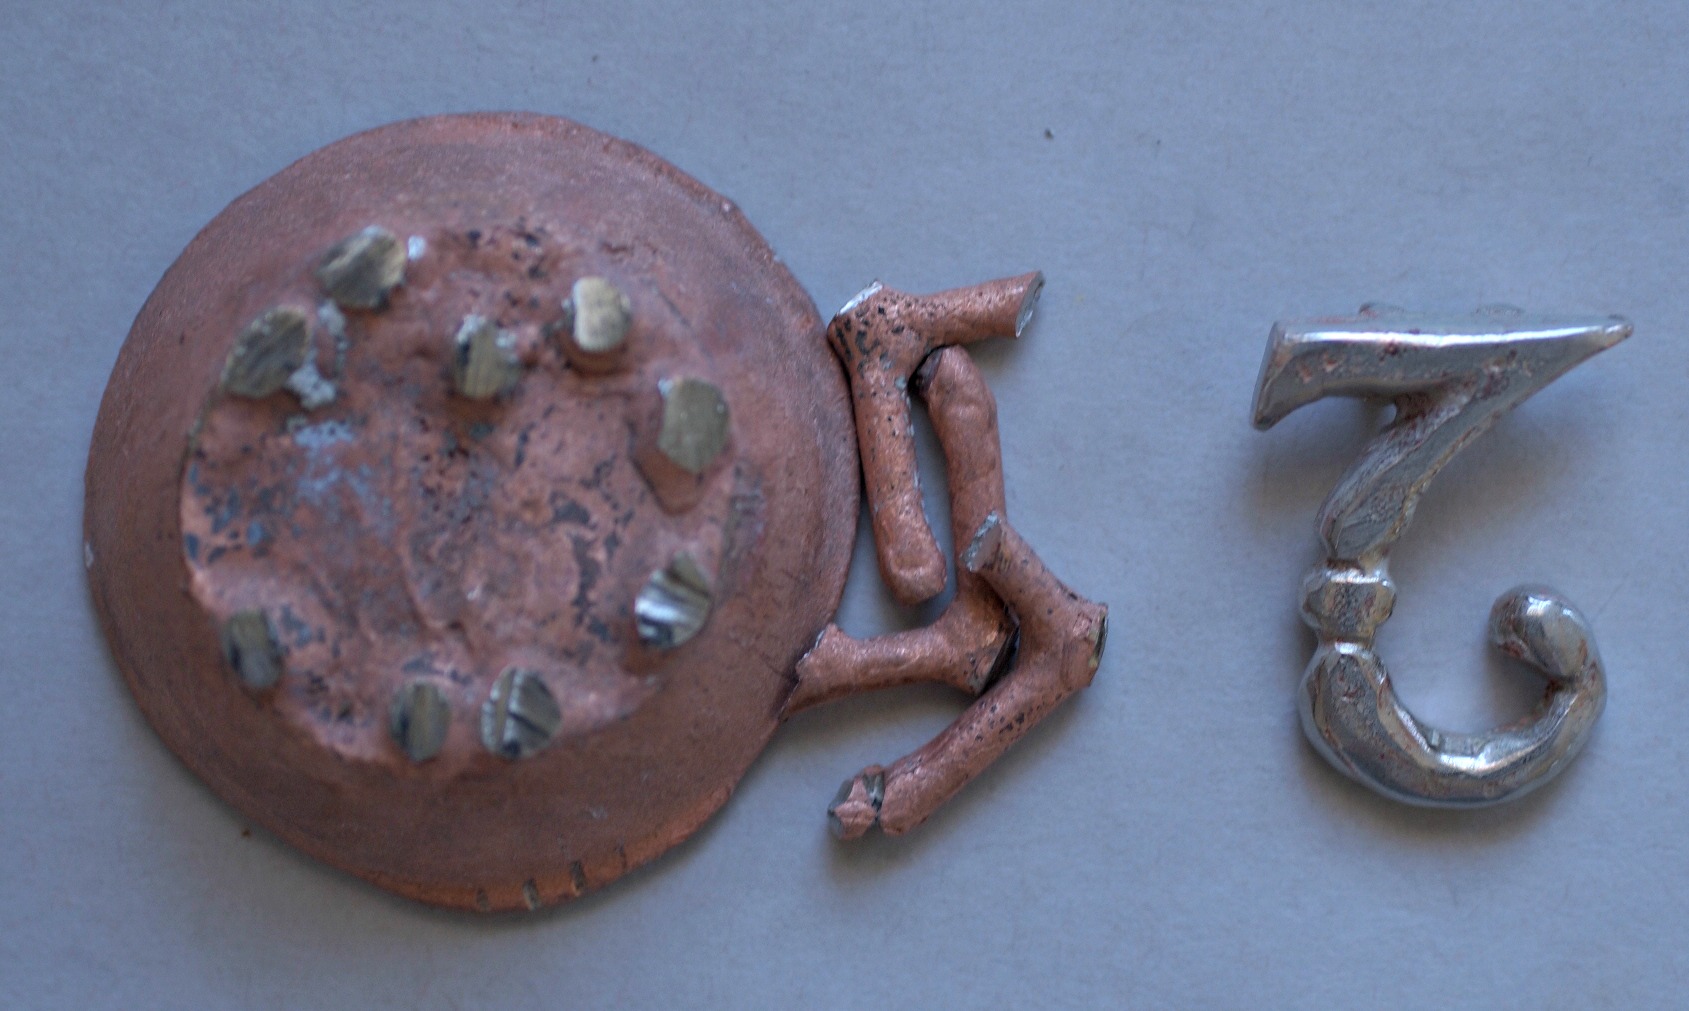
This picture shows the initial sheet (large flat piece of antler) and some of the shorter pieces that were cut for the teeth. The “dots” on the piece on the right are rivets. This was a practice piece to figure out how to rivet the antler without splitting it.

I made the rivets by annealing brass wire, cutting it to the approximate length, and peening a head onto the wire. The rivet was then placed in the pre-drilled hole in the antler, trimmed to the required length, and filed flat on the end. I then used a punch and hammer to spread the remaining end of the wire and complete the riveting process. The rivet was then filed to eliminate sharp edges.

I used only hand tools for this project. I used a saw, drill, knife, files, and sandpaper, for forming the antler. The rivets were made using a torch (for annealing the rivet metal), a hammer, punch, wire cutter, and file. I also used a dust mask (bone and antler dust is a health hazard), a vise for holding the antler while I sawed it, and a piece of leather to help hold the antler (and protect my skin), both in my hand and in the vise.

antler comb

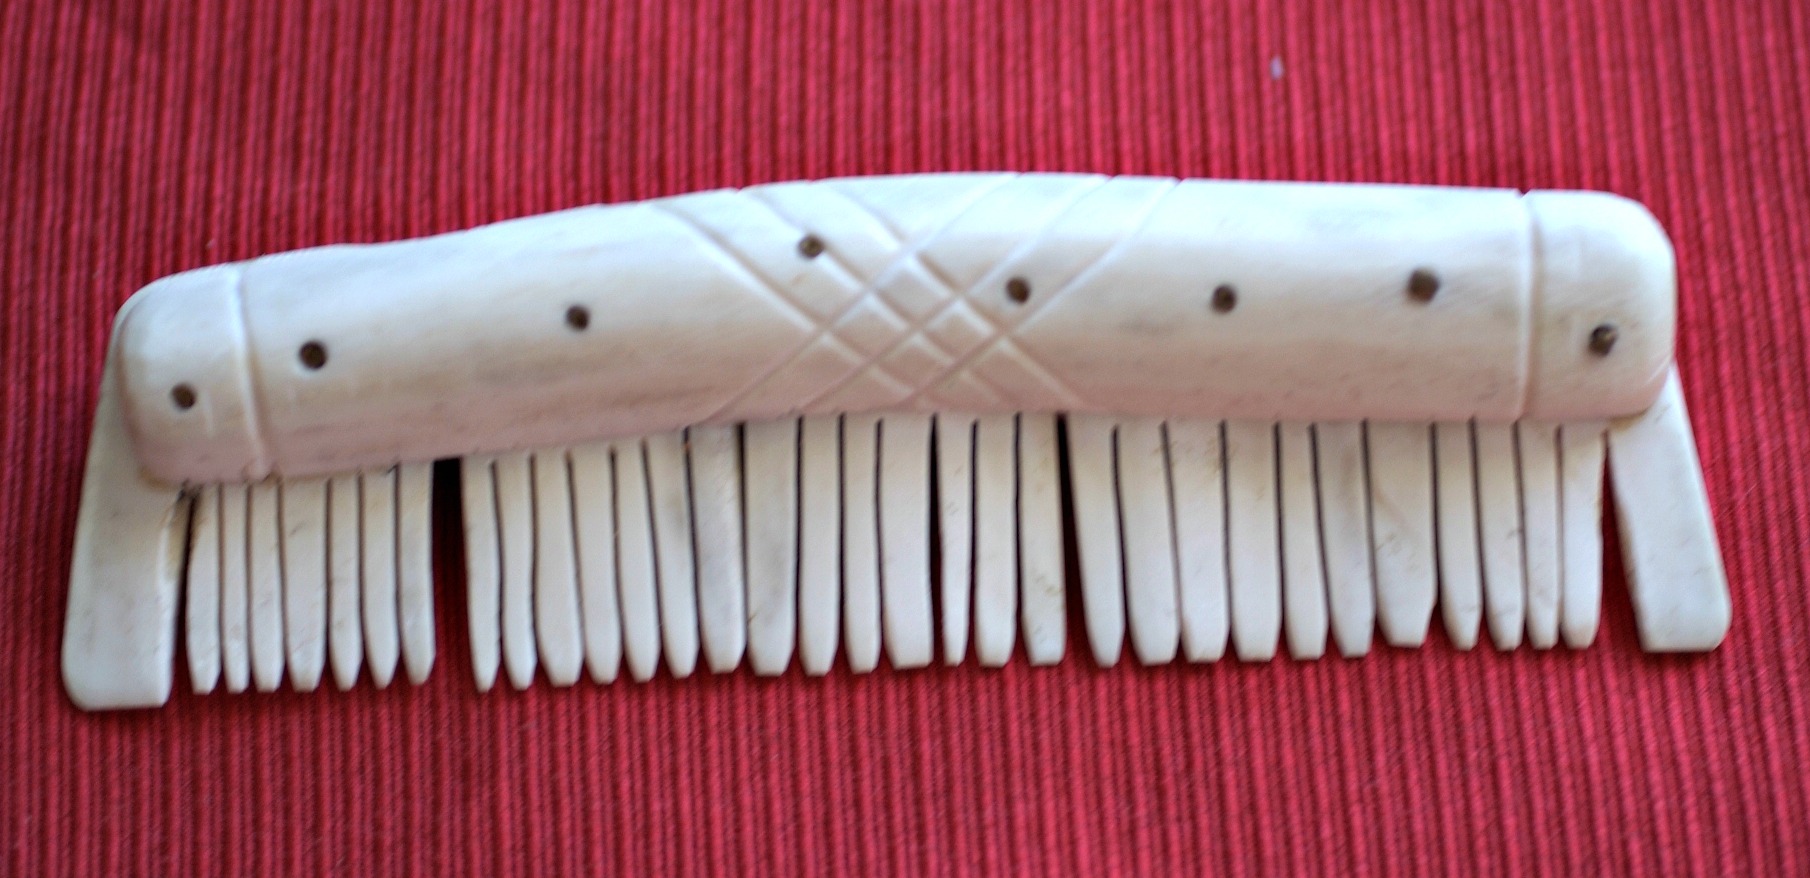
This is a picture of the back side of the comb. In this type of comb the decoration is essentially the same on both sides. I can tell the difference because the rivets line up better on the “front”. The comb is about 5 3/4″ long by 1 3/4 wide.

I was quite impressed by the amount of sheer muscle power that was needed to complete this project. I have completed many projects that required large numbers of hours, but none that required more physical stamina. Sawing the antler by hand was an amazingly tedious and strenuous project. I had never worked with antler before, only bone and horn. My comb is definitely on the clunky side, but I learned a lot about Viking Age comb production. And best of all, the comb really does work!


Removing “Copper” Surfaces from your Brass or Bronze

Anyone who has ever done a bunch of soldering and casting, using brass or bronze has had it happen. You are working away, being careful to keep your pickle and other chemicals clean, and suddenly your piece looks as if has been copper plated. You change the pickle, re-pickle the piece, maybe run it in the rotary tumbler with media, but your piece is still “pink”.

What now? Well you can physically remove the copper – literally polish the surface of the piece until the “pink” is gone. No fun, and often not very effective. I grumbled to my partner Henry about the problem and he researched it. There was an industrial strength chemistry answer, but dangerous chemicals are low on my list of things to do if I can avoid it. So he did a more directed search on the Internet.  Magic! He found someone who understood the problem, the chemistry involved, and how to fix the problem.

So, here is how it works. Sometimes the layer of copper is actually “plate” – that is your pickle has been contaminated with iron, which effectively creates a battery, and literally copper plates your piece. Other times you have done some soldering or casting, you toss the piece into the pickle and the black fire scale is removed, but not the copper coating. And worse, sometimes the piece is coated with a reddish oxide that leaves copper behind. What happened? The black is cupric oxide and the reddish or pink coating is cuprous oxide. They are both the result of the heating of the original copper alloy. The pickle removes the black, but not the reddish pink. But there is a “special” pickle that will usually remove the cuprous oxide or the copper plating. And best of all, it does not require any unusual or exotic ingredients. Warning – as with all chemical processes – use this at your own risk! If you leave the piece unattended for too long the pickle may actually eat the surface of the piece away.

DSC_6560

Special Pickle Solution

3 parts Hydrogen Peroxide (3%) – Available at the grocery store and pharmacy.

1 part white vinegar (5%) – Available in your local grocery.

Place the mixture into a plastic or glass container and set the container in a bowl of warm water (100-110F). Place the items to be cleaned in the mixture, and wait. I like to swirl the piece around every couple of minutes to see how it is doing and remove the bubbles. It will develop a brown gunk on the surface. I keep another container with more plain white vinegar at hand, and when the gunk gets too dark for me to see the piece clearly I dump the piece into the plain vinegar. This will clean off the surface of the piece. You may need to rub the piece under a little running water and turn it over to get both sides to clean off. Check to see if the piece is clean enough, and repeat as necessary with the pickle and the vinegar wash. Rinse with clean water when you are done. Polish the piece in a tumbler and you are “back in business”. WARNING: This process will remove every bit of oil from your hands, so if you have sensitive skin, I recommend that you wear rubber gloves.

The original article that Henry found is at www.artmetal.com/files/imported/project/TOC/finishes/nonfe/H2O2.html

A before and after picture of white bronze that had turned “pink” after being pickled.

DSC_6540

Part 3 – Making a Cool Storage Container – Interior Finishing Touches!

We have talked about choosing your box, designing your storage inserts to keep your item safe, and some of the basic principles of assembling your storage box. Now it is time to give the interior of your container a finished look.

I thought a LOT about this and decided that the best approach would be pictures, so I did a simple box and took a bunch of pictures!

steps 1 thru3

So here we have the process of a basic box. The entire box, the cut down box, and cutting the foam insert for the box – very messy process.

steps 4 thru 6

Here we have the final foam insert, stacked and glued together, the foam insert in the box, and the first fit of the fabric in the foam form. Once you are certain that the fabric is large enough, remove the storage item and the fabric from the foam. Apply the hot glue to the foam, put the fabric back in place, and quickly press the storage item back into the cavity. This will create a nicely lined cavity in the foam. Allow the hot glue to cool for a couple of minutes.

steps 7 thru 9

Trim the fabric into a rough circle (remember the box in this case is a circle so you want to be able to distribute the fabric evenly around the edge of the box). Lift up the edge of the fabric and apply more hot glue to hold the fabric down along the sides of the foam. Be extra careful during this process. The hot glue tends to leak out, and it can burn you and make a mess. I like to hold the fabric in place temporarily with a rubber band (that is what the blue stripe is). Allow the glue to cool and then, with the rubber band in place, slide the foam insert down into the box. As you slide it down, work the rubber band up and allow it to come off. Use a butter knife or a super thin metal spatula (narrow cake icing spatulas are perfect!) to push the fabric down between the foam and the wall of the box. This allows you to adjust the tension of the fabric and have a very neat and clean looking finish.

If I am using a form that is raised in the center, I glue the fabric in place on the foam and then tie a ribbon at the bottom of the center piece of foam for both appearance and sturdiness. The ribbon can be hot glued in place – be careful – random drips of hot glue on the lining will not look good! Or it can be pinned in place with straight pins. The pins are simply pushed through the ribbon and fabric and into the foam. I prefer to use flat headed plain metal pins – they look almost like tiny studs or nail heads. If you are concerned about the pins coming out, they can be glued in place with a tiny bit of liquid glue. I don’t usually glue them in place, but if I do I use glue that is compatible with the foam in my form and dries clear. I use as little as possible to avoid drips and smears.

foam with fabric and ribbon diagram


Enhanced by Zemanta