Garden Defenses: Making Large Covers for Your Garden – Part 1

I have always loved the pictures of English Country gardens, complete with the occasional cute little bunny, nibbling contentedly on some random grass or weed. A lovely vision, but unfortunately nothing like where I live. With drought even worse than usual this year the rabbits have become voracious predators, eating everything that they can get their self-sharpening teeth on.

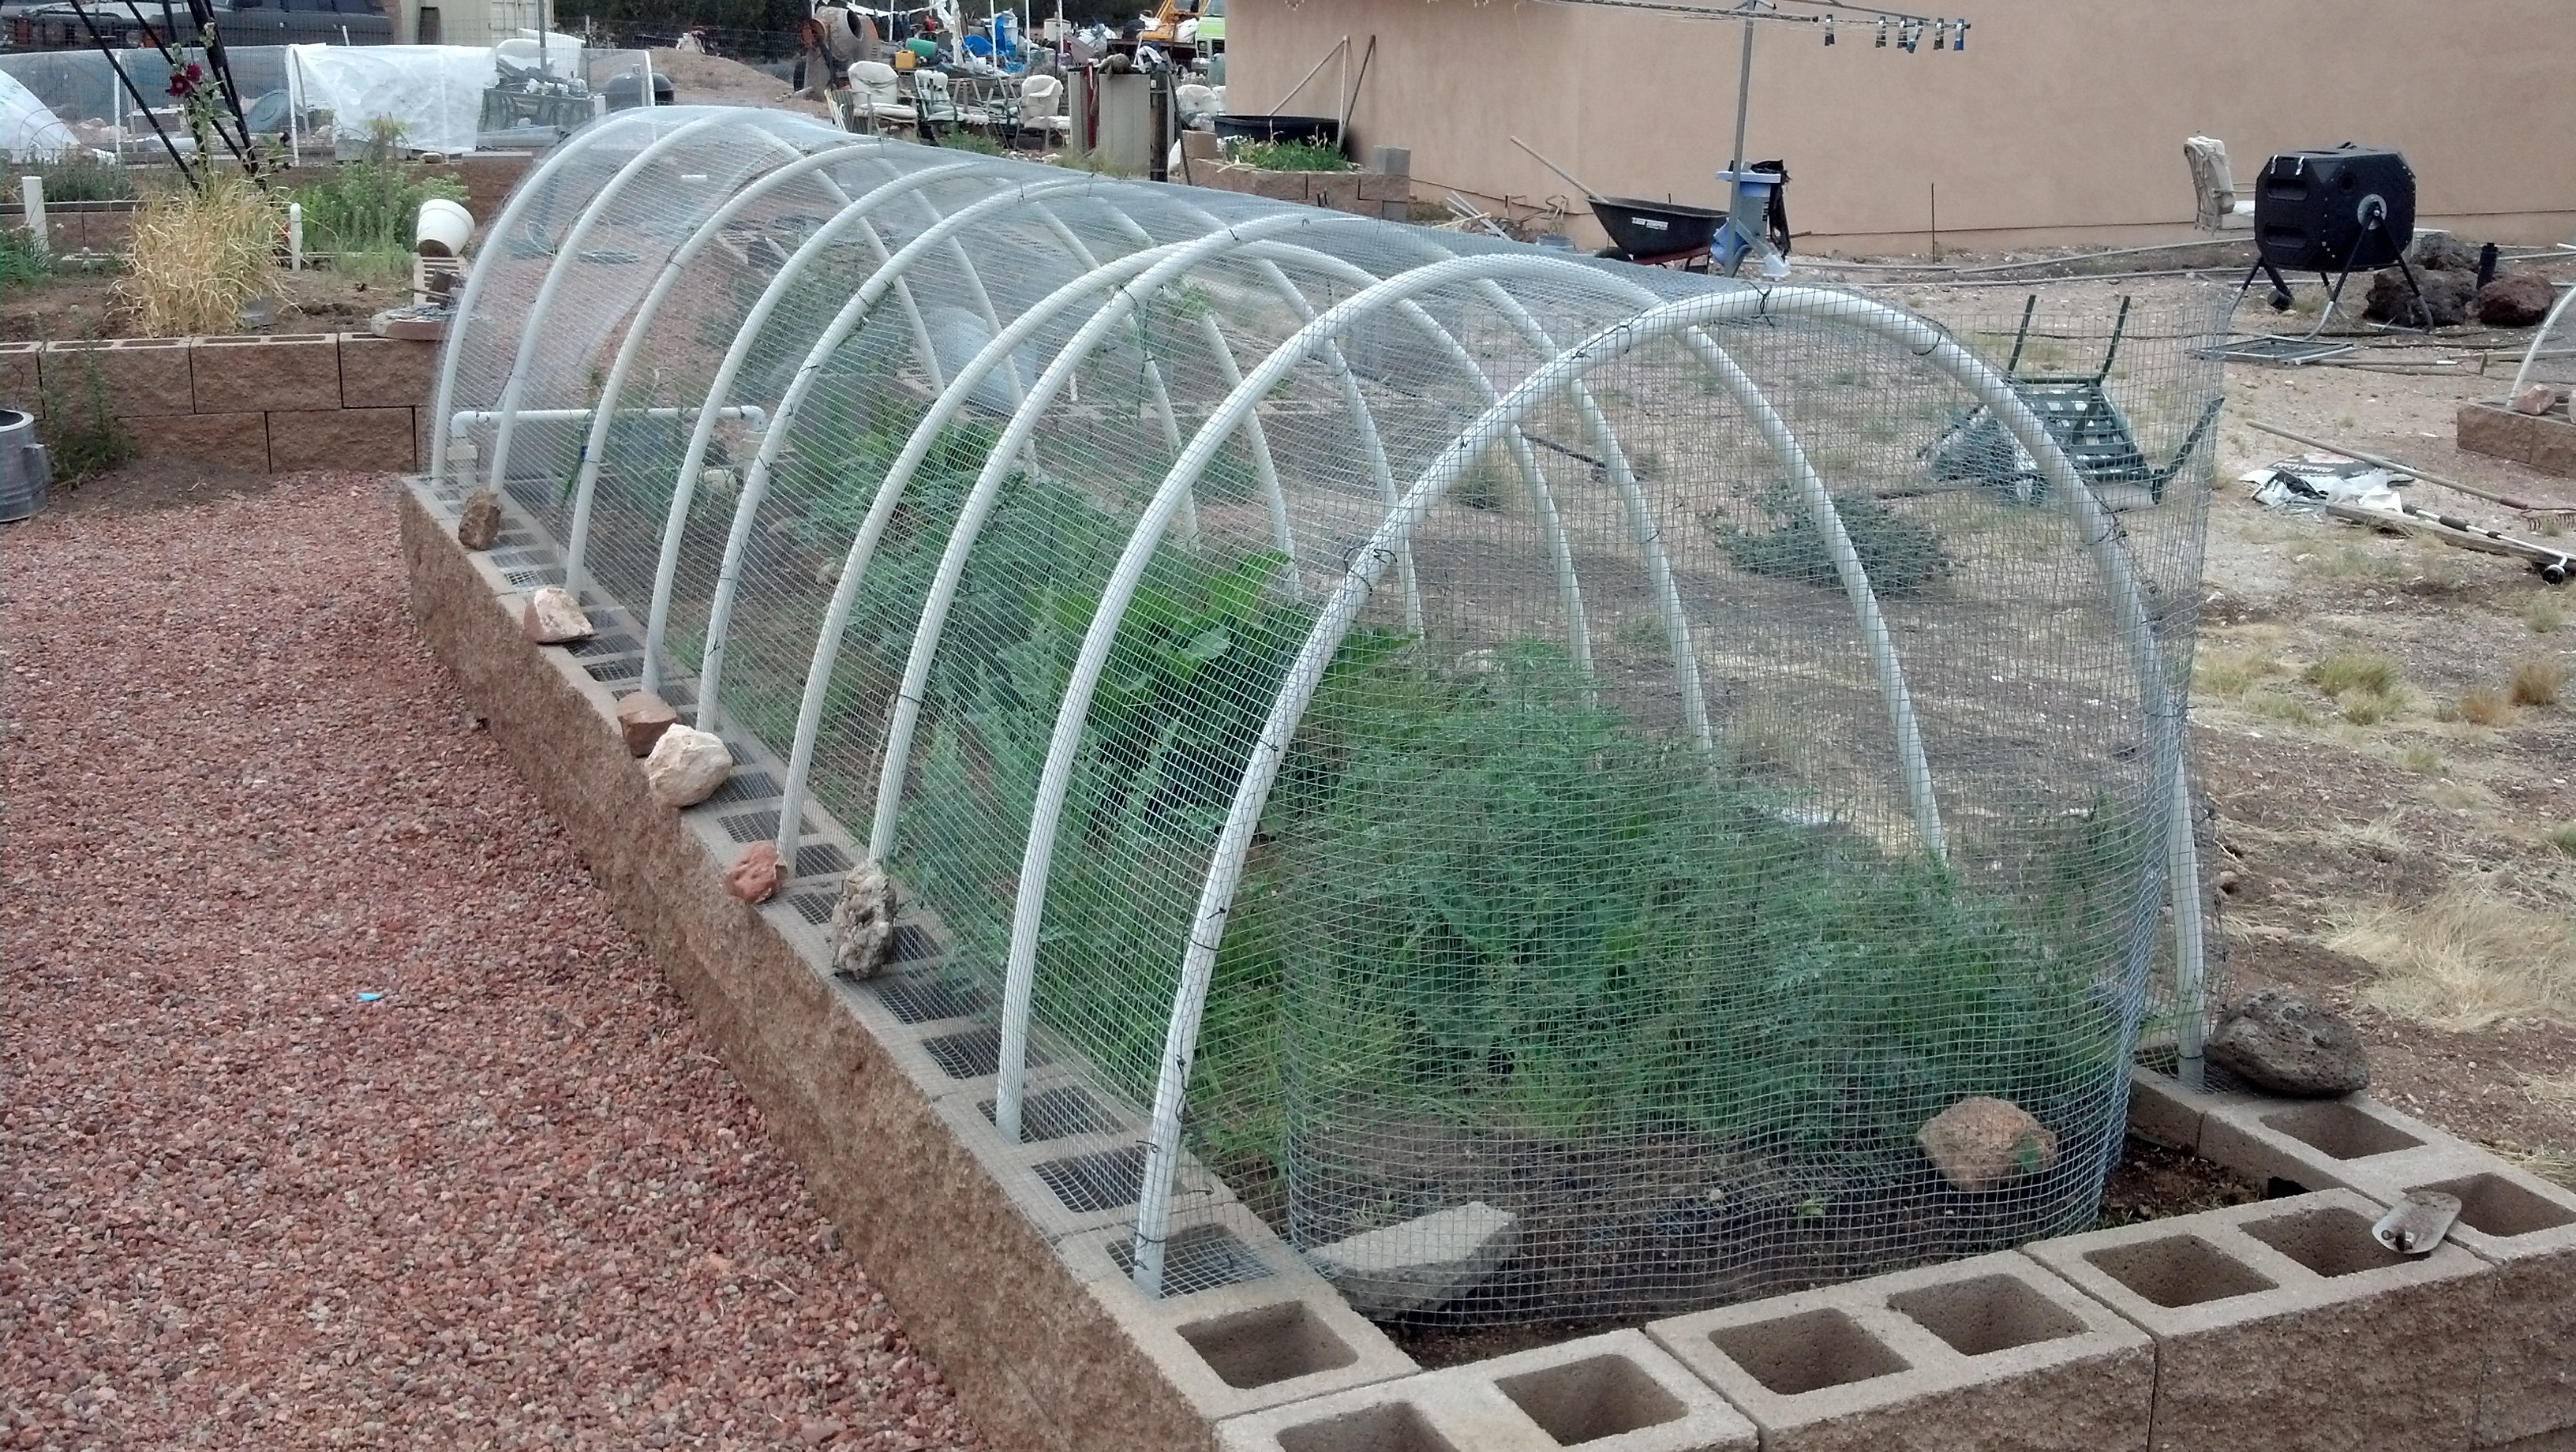
I have considered building enclosures for my beds for several years. I loved the pictures of neatly constructed cedar or redwood frames, with hinges for easy access and latches to keep the covers from blowing open. But have you priced quality wood lately? I have, and it just wasn’t going to happen. So I took my old standby PVC pipe, and went to work. My larger enclosures use 10 foot sticks of 1 inch PVC and my smaller ones use 3/4 inch PVC. I do not recommend using anything smaller than 3/4 inch PVC – it just won’t have the structural stability that you need.

In previous years I have used these PVC pipe arches to support row covers over my garden beds. The row covers allowed me to set my vegetable seedlings out before all danger of frost was gone, protected them from bugs, protected them from hail storms, and allowed me to extend the summer season solidly into the edge of winter.

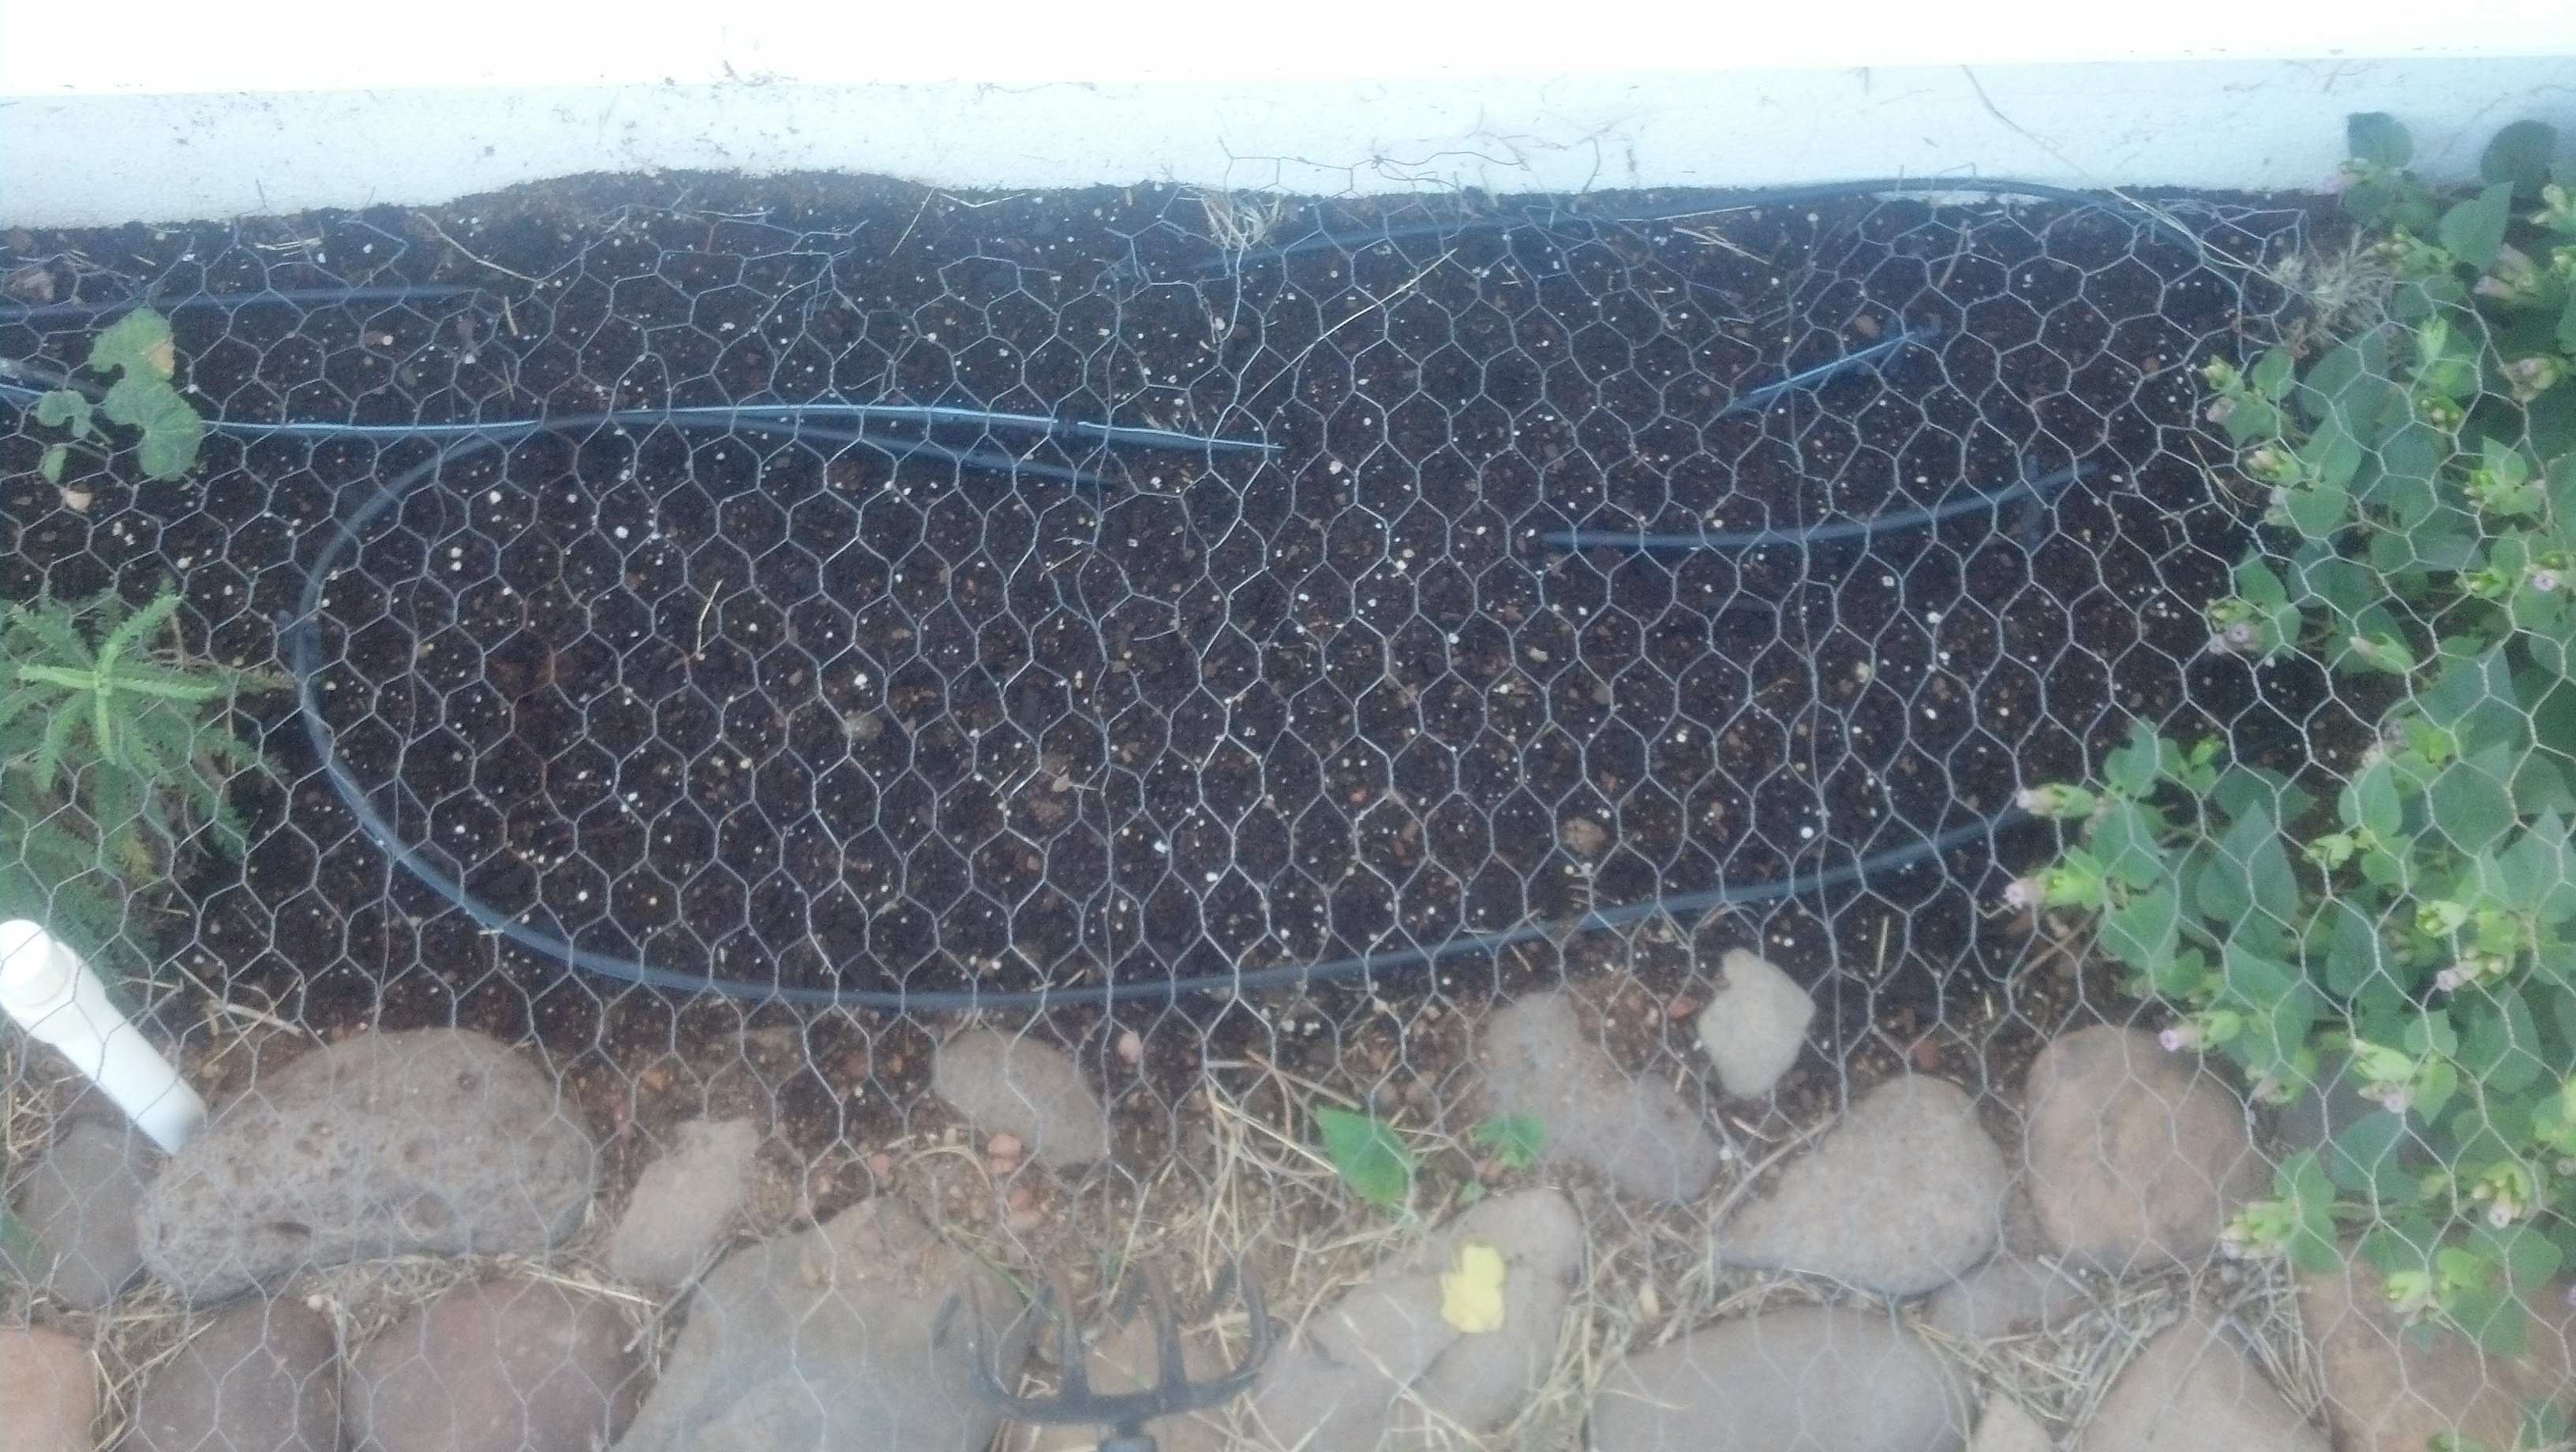
So first let’s take a look at my garden beds. Because the quality of the soil where I live is very poor, and water is something that rarely arrives from the sky, I used raised beds that are made of dry laid cement blocks. Adding the PVC arches is very simple. I just buy 10 foot sticks of PVC pipe, bend it and stick the ends in the concrete blocks that make up my raised beds.

garden beds
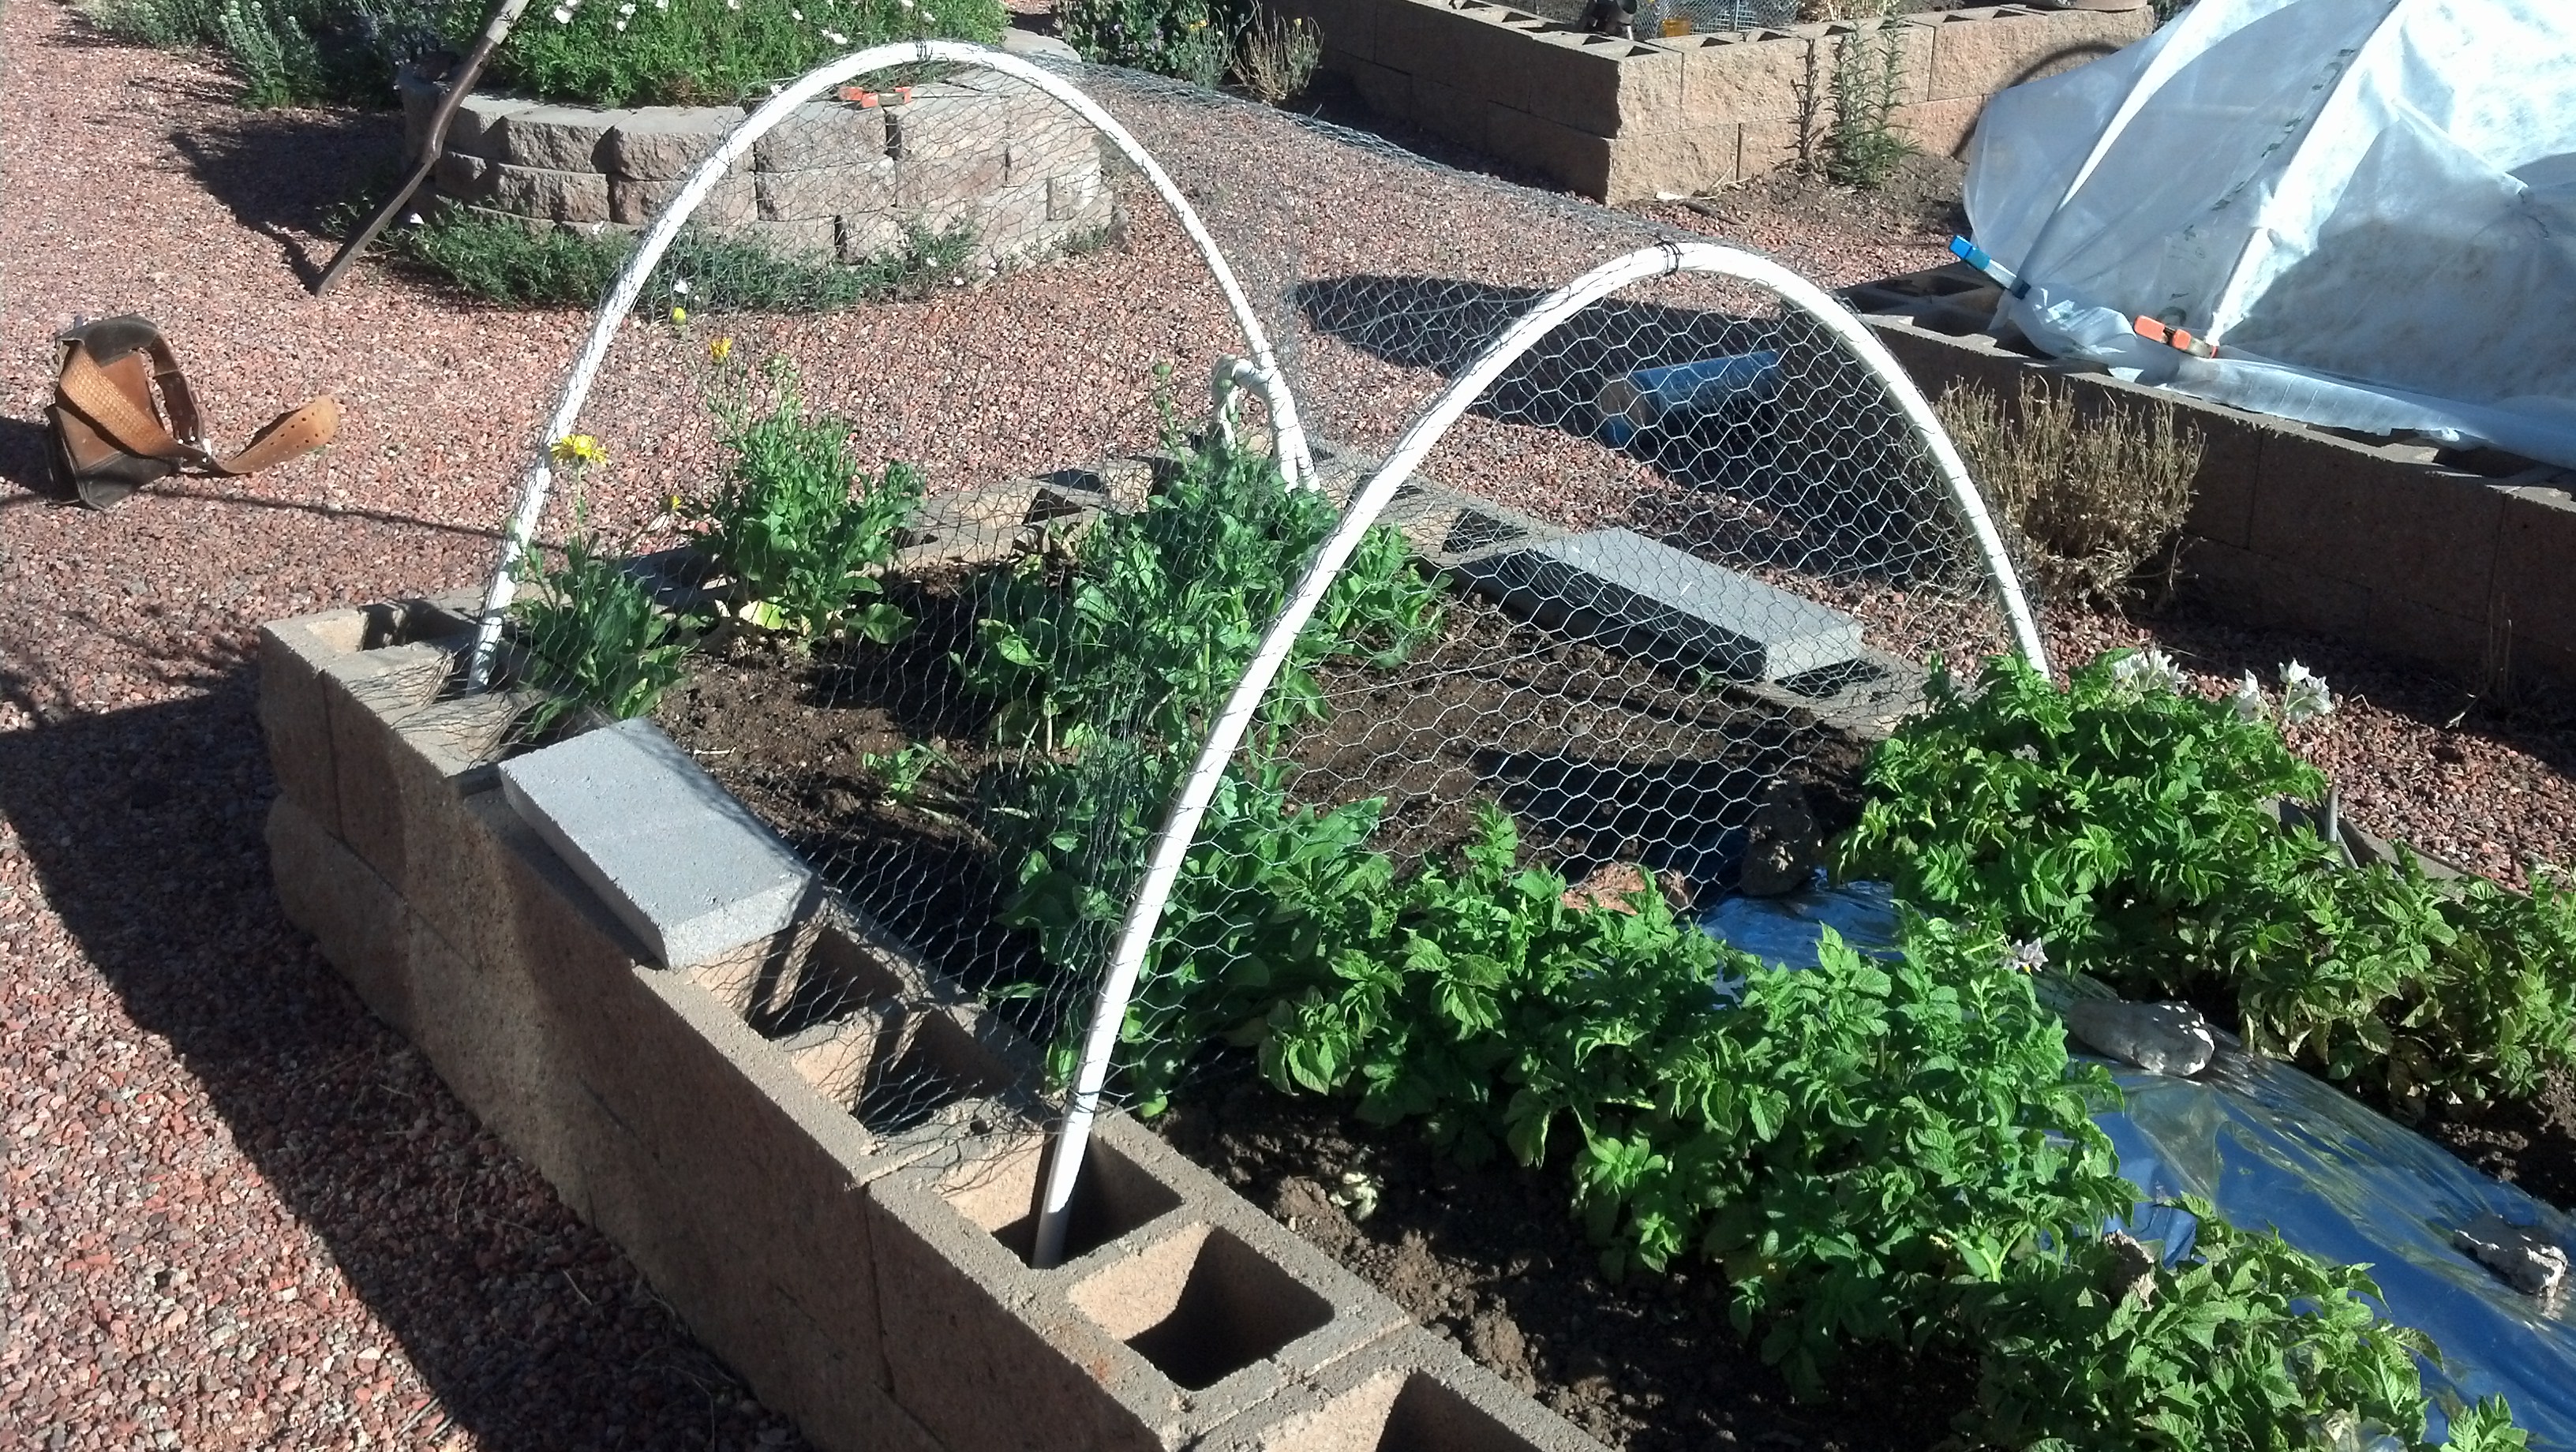
This picture shows some of the beds in my garden. The closest bed has a small chicken wire cage on one end and the bed to the right has a row cover on the PVC hoops.

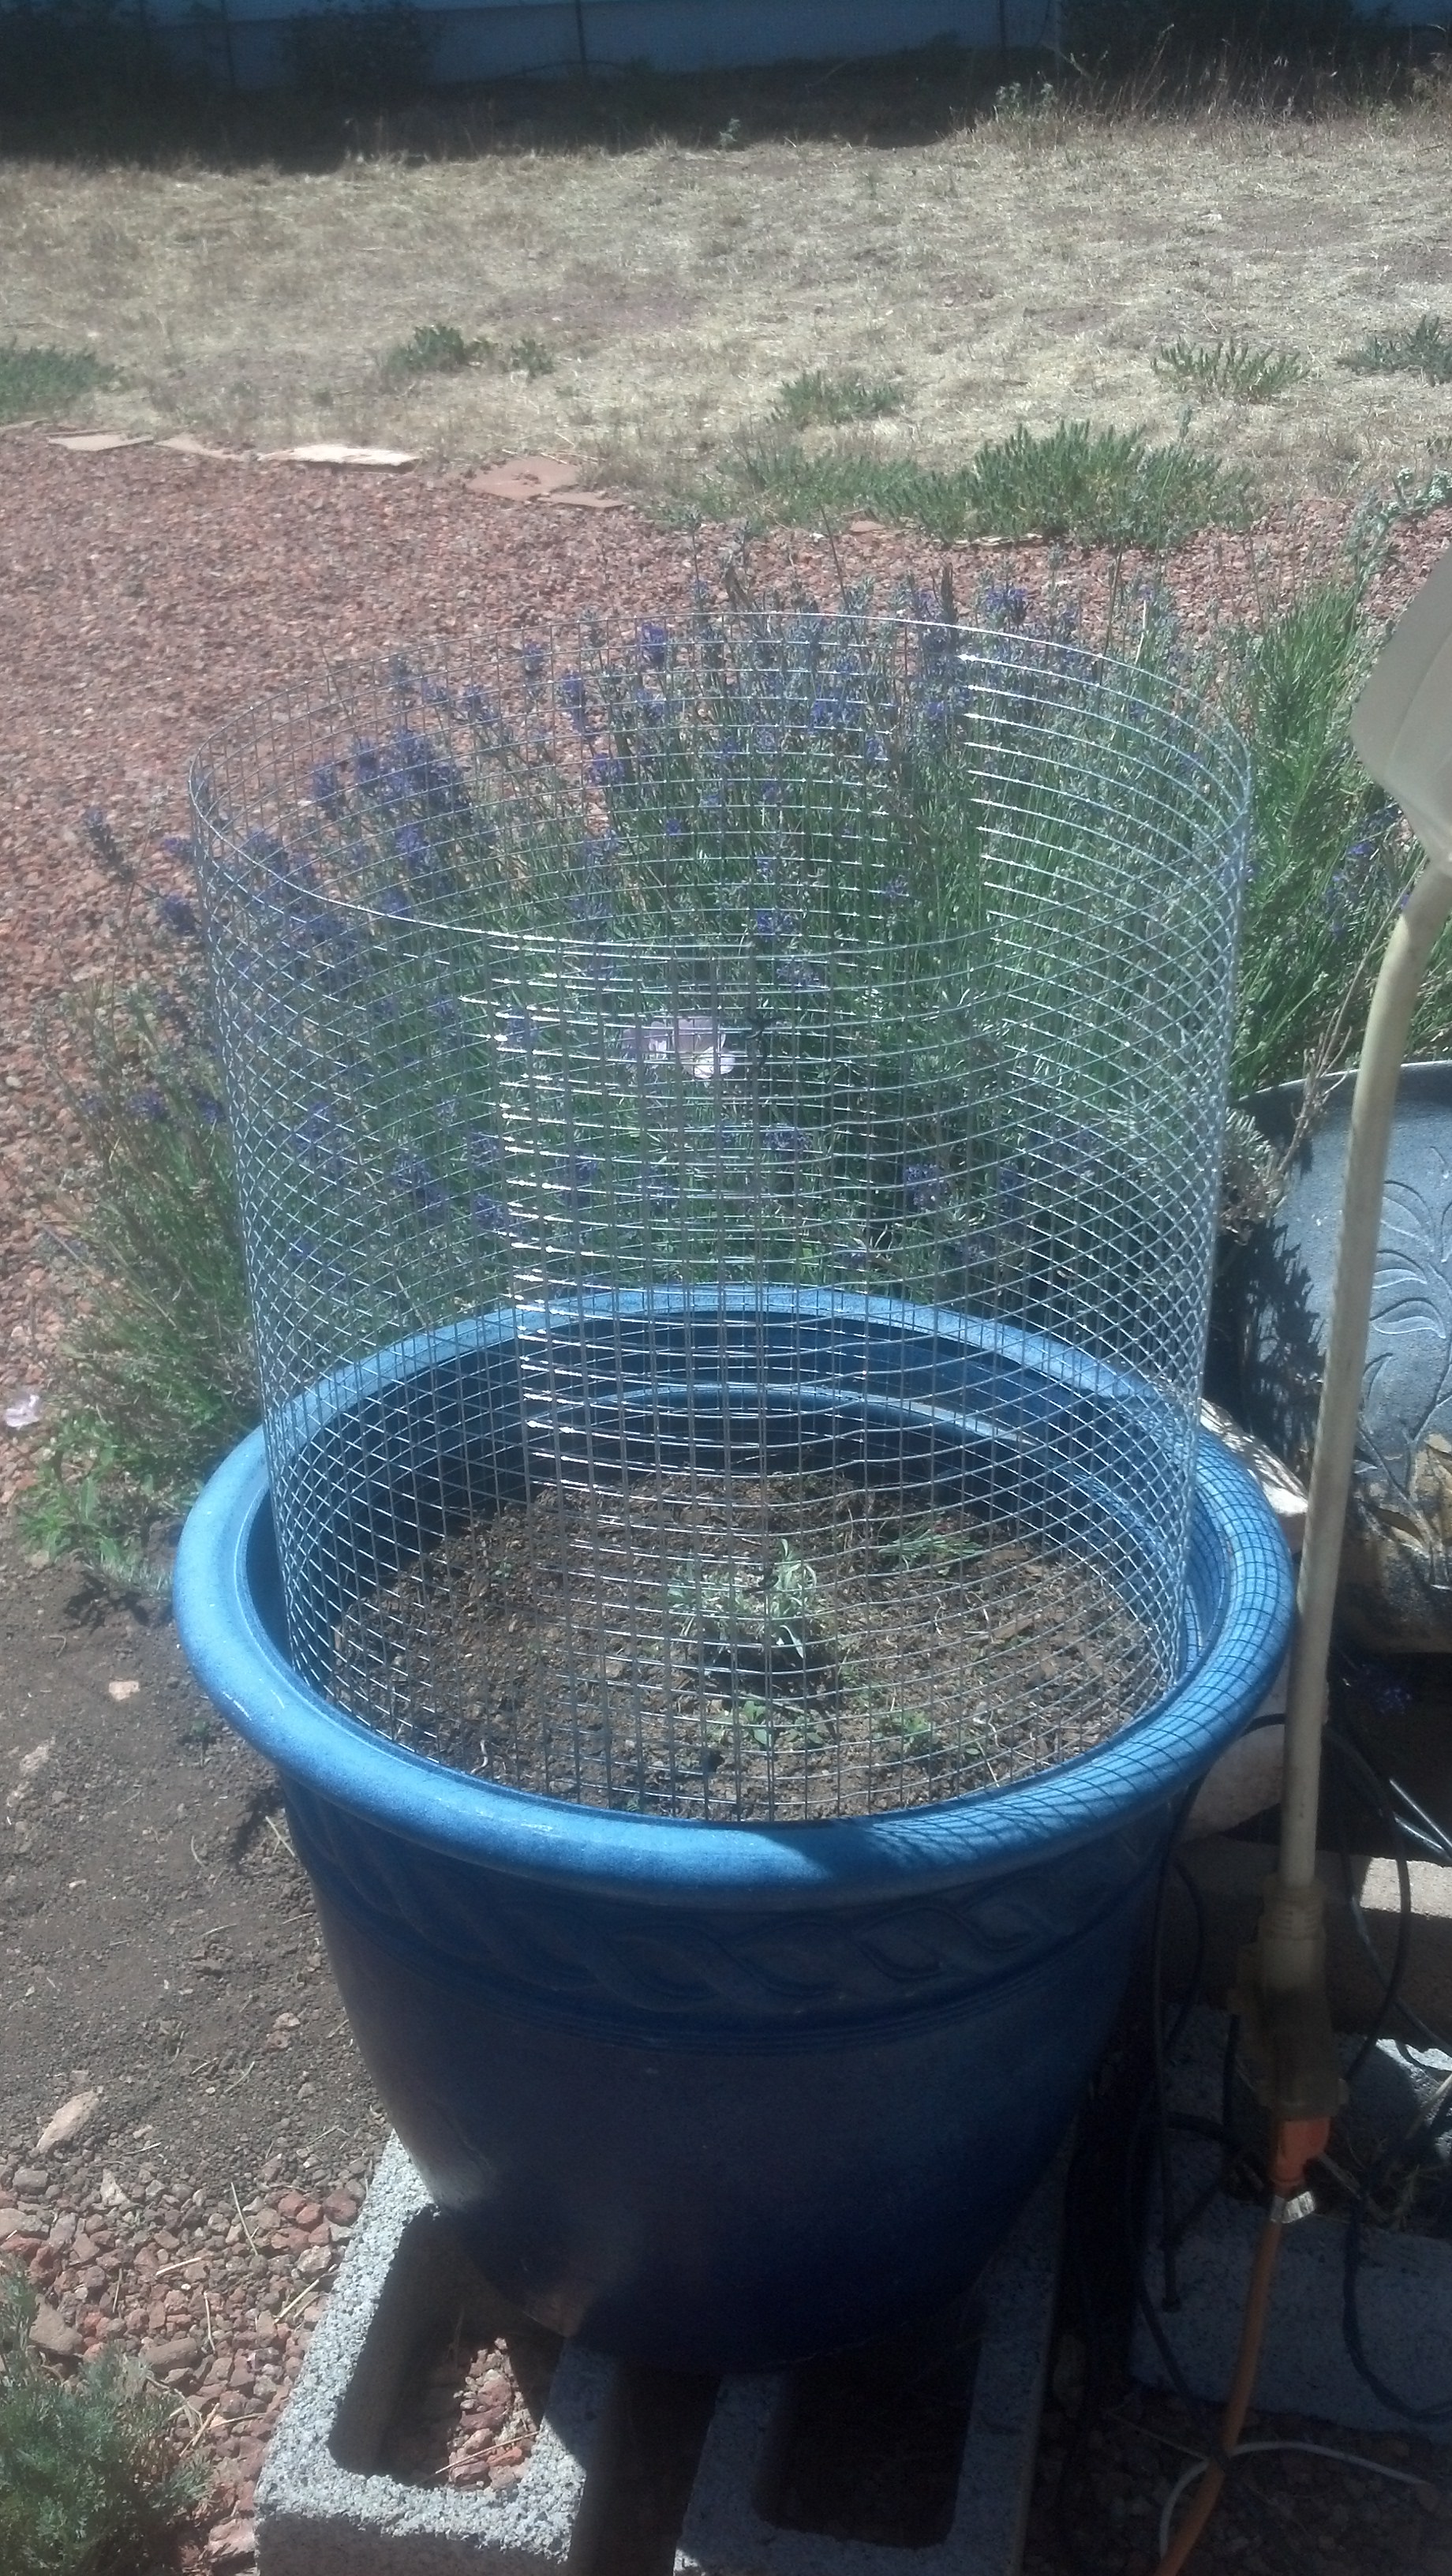
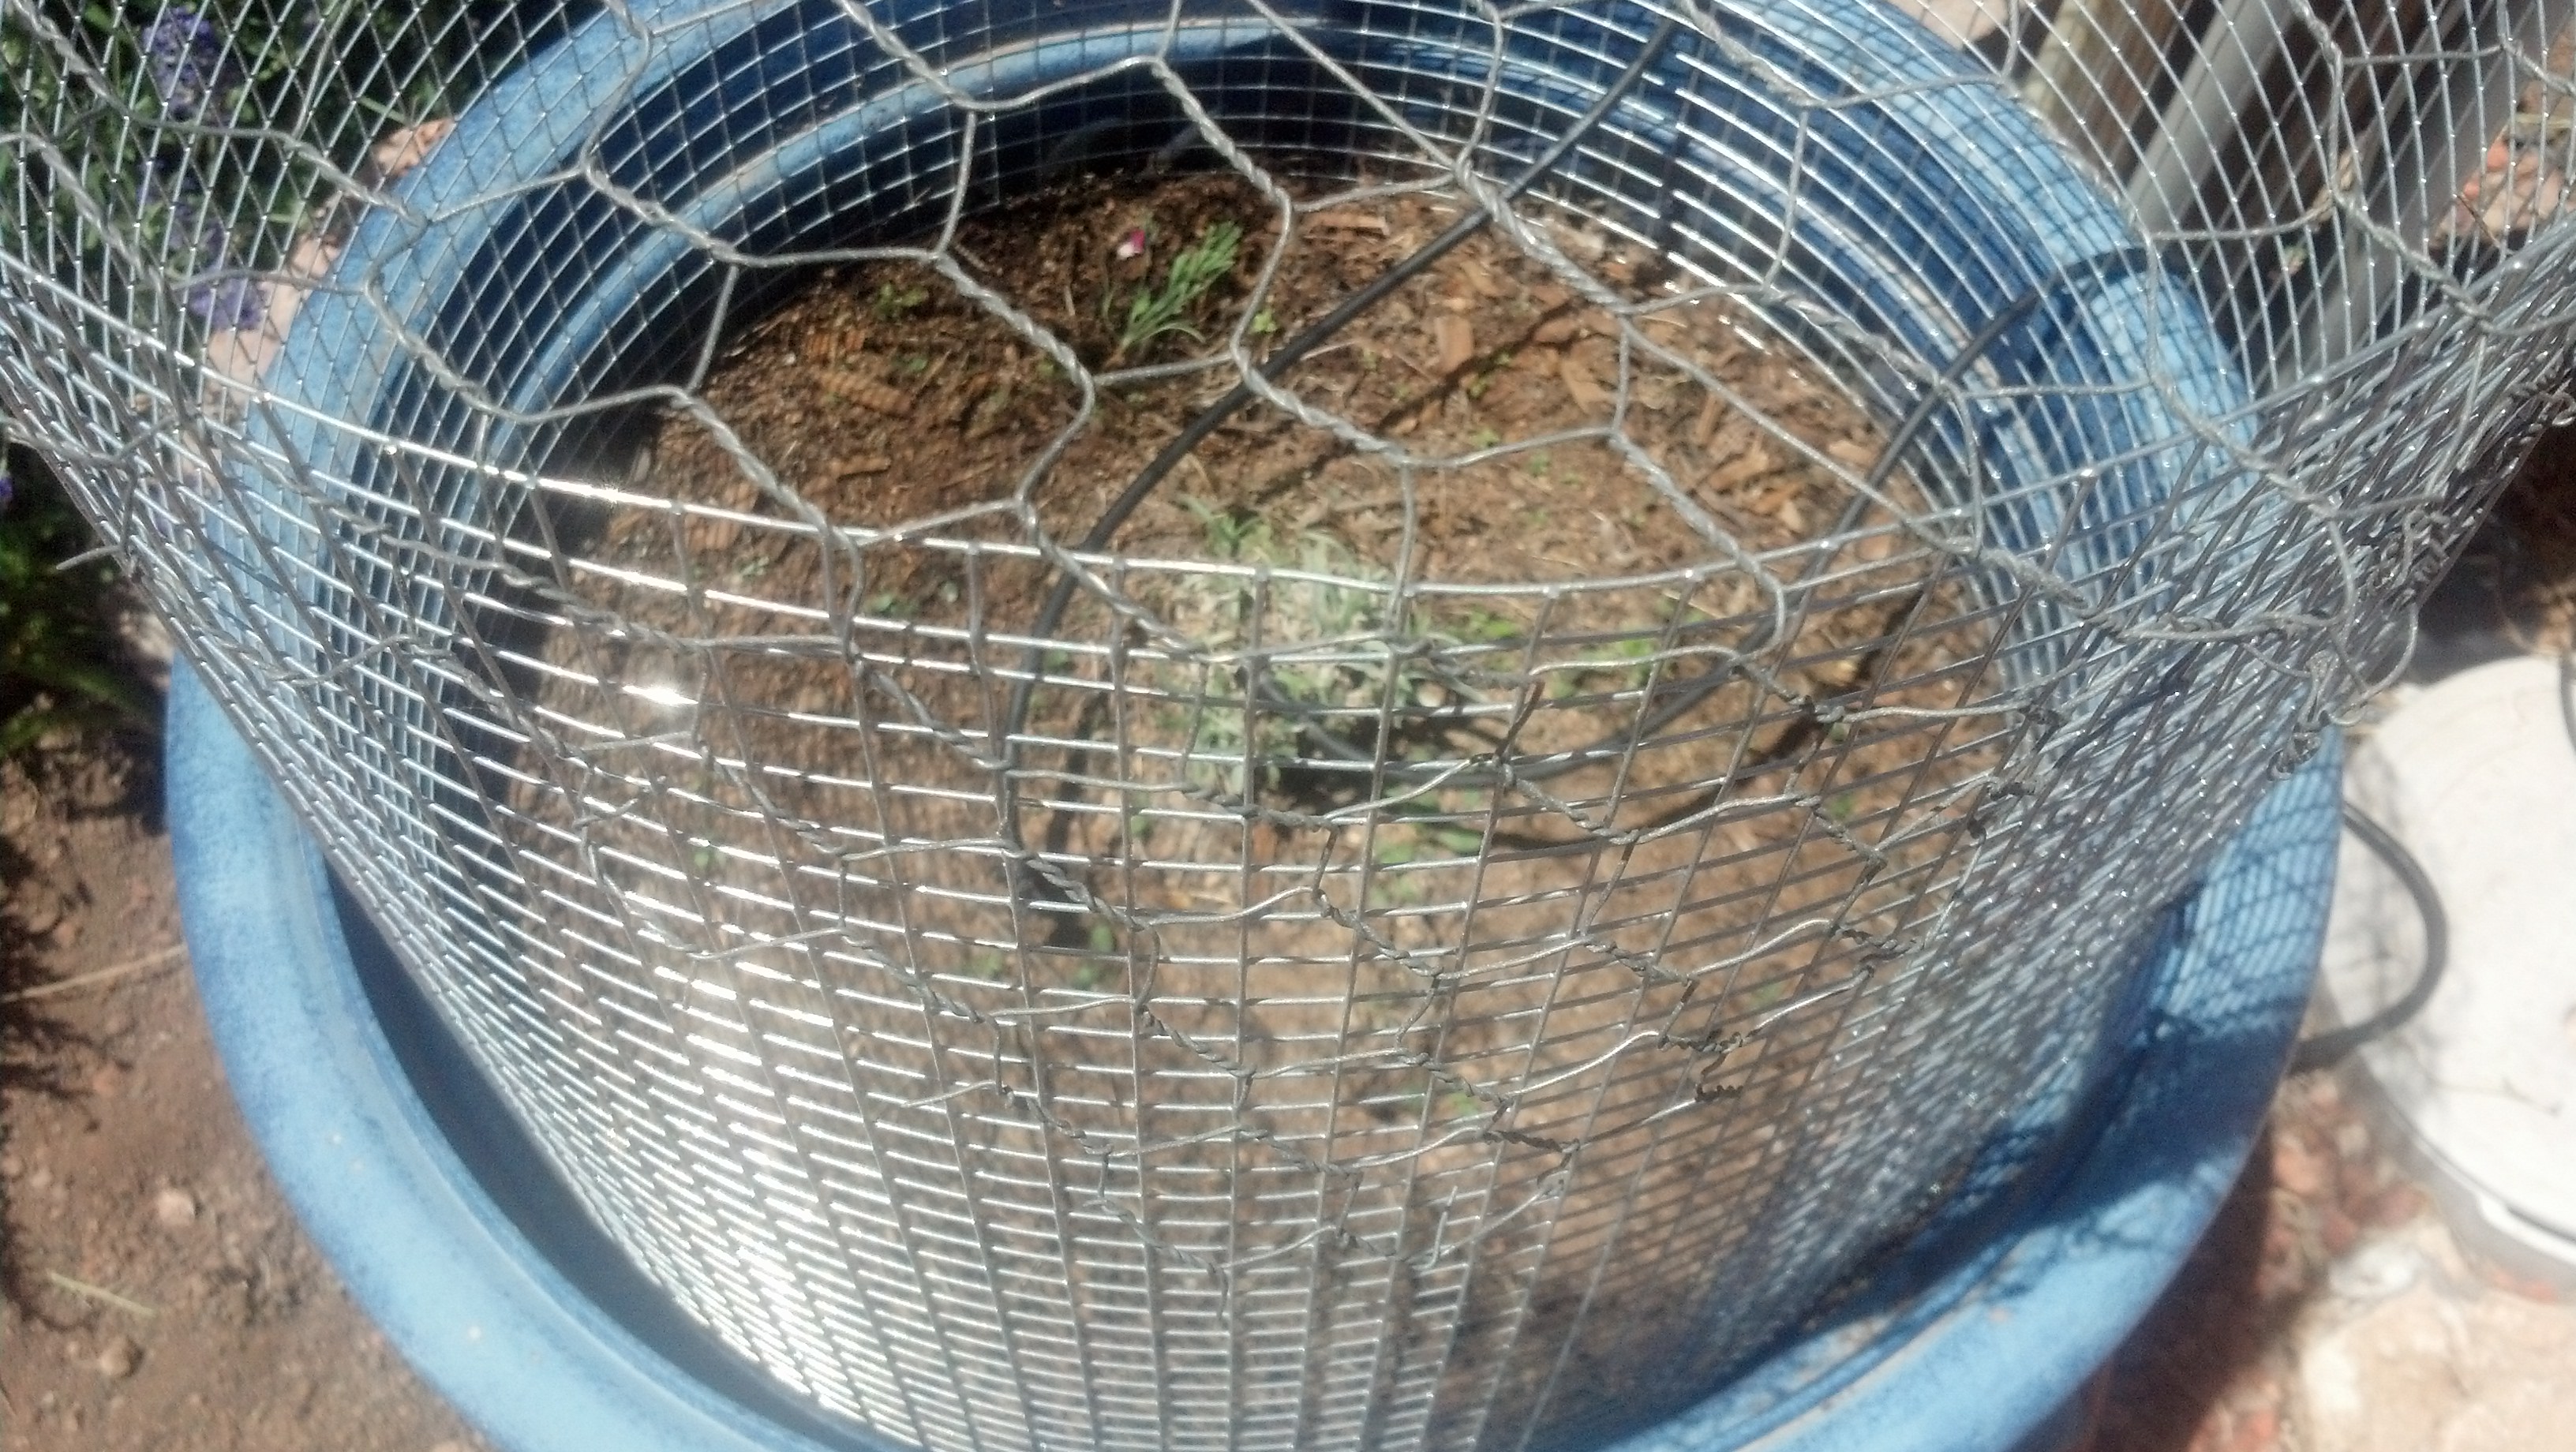
If you do not have raised beds, or you have raised beds that are made from boards, railroad ties, or dry laid stone, you will need to put something into the ground to hold the ends of the PVC pipe. The most efficient, sturdy, and available “something” is a piece of rebar. Large home stores sell rebar precut to different lengths. They are not cheap, but they will last a lifetime and more. I would not buy anything shorter than a foot. You want to have several inches to drive into the ground and about six above ground. If your ground is particularly friable (not structurally stable) you may need to buy 18 inch pieces in order to have sturdy supports for your “cage”. The stakes and/or PVC pipes are placed so that they line up with the middle or the edge of a piece of wire. For instance, if I was using five foot tall chicken wire, which does not have much structural stability, I would plan to use a PVC hoop at each end and one in the middle to support the wire and keep it from crushing easily. On the other hand, if I was using two foot tall 1/2 inch hardware cloth I would place one hoop on each edge of the hardware cloth, and that would be more than enough support.

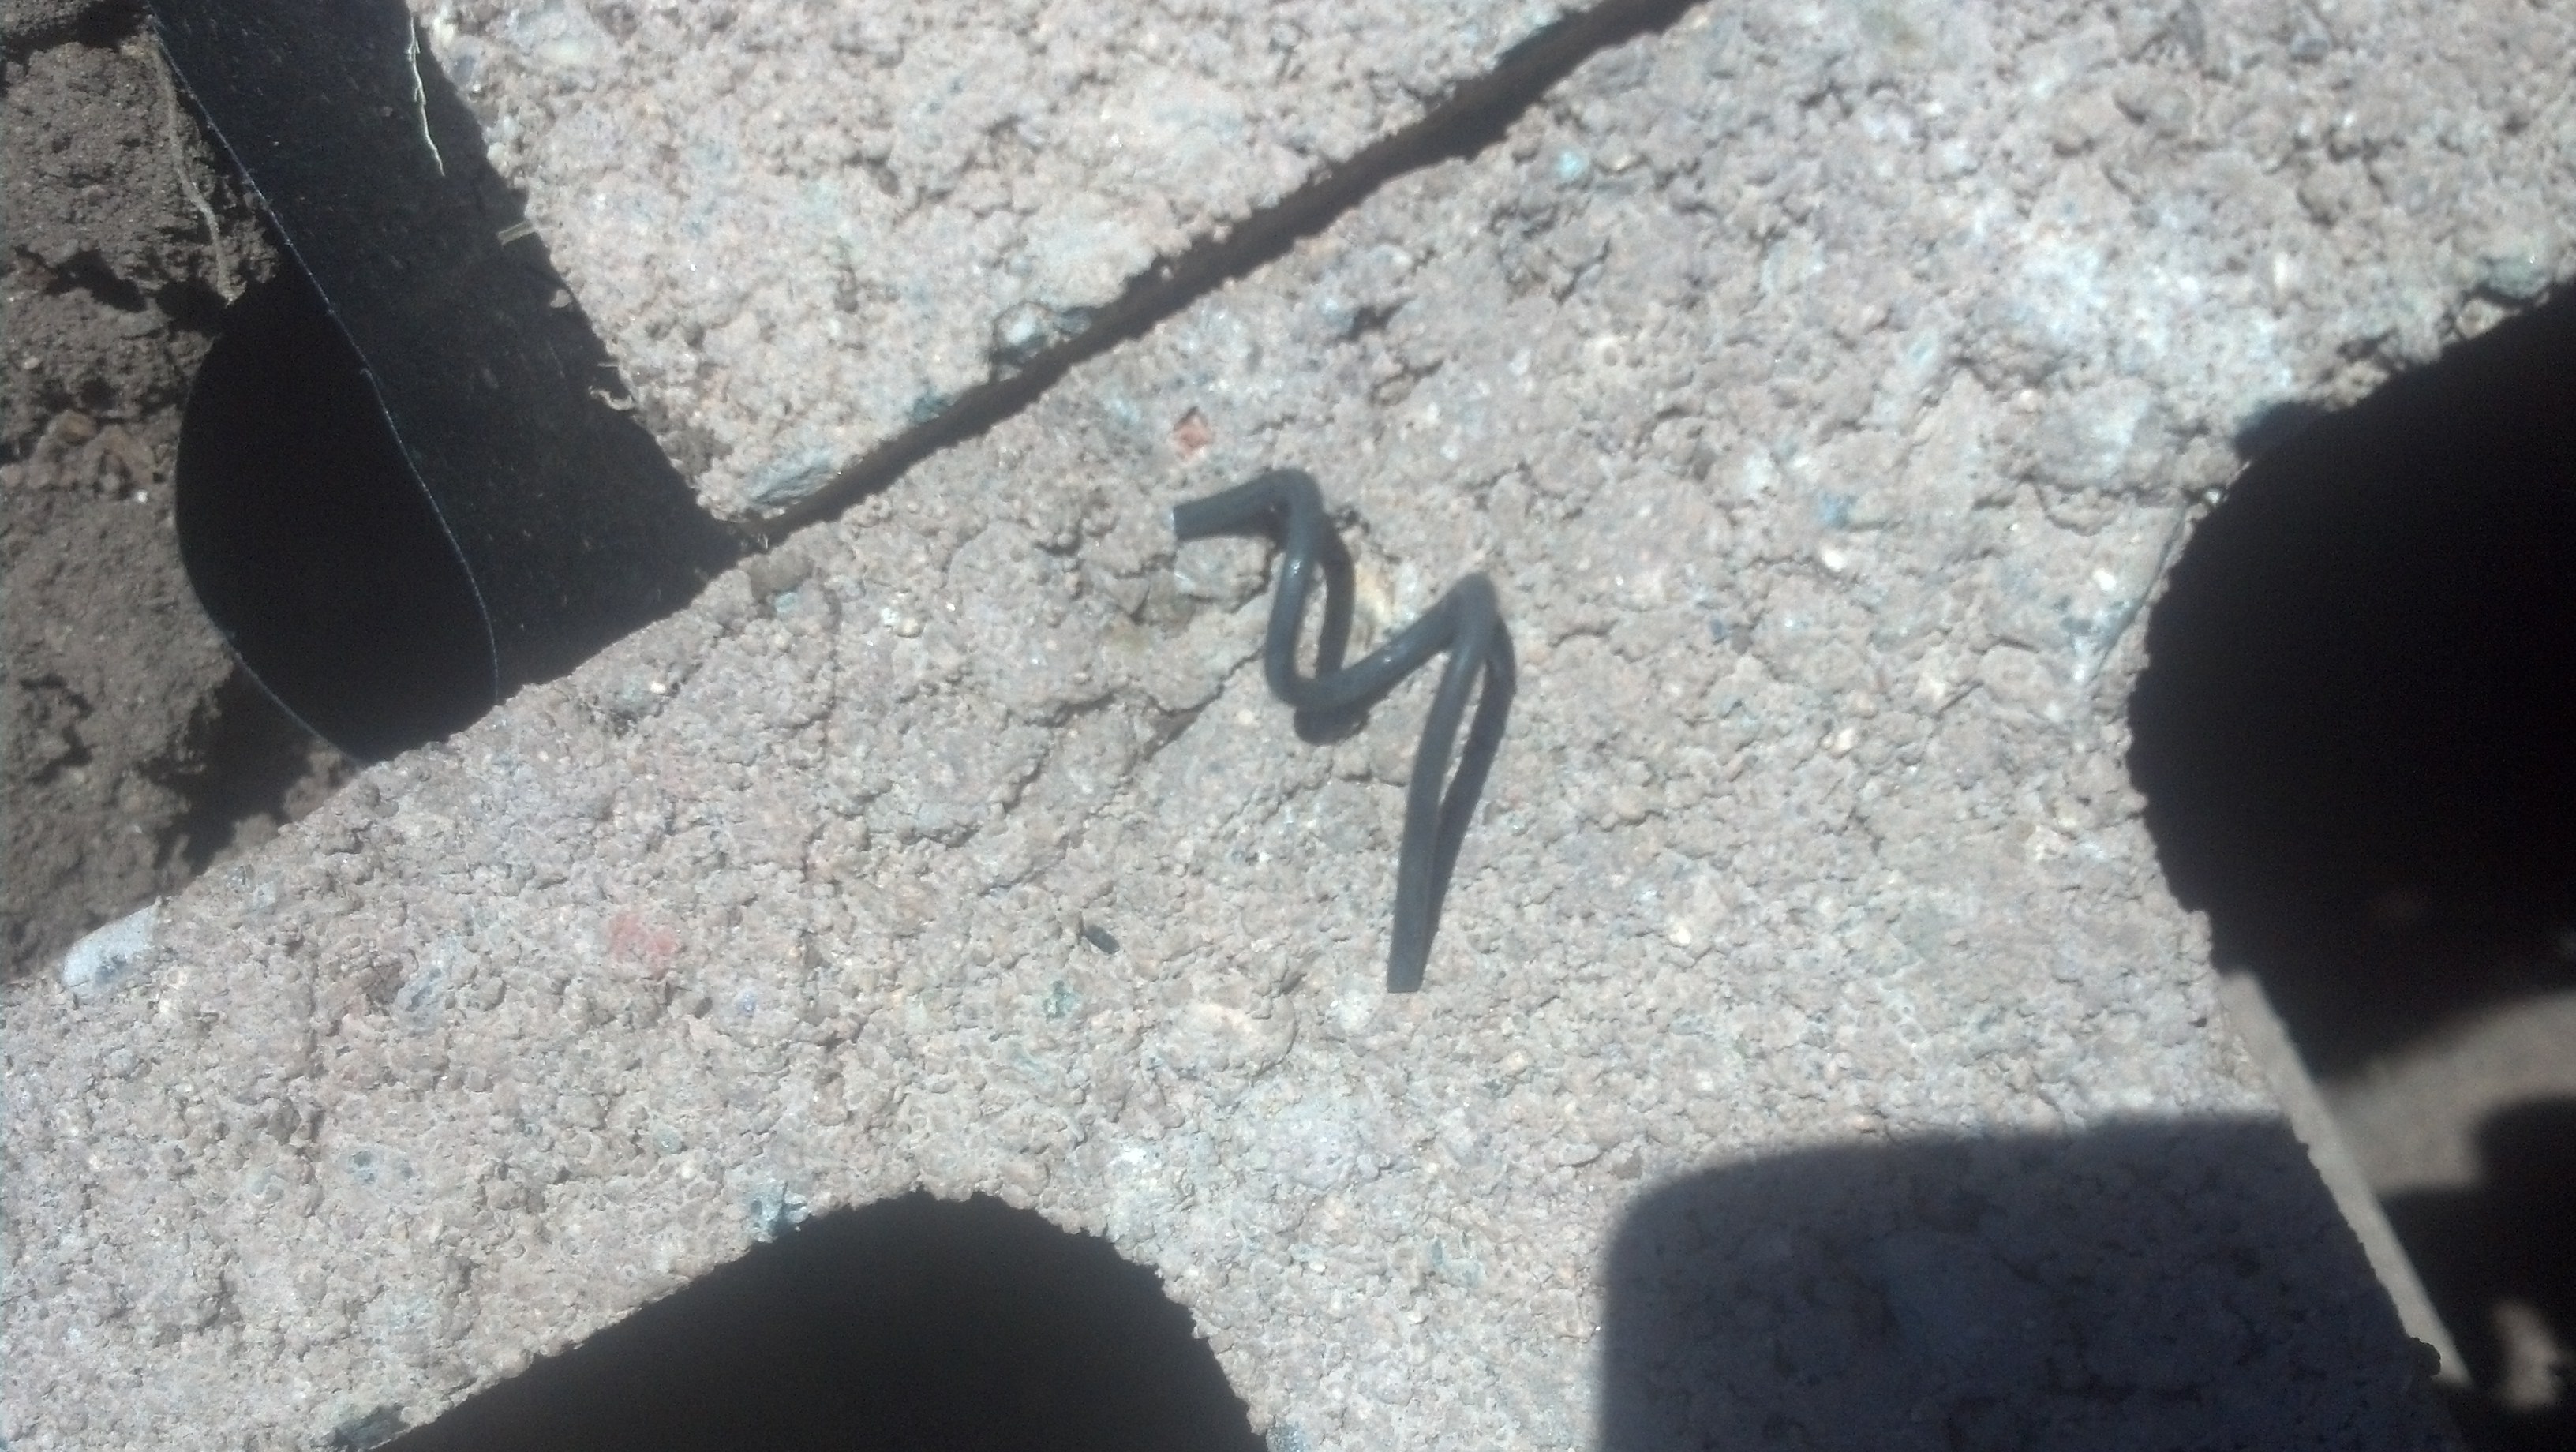
But how do I keep my wire on the hoops? Simple – cut pieces of baling wire that are long enough to wrap around the PVC pipe, stick through the wire, and wrap into a twist to hold everything together. I usually just cut my wire, form a U shape, push the wire U through the wire fencing and twist the ends together the same way that that you would twist a twist tie. I often use a pair of pliers to do the actual twisting – saves the fingers a bit and makes for a tighter twist.

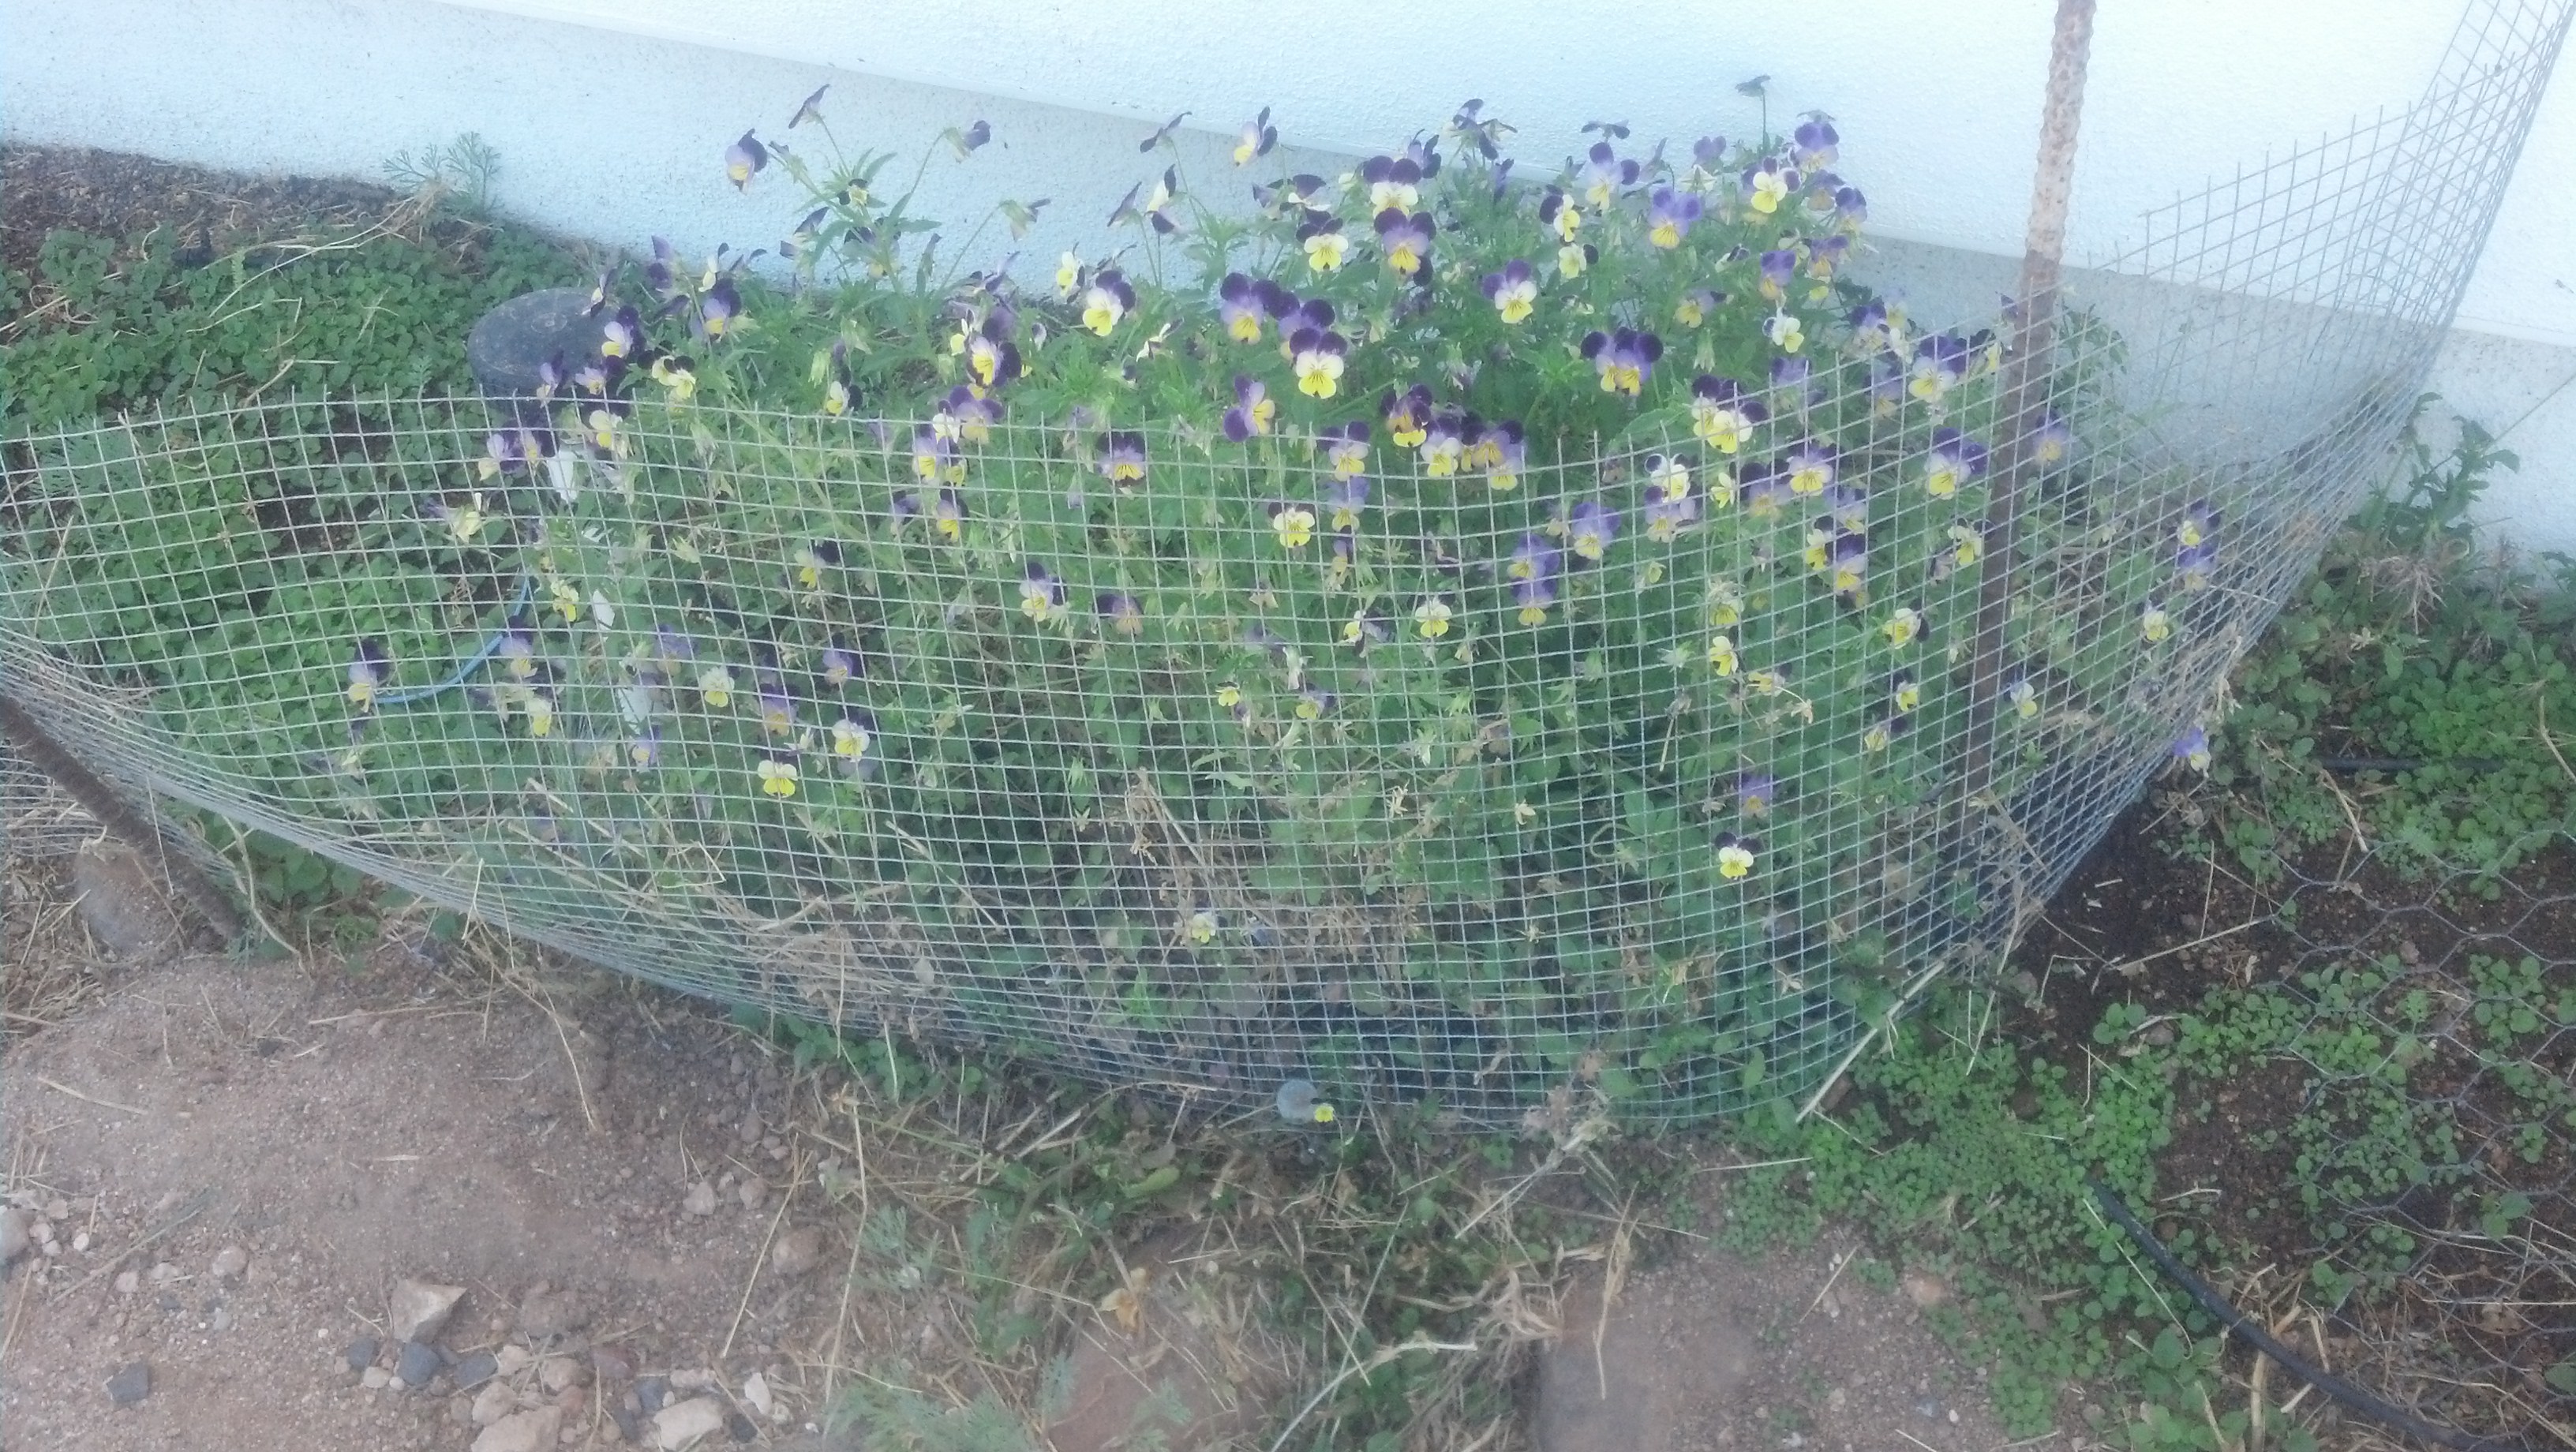
And this is what you wind up when you are done – a complete cage over and around the vegetable bed. This particular bed also has a “c shaped” piece of hardware cloth attached to the end to protect the pole beans from rabbits and crows (they sometimes pull newly sprouted beans). I did not put the pole beans inside the cage because I want to allow the beans to climb on the top of the cage.

Rhubarb bed

But, you say, how do I get to my veggies to harvest them and pull weeds? We will discuss creating access next time.

Garden Defenses: Making a Sturdy Cover for Your Flower Pot

So, a couple of blogs ago I started off by discussing my poor chomped on bachelor button plant. Let me show you my solution to this problem. While I would prefer to have completely “natural” and unfenced gardens, this is simply unrealistic in the environment that I live in, especially with our continuing drought. As far as the wildlife is concerned my garden is a veritable supermarket of yummy water logged flowers and vegetables, just ripe for the picking.

First decide on what sort of materials you are going to use. I chose hardware cloth because I wanted to make a permanent cover for my flower pot that I can use every year. Now this is not a tiny flower pot. The inside diameter of the top of the pot is about 16 inches and the pot is 15 inches tall. I had a piece of hardware cloth, left over from another project that was 17 inches tall and about 6 feet long. I simply coiled the hardware cloth inside the lip of the pot, noted where to cut the wires (leaving at least an inch or two overlap), removed it from the pot, and used my dikes to cut the wires.

Let me take a moment to show you my basic arsenal of tools for this project.

tools for fencing

Pretty basic stuff – a pair of wire cutting dikes, a pair of needle nosed pliers, and a roll of baling wire. You may also consider having another set of pliers on hand, just in case you really need two hands for something. I usually carry a smaller set of needle nosed pliers, just in case. The red and white checked table cloth is not necessary, but it does add a nice “country” touch – yes, that is really my kitchen tablecloth.

Once I had cut the hardware cloth I refit it to the pot to be sure that it was the correct size – better to find out that I had made a mistake now than after I had wired it together. Then I used my needle nosed pliers to create spirals from two inch pieces of baling wire.

spiral

This spiral isn’t very pretty, but it will still work. I simply hold the hardware cloth ends together (remember that overlap!) in the position that I want them, spin the spiral wire so that it rotates around both layers of the hardware cloth wires to hold them together and then squish the coil tighter with the needle nosed pliers to hold everything in place. Put as many spirals on as you need to to create a sturdy structure.

hardware cloth in place

Now I had a sturdy hardware cloth “wall” around the pot, but I still needed a top. If you don’t need a permanent top you can just cut a piece of fencing – either hardware cloth or chicken wire to fit and put a rock on top, or use zip ties or twist ties. If you need to create shade instead, just use a board or piece of plywood to cover the top. I wanted to attach a “permanent” top of chicken wire, so I cut a piece that was larger than the top of the circle of hardware cloth. I then bent the chicken wire down around the edges to form it to the hardware cloth and twisted a few of the loose chicken wire wires around the hardware cloth to anchor it in place.

chickenwire top

My flower pot cover was now complete. I can lift it off if I need to pull a weed or two. Before I put the top in place I threaded the drip irrigation in through the hardware cloth and anchored it where I wanted it with small plastic spikes. In the week since I did this the bachelor button is already beginning to perk up and the seeds that I planted are sprouting and growing in the safety of the wire cover.

Next: Garden Defenses – Making Large Covers for your Garden.

Garden Defenses: Designing Your Enclosures to Meet Your Needs

Last time we discussed the basic need for protecting plants from hungry critters, and what sort of materials you might choose to use. We also mentioned briefly the need to think about what sort of longevity you wanted to have in these structures. Let’s talk a little more about that.

Say I wanted to create a simple, easy to assemble, temporary cover for a plant – just something to keep the bunnies from munching on it until it was big enough to not mind an occasional trimming. A simple piece of chicken wire, held in shape by a couple of zip ties or twist ties would do the trick. If I needed to hold it down a rock, or a landscape spike or two would keep it in place (we have high winds where I live on a regular basis).

I have a section of flower bed in the yard where I grow Violas. Last year the baby bunnies were sneaking into my yard and munching them, so I quickly threw up a piece of hardware cloth and held it in place with short pieces of rebar. I had actually planned to do something fancier, but time got away from me, and by the time I realized it the violas had grown through the hardware cloth and created a lovely cascade of flowers, the majority of which was protected from bunnies. So I left it. The marauding bunnies have once again trimmed the violas outside of the hardware cloth this year, but not the plants or seedlings on the inside. I am planning to rebuild the enclosure next year, but meanwhile my “stock” of naturally reseeding violas is safe from the rabbits.

violas

There is a wonderful kitty at our house named Jesse James. He totally loves playing out in the yard, chasing grasshoppers and lizards. But he also loves to use my freshly dug garden beds as a litter box. Something that I do not approve of. So, when I plant a section of garden bed, as soon as it is planted I water it (he does NOT like mud) and then I cover it with a piece of wire. It may be chicken wire, or in the case of larger plantings, like my potato bed, field fencing, but it keeps out the kitty and allows the plants to grow safely. In the case of the potato bed, I remove the wire when I hill up the potatoes and put down plastic mulch between the plants. Sometimes I simply leave the chicken wire in place on the ground and let the plants grow up through it.

cat protection

If you are growing Cat Mint (catnip) you may find it necessary to make a cover for your plant. Cats will sometimes eat the plants all the way down to the ground in their search for a “feline high”. It can actually kill the plant. A simple chicken wire “hat” should be enough protection. The cats will trim it to the wire, but the plant will survive. So be sure to chose a pleasing shape for your wire hat – think of it as a topiary form.

If you are a scrounger like me, don’t be afraid to use other “found objects” to help protect your plants. Another excellent example of a sturdy barrier is expanded steel mesh. I once used a wire drawer to keep my kitties from sitting on the seedlings that I was starting in the dining room. There are lots of options if you think outside of the box.

Next Time: Garden Defenses – Making a Sturdy Cover for Your Flower Pot