Making a Garment Bag from a Table Cloth

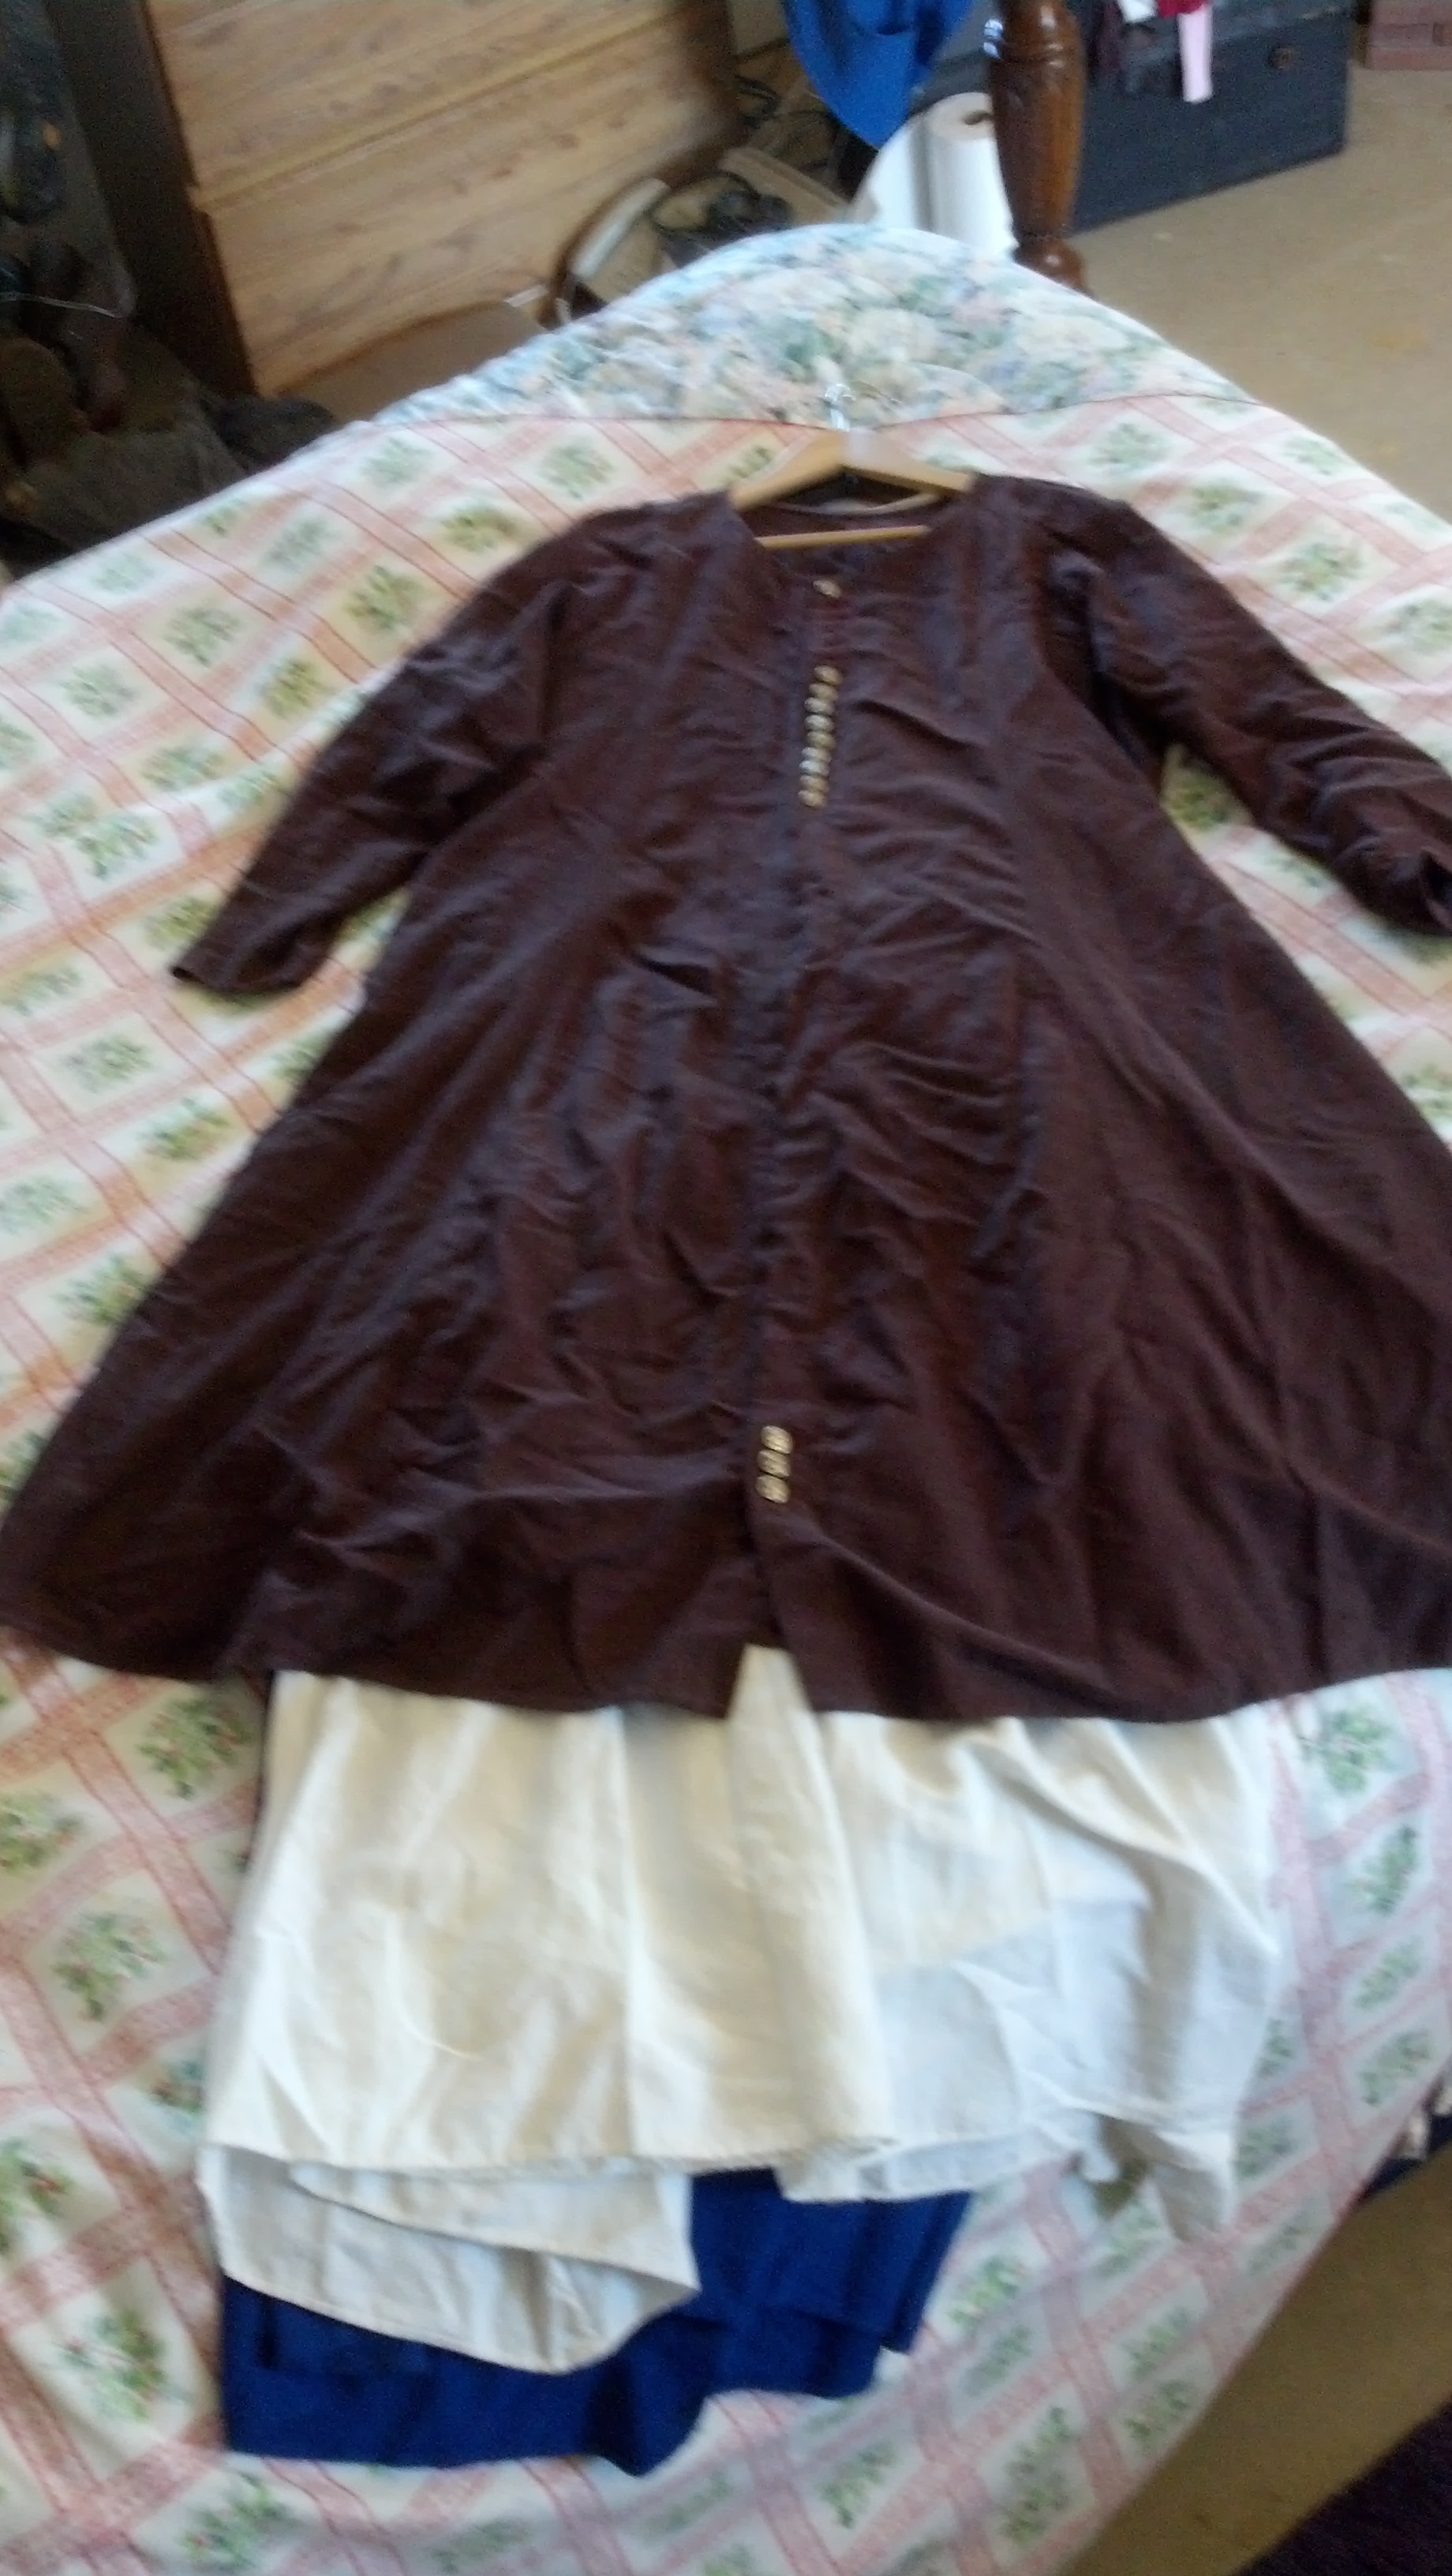
One of the challenges that we deal with all the time is how to safely transport long gowns and tunics to events. I remembered that when my children used to compete in major figure skating competitions a lot of the skaters had custom garment bags. A single outfit, and all of the accessories that went with it, would go into a specially designed bag. That seemed like an excellent solution, so I went to the internet to see if I could locate some general directions for garment bag construction. I wanted one without zippers that would take into consideration the sheer volume of the fabric that I was trying to transport. And there it was – a web page with instructions on how to build a custom garment bag that is designed to handle bulky or long items.

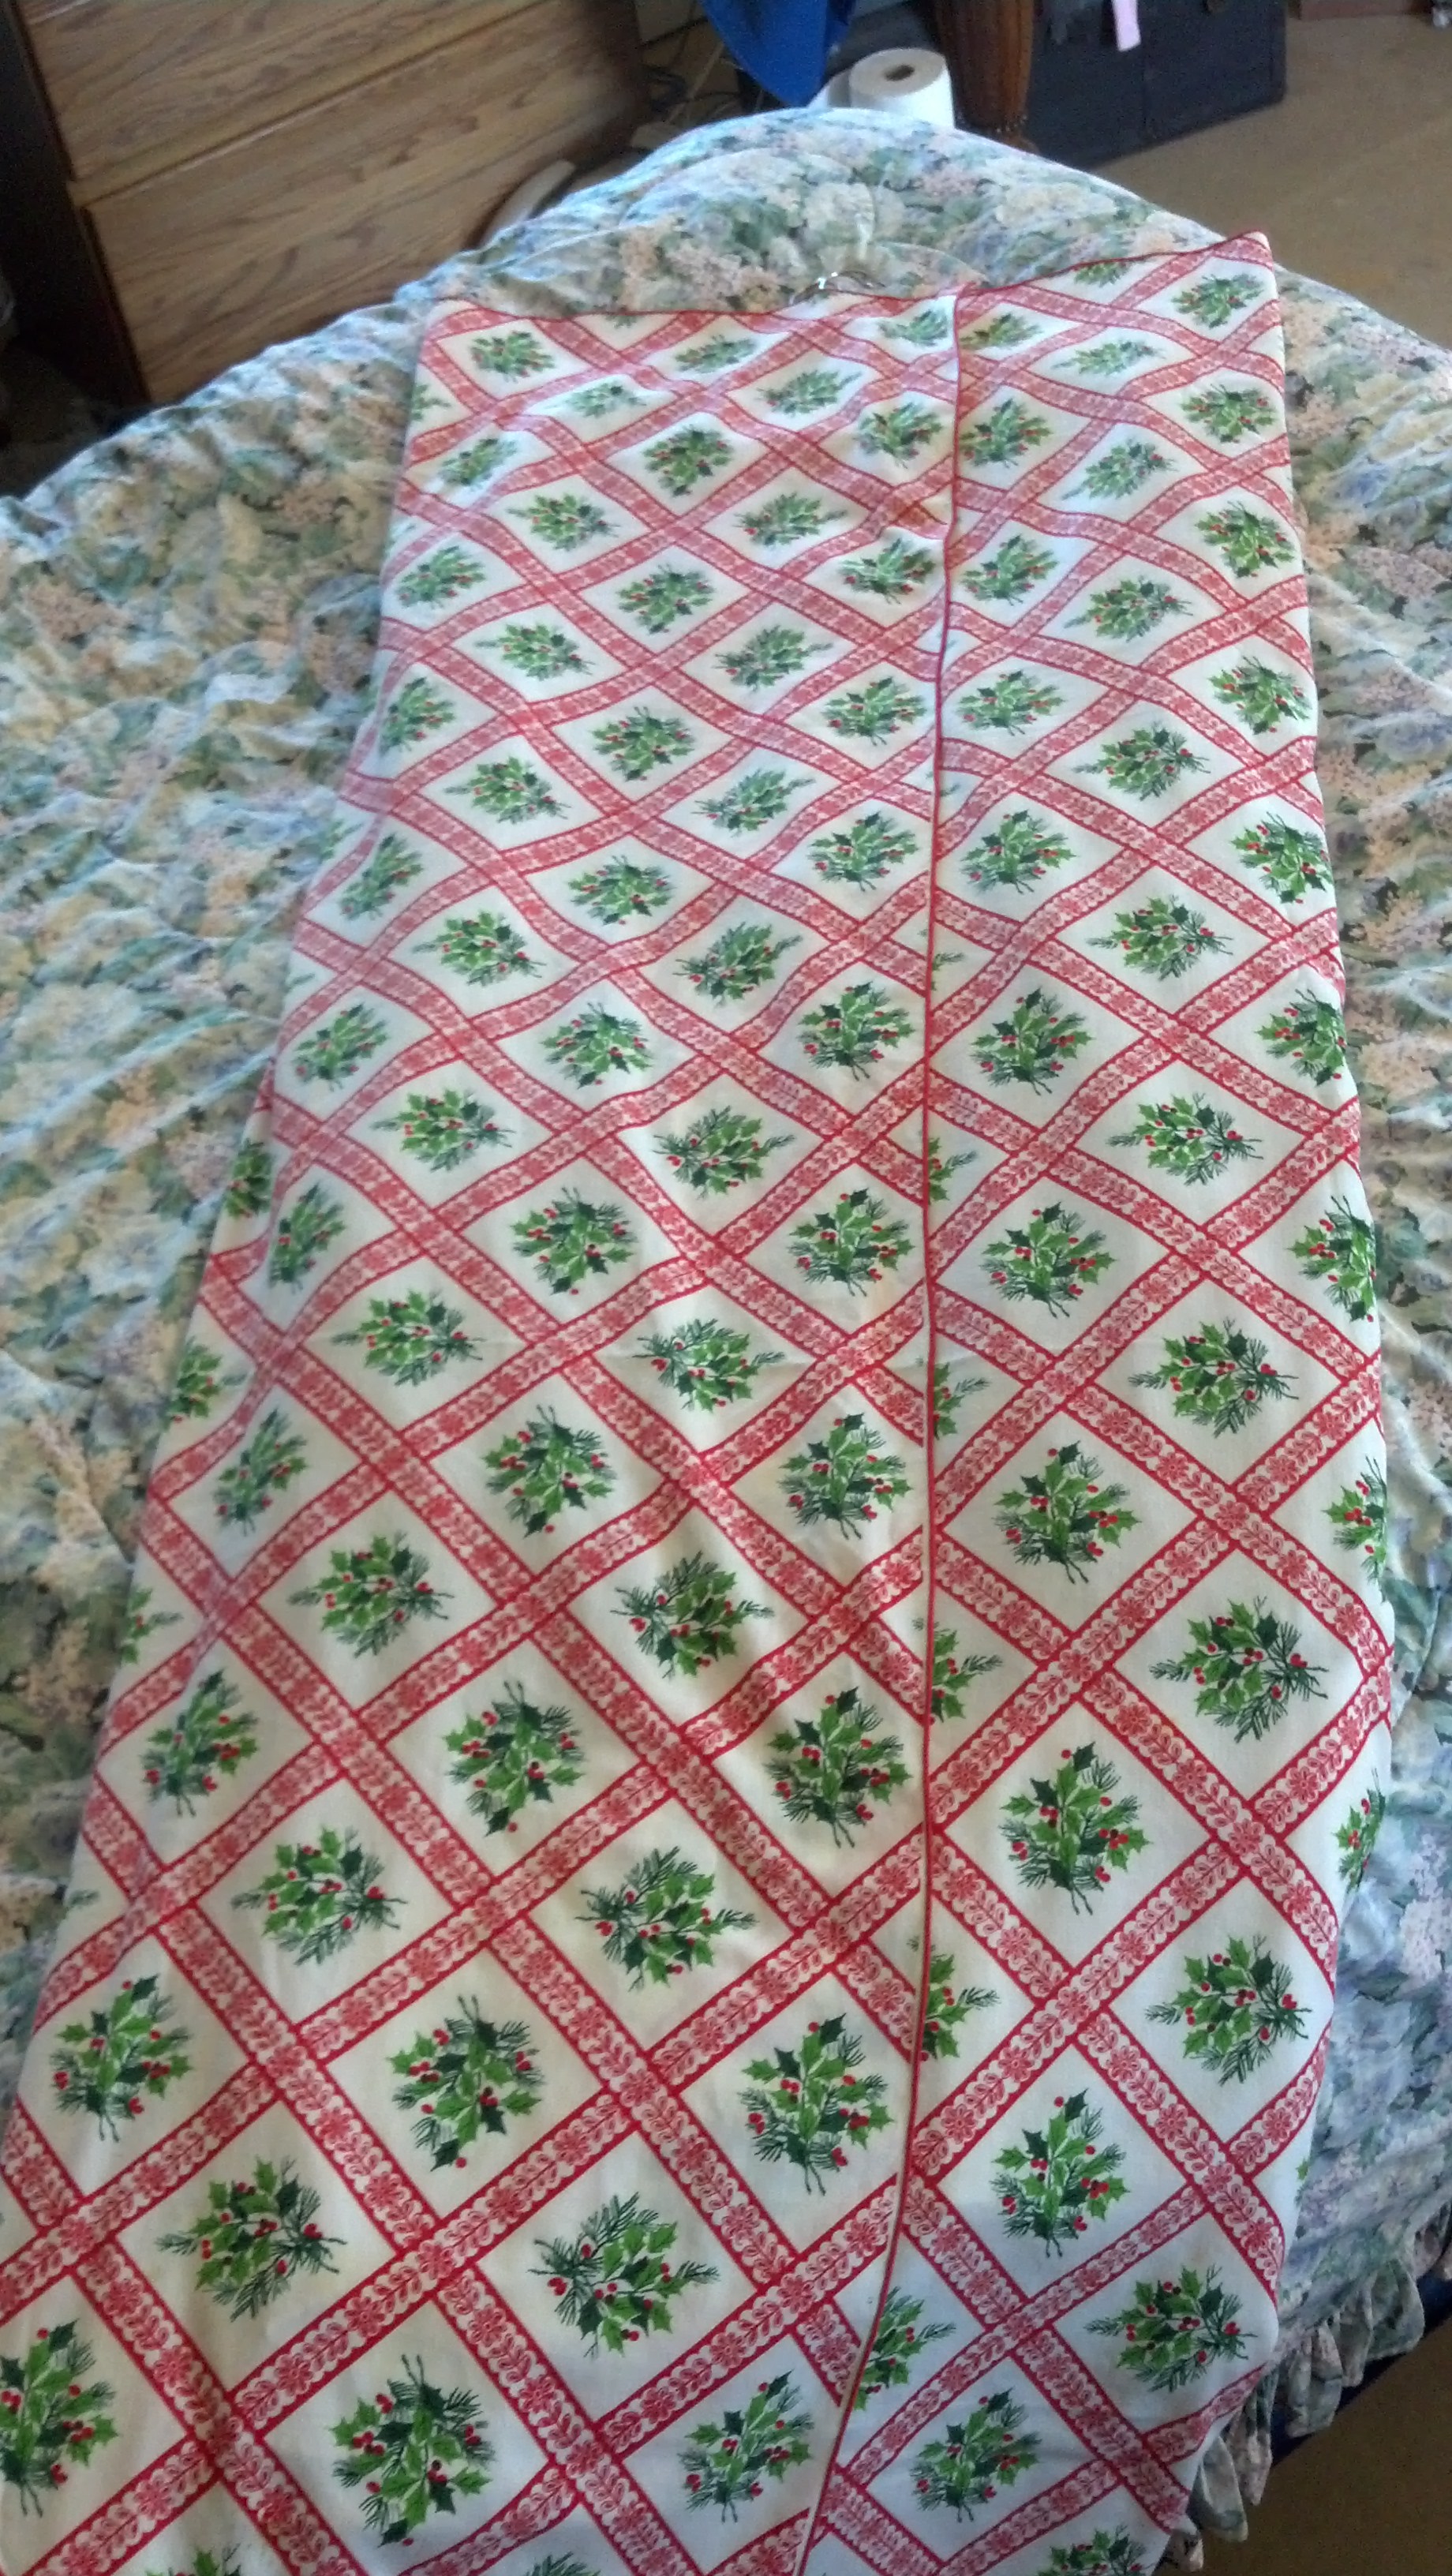
Now I understood how someone else was making a successful garment bag, and I actually have bought some good quality ticking to make some custom bags, but I was looking at another issue at the same time – what to do with an old, completely intact, but stained on one end, Christmas table cloth. The stain simply would NOT come out. But it felt like a waste to just toss it out. And then the two projects merged in my brain and here it is. I laid the table cloth out on my bed – it was the only cat and dog free location that was big enough. I recommend using large rectangular table cloths – thrift store finds are perfect, and cheap.

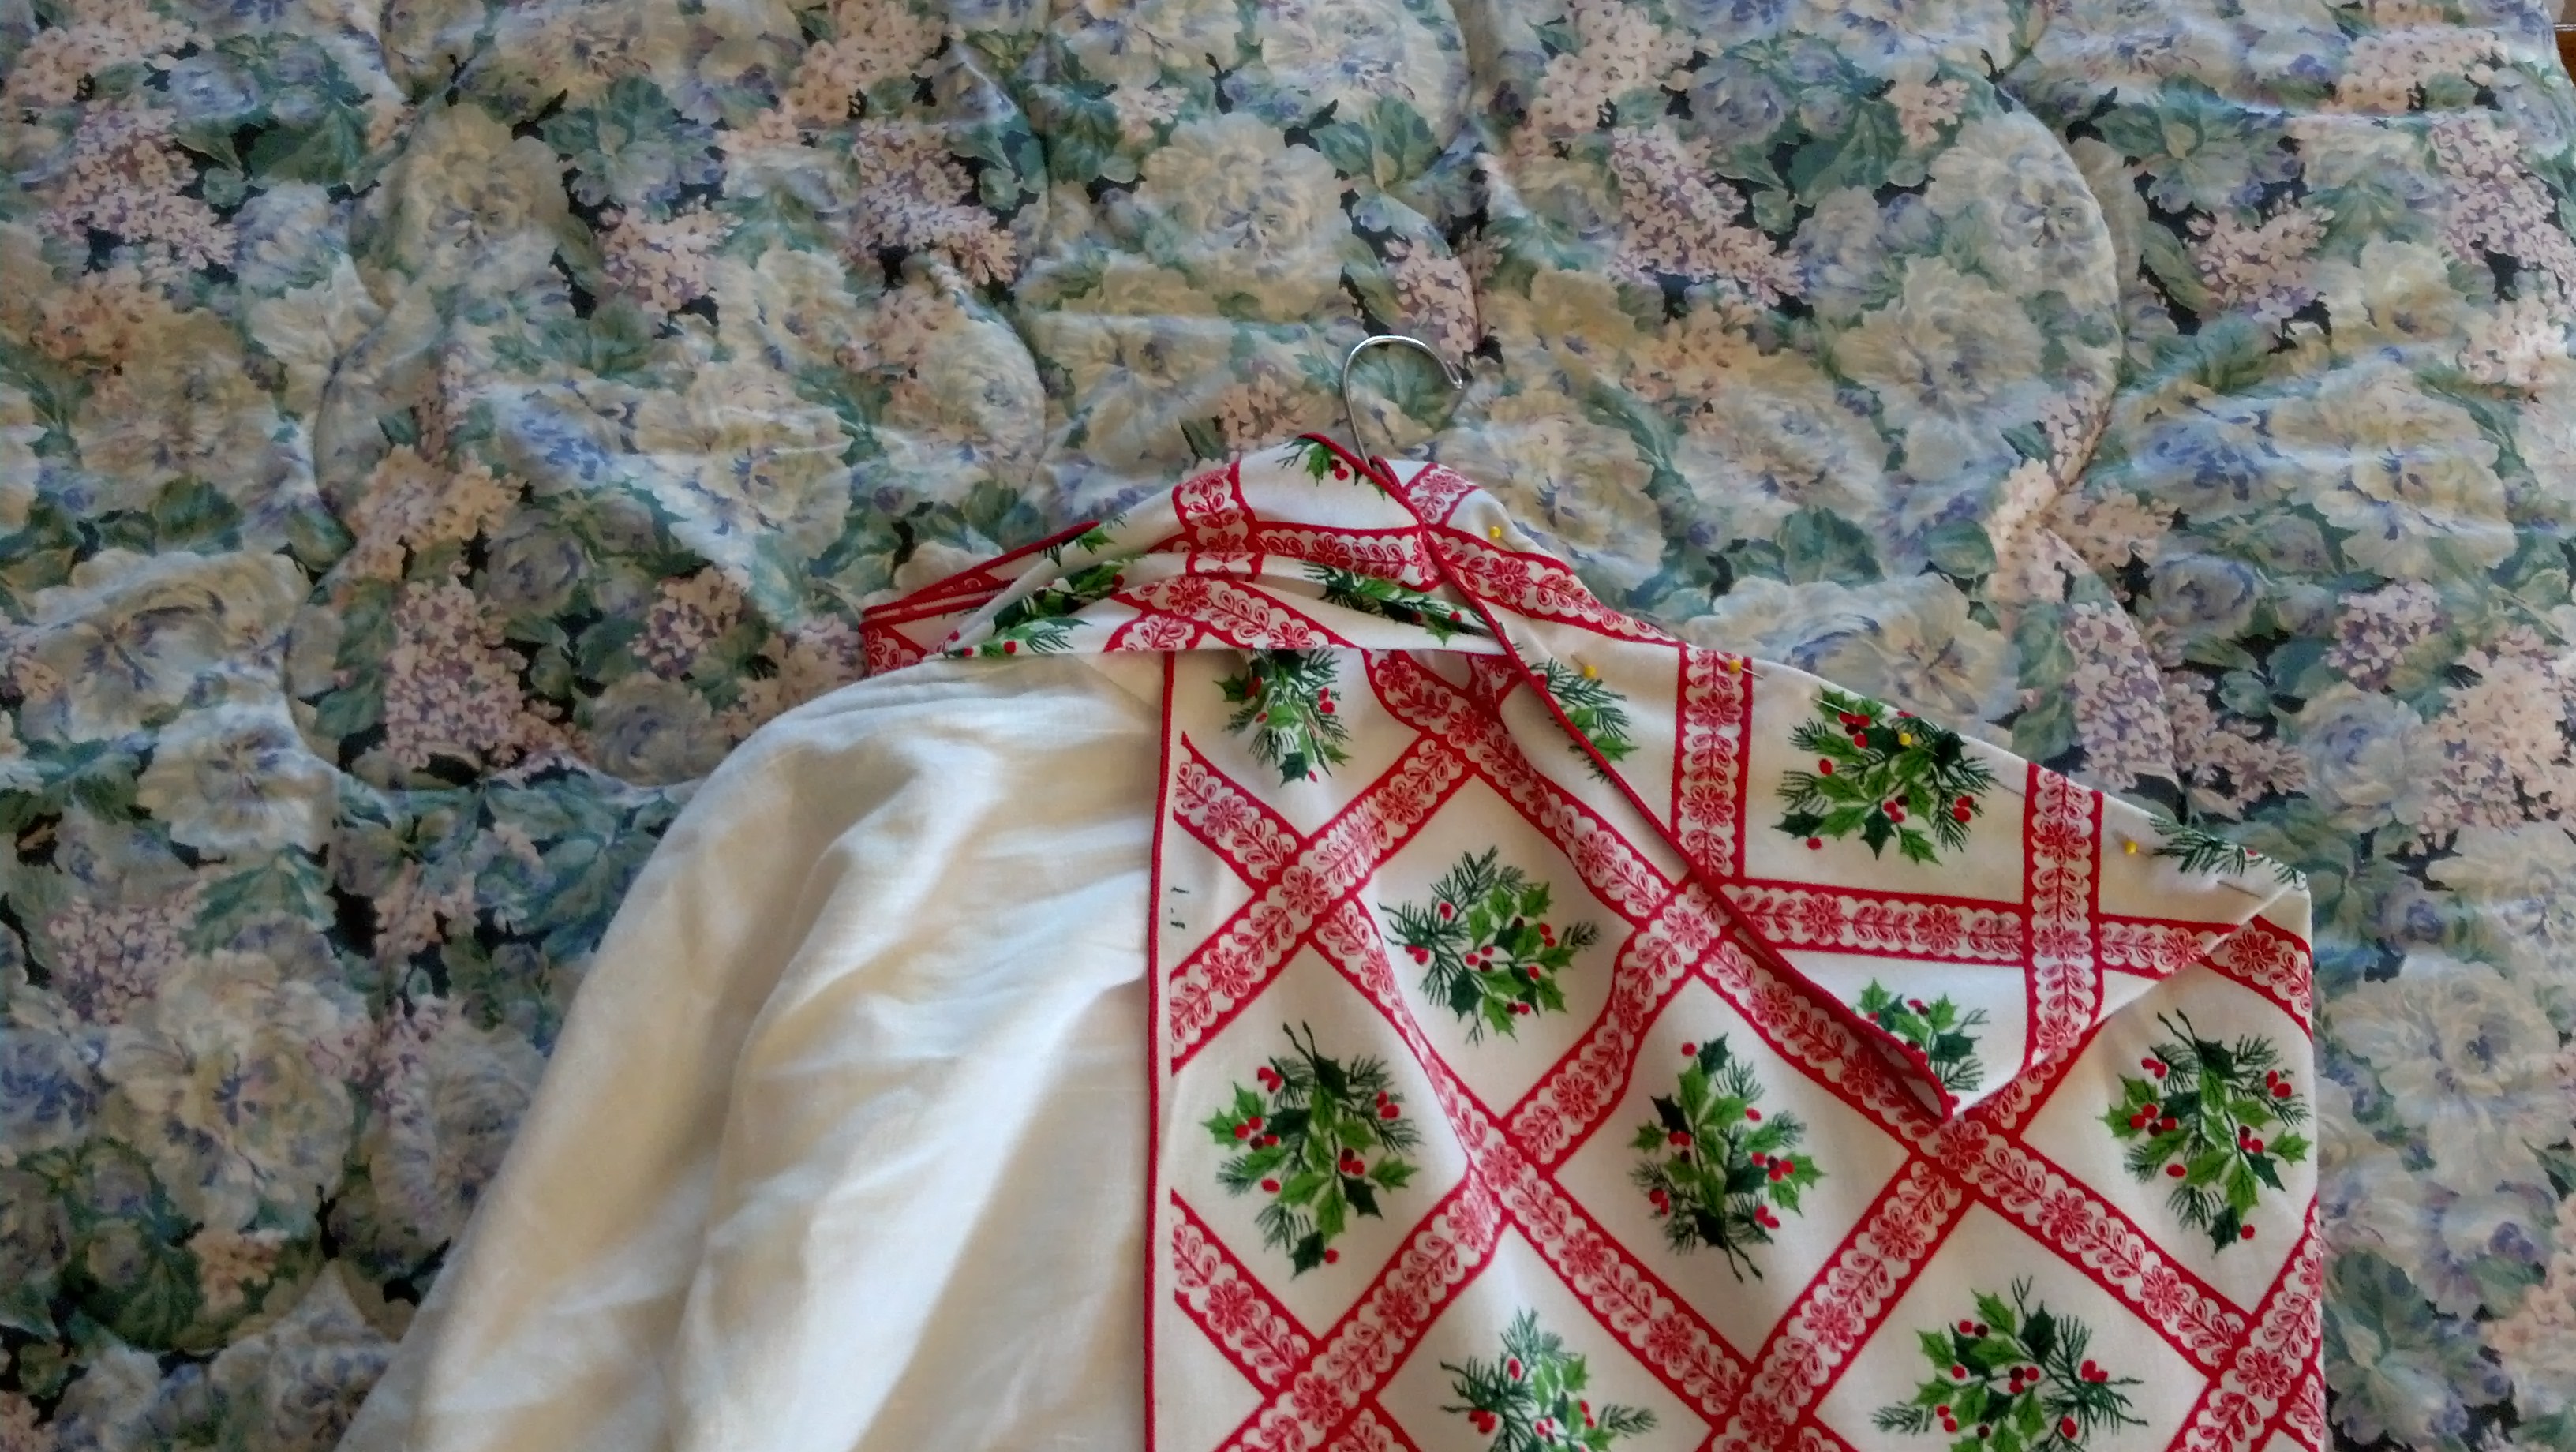
Center the hangers that you plan to use, with the clothing that you plan to hang on them on the short side of the table cloth so that the longest part of the table cloth will be way longer than the clothes that you want to protect.

garment bag 1Then carefully fold over one side of the table cloth so that it goes more than half way across the clothes. Do not make it tight against the clothes – leave at least three inches at the shoulder. Make sure that you keep the top edges of the table cloth even and straight. Use a couple of sewing pins if you need to to keep things from sliding.

garment bag 1st fold

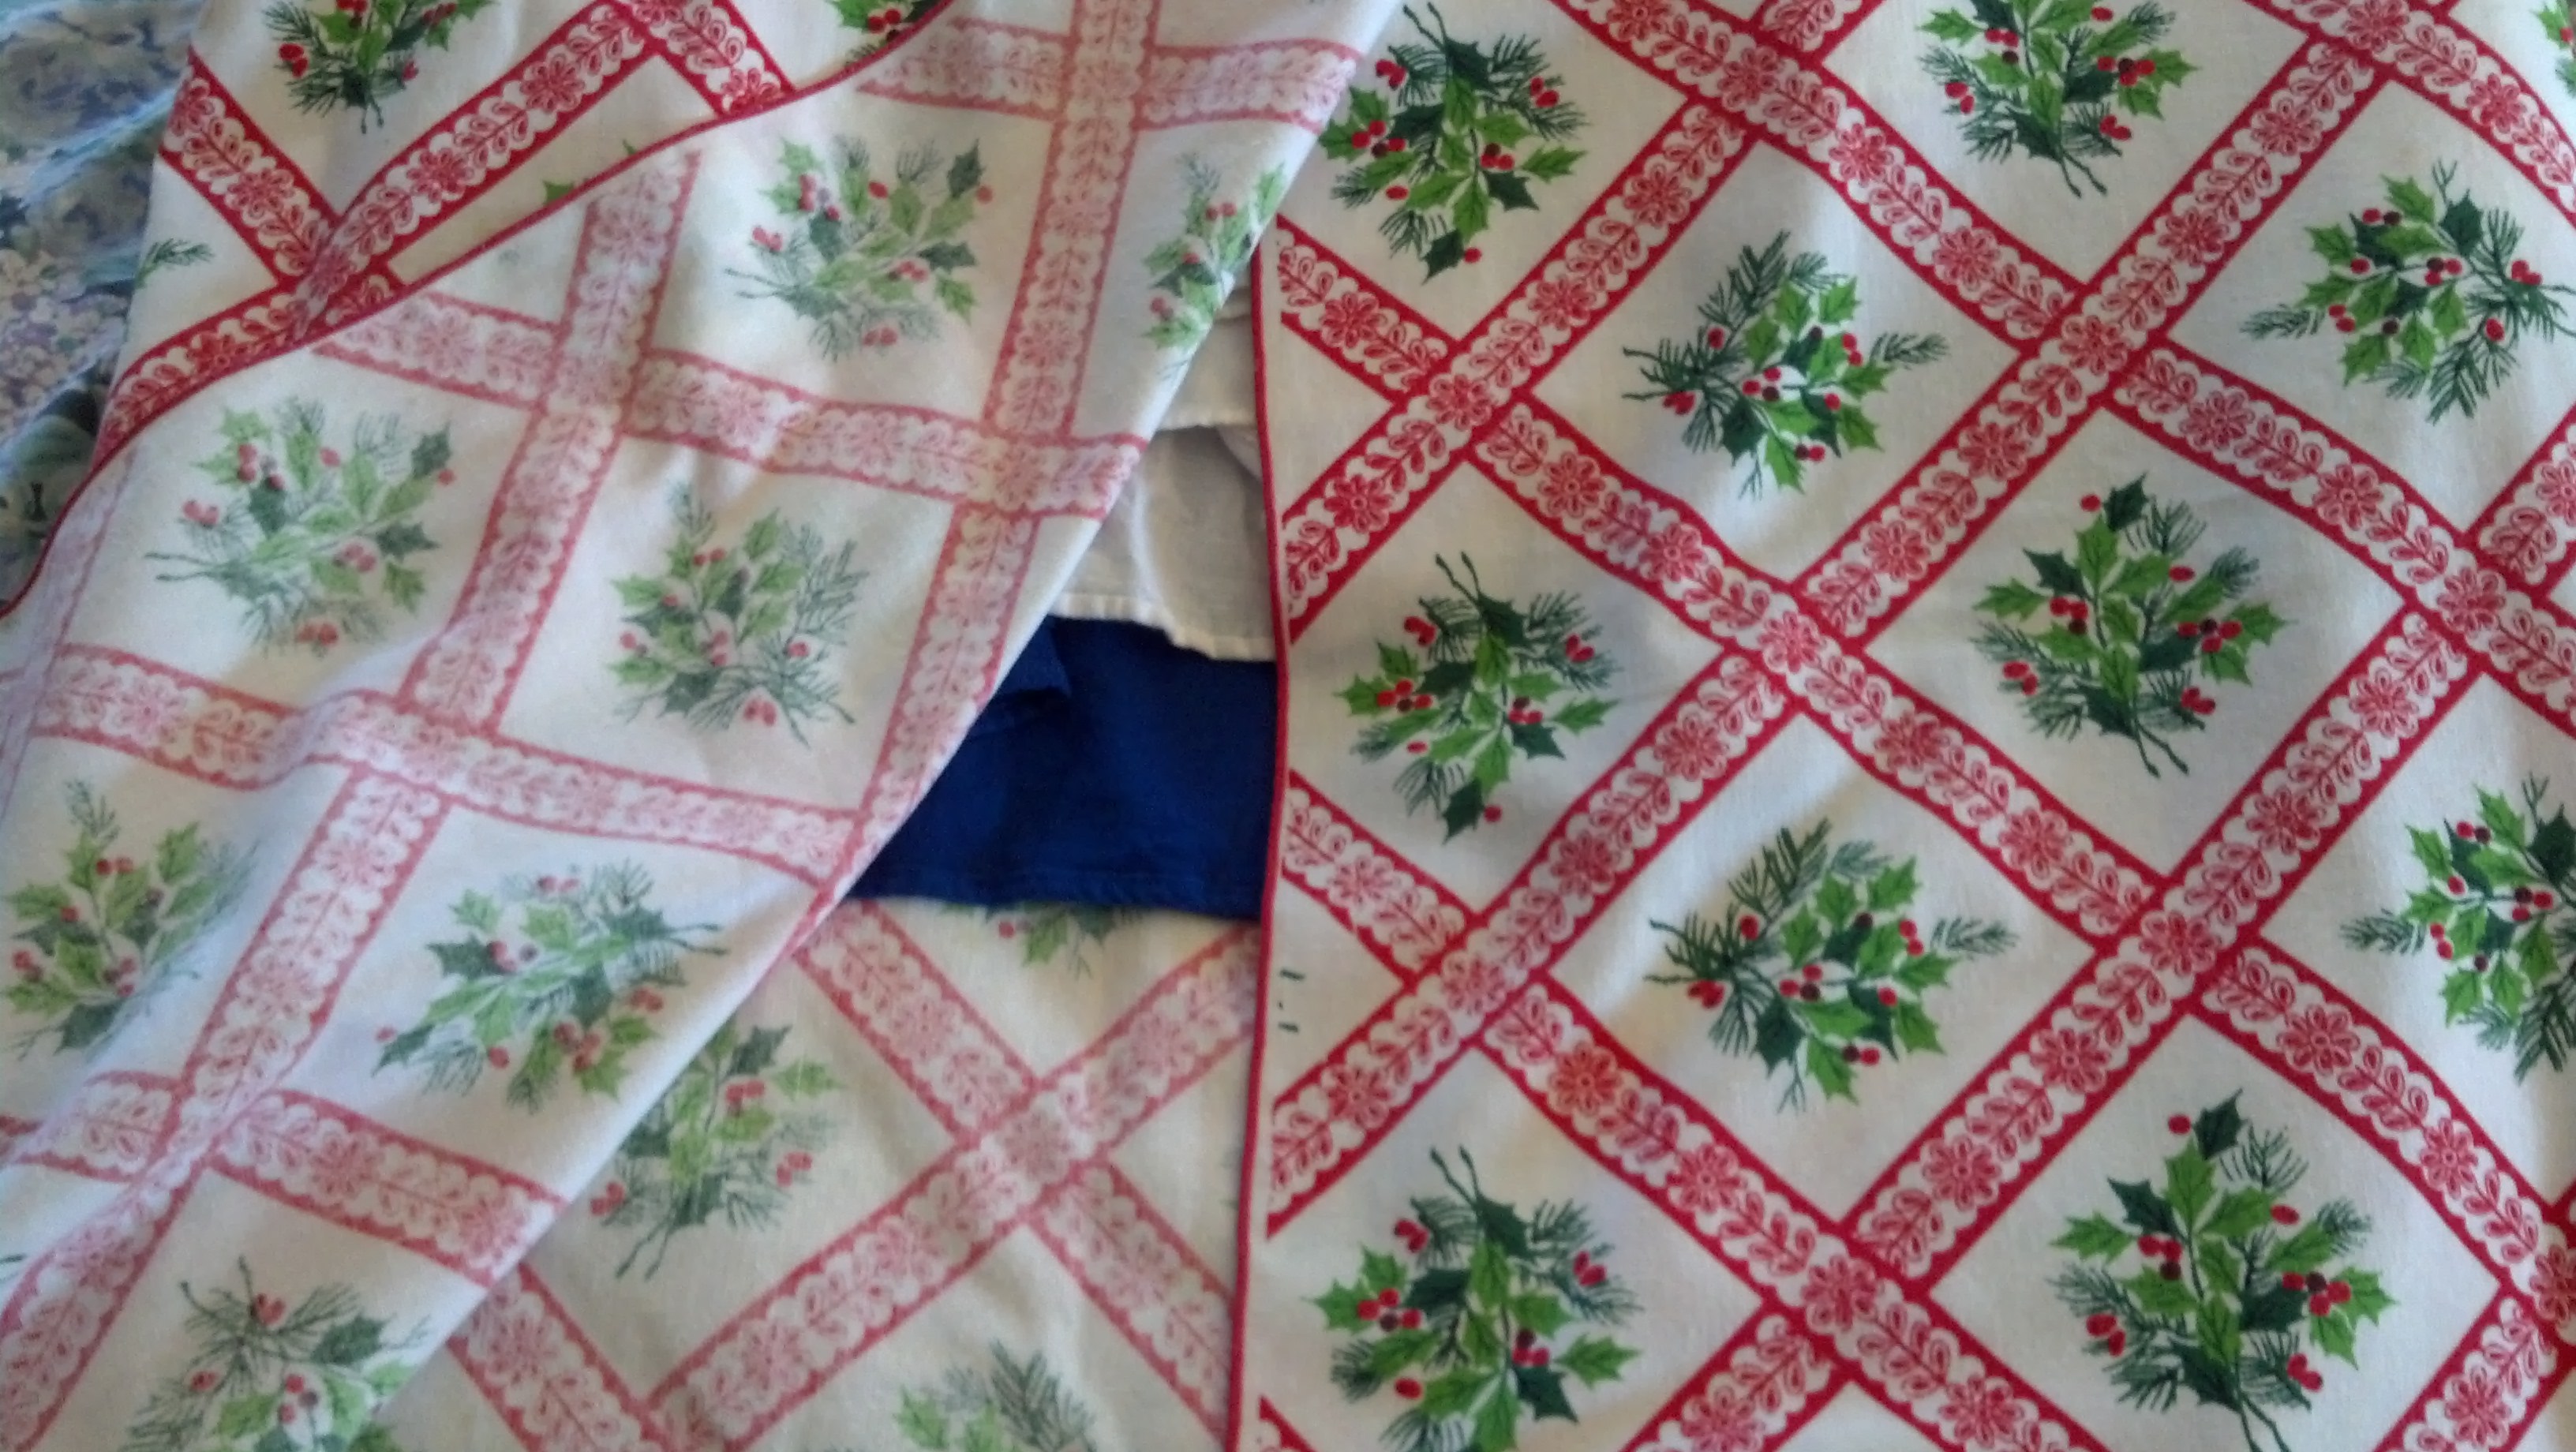
Then fold over the other half of the table cloth, lining up the top edges again and pinning them to keep them from slipping.

garmentbag fold 2

You now have a big cloth burrito with clothes hangers sticking out of the top. So now it is time to shape the top. Carefully fold down the top corners of the table cloth to shape the bag and pin it. Be sure to catch all of the layers of the table cloth in the pins and NONE of the clothing. You can choose to place the folds to the front or the back, hide them inside, trim them off – it is up to you. You will need to sew the shoulder seams. I recommend leaving about 2-3 inches open for the hanger hooks.

garmentbag top

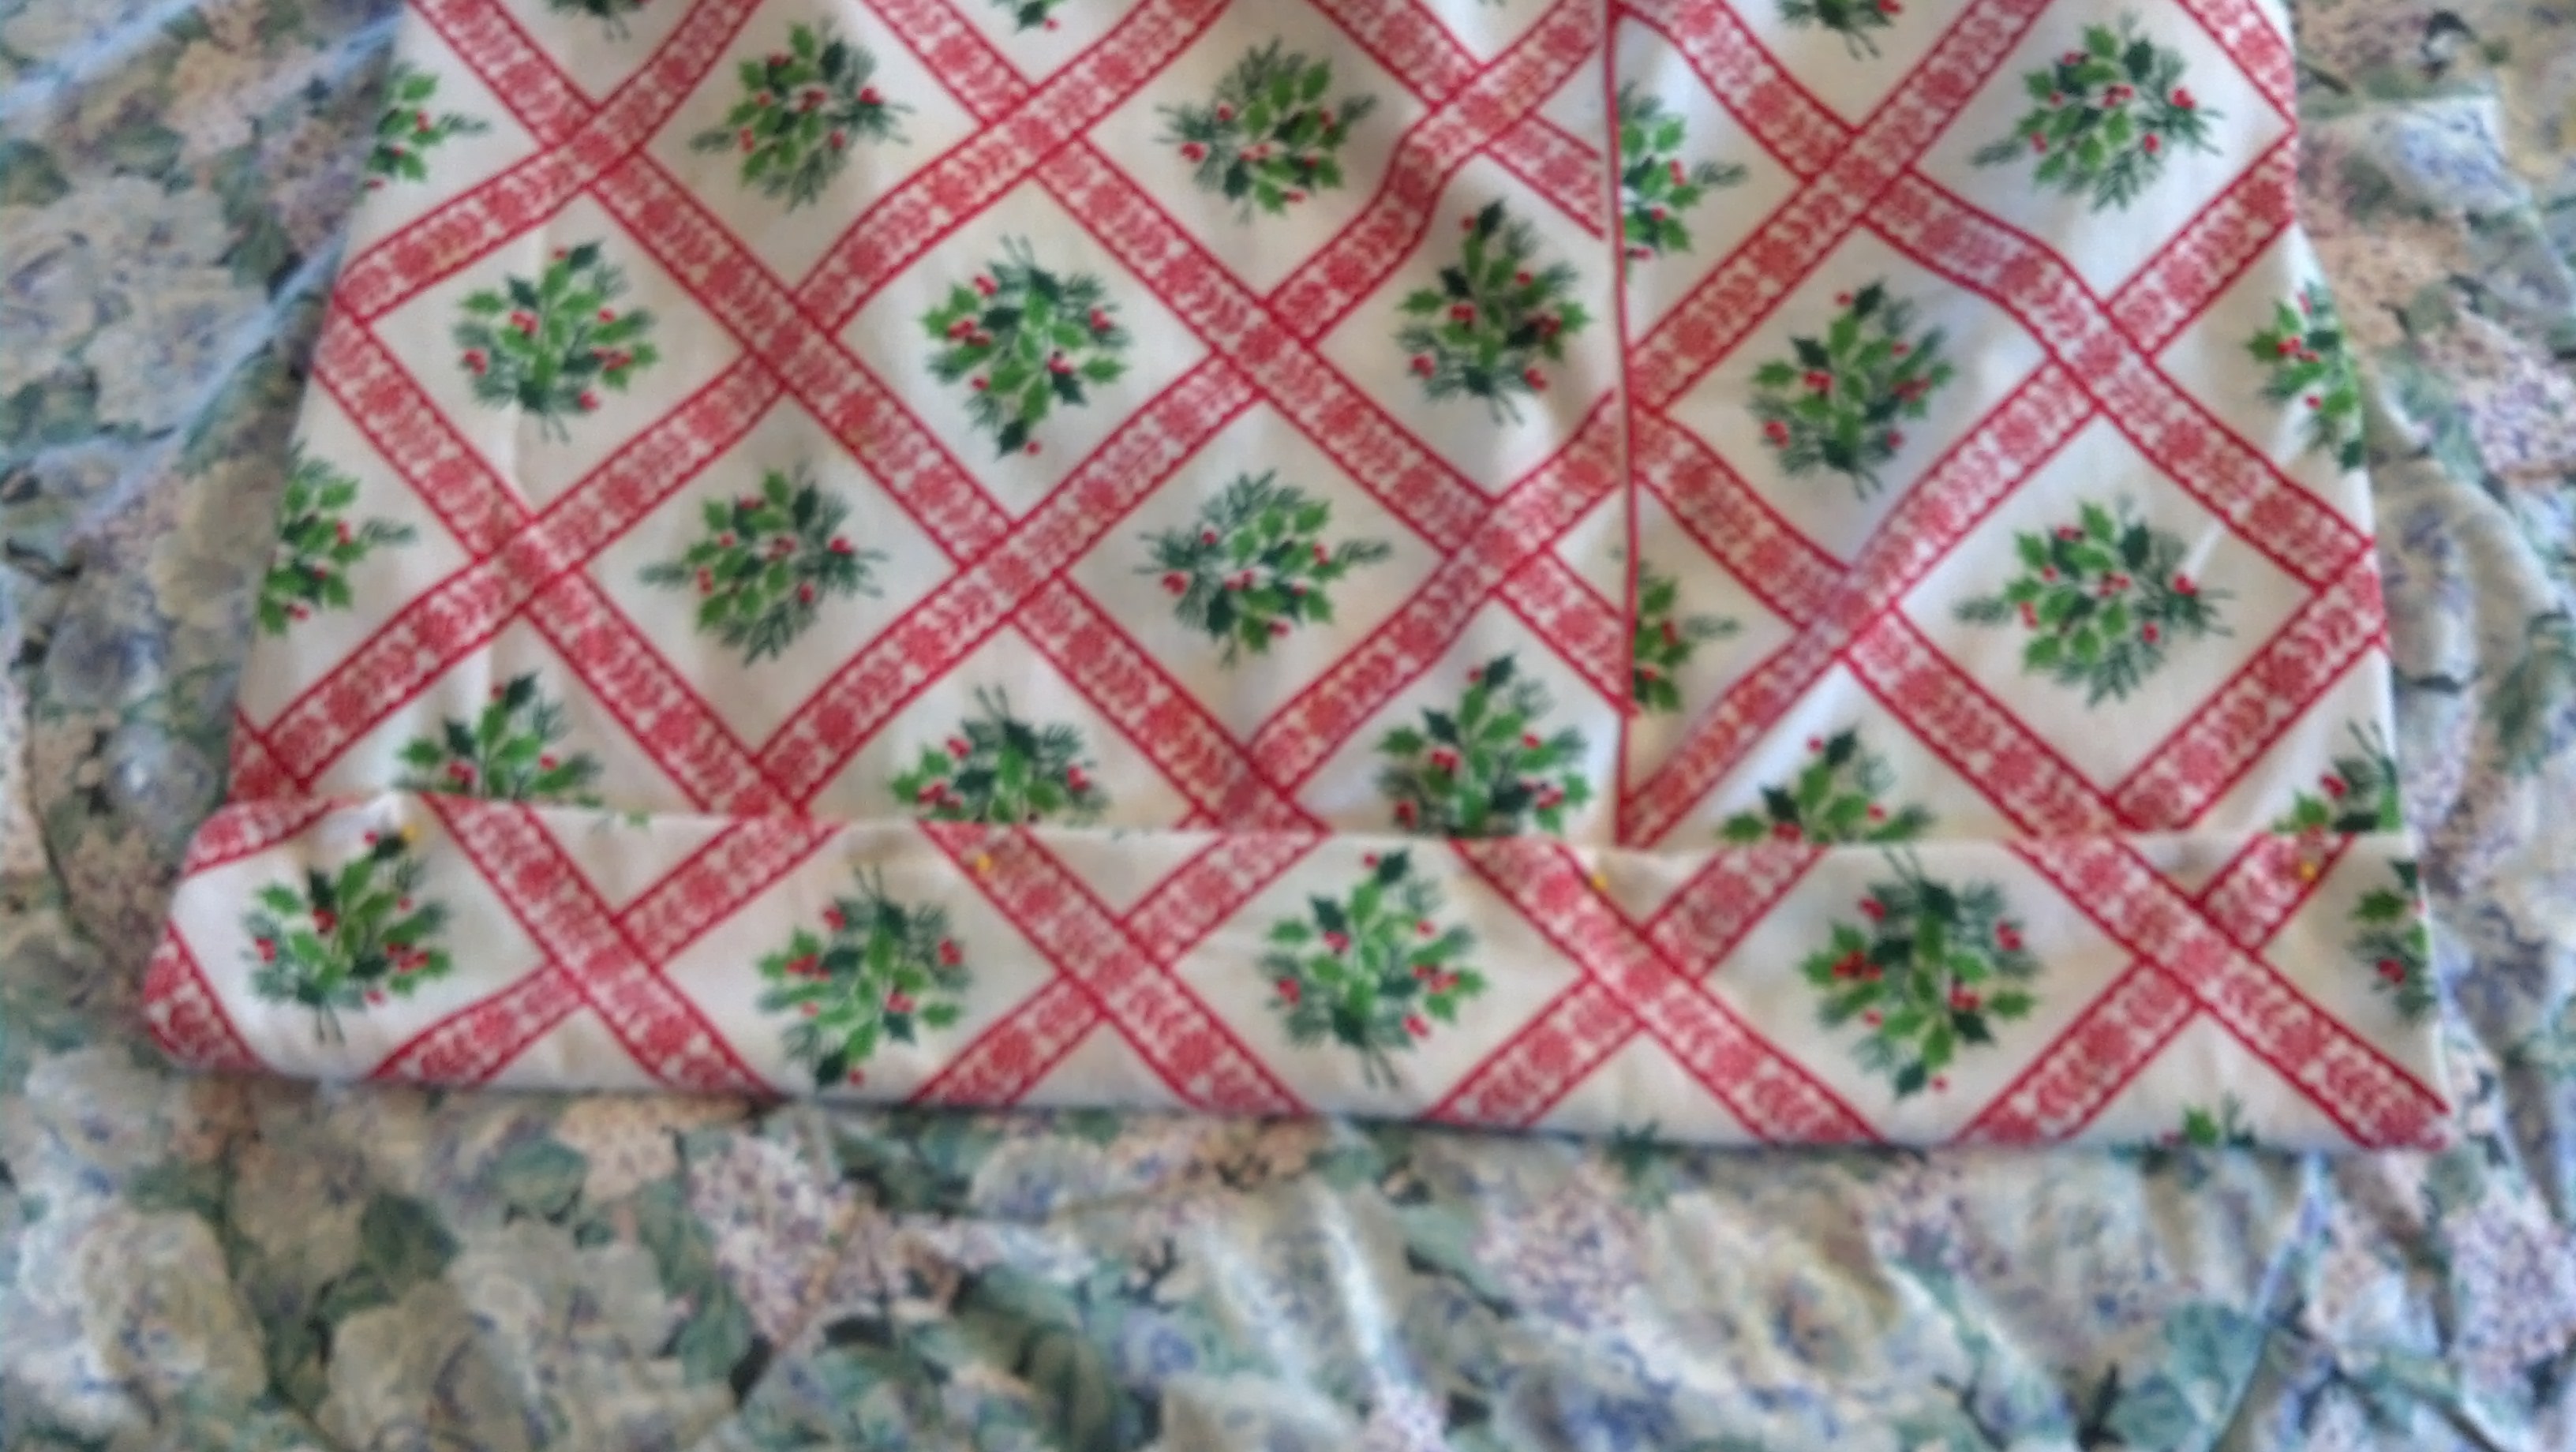
Once you have the top pinned, or sewed, go to the bottom of the soon-to-be-bag and figure out how long it needs to be. The easiest way to do this is peek inside. I recommend leaving at least an extra 4-6 inches at the bottom before you seam it. I usually leave a little bit more so that I can throw a pair of shoes and socks in the bottom of the bag.

garmentbag finding bottom

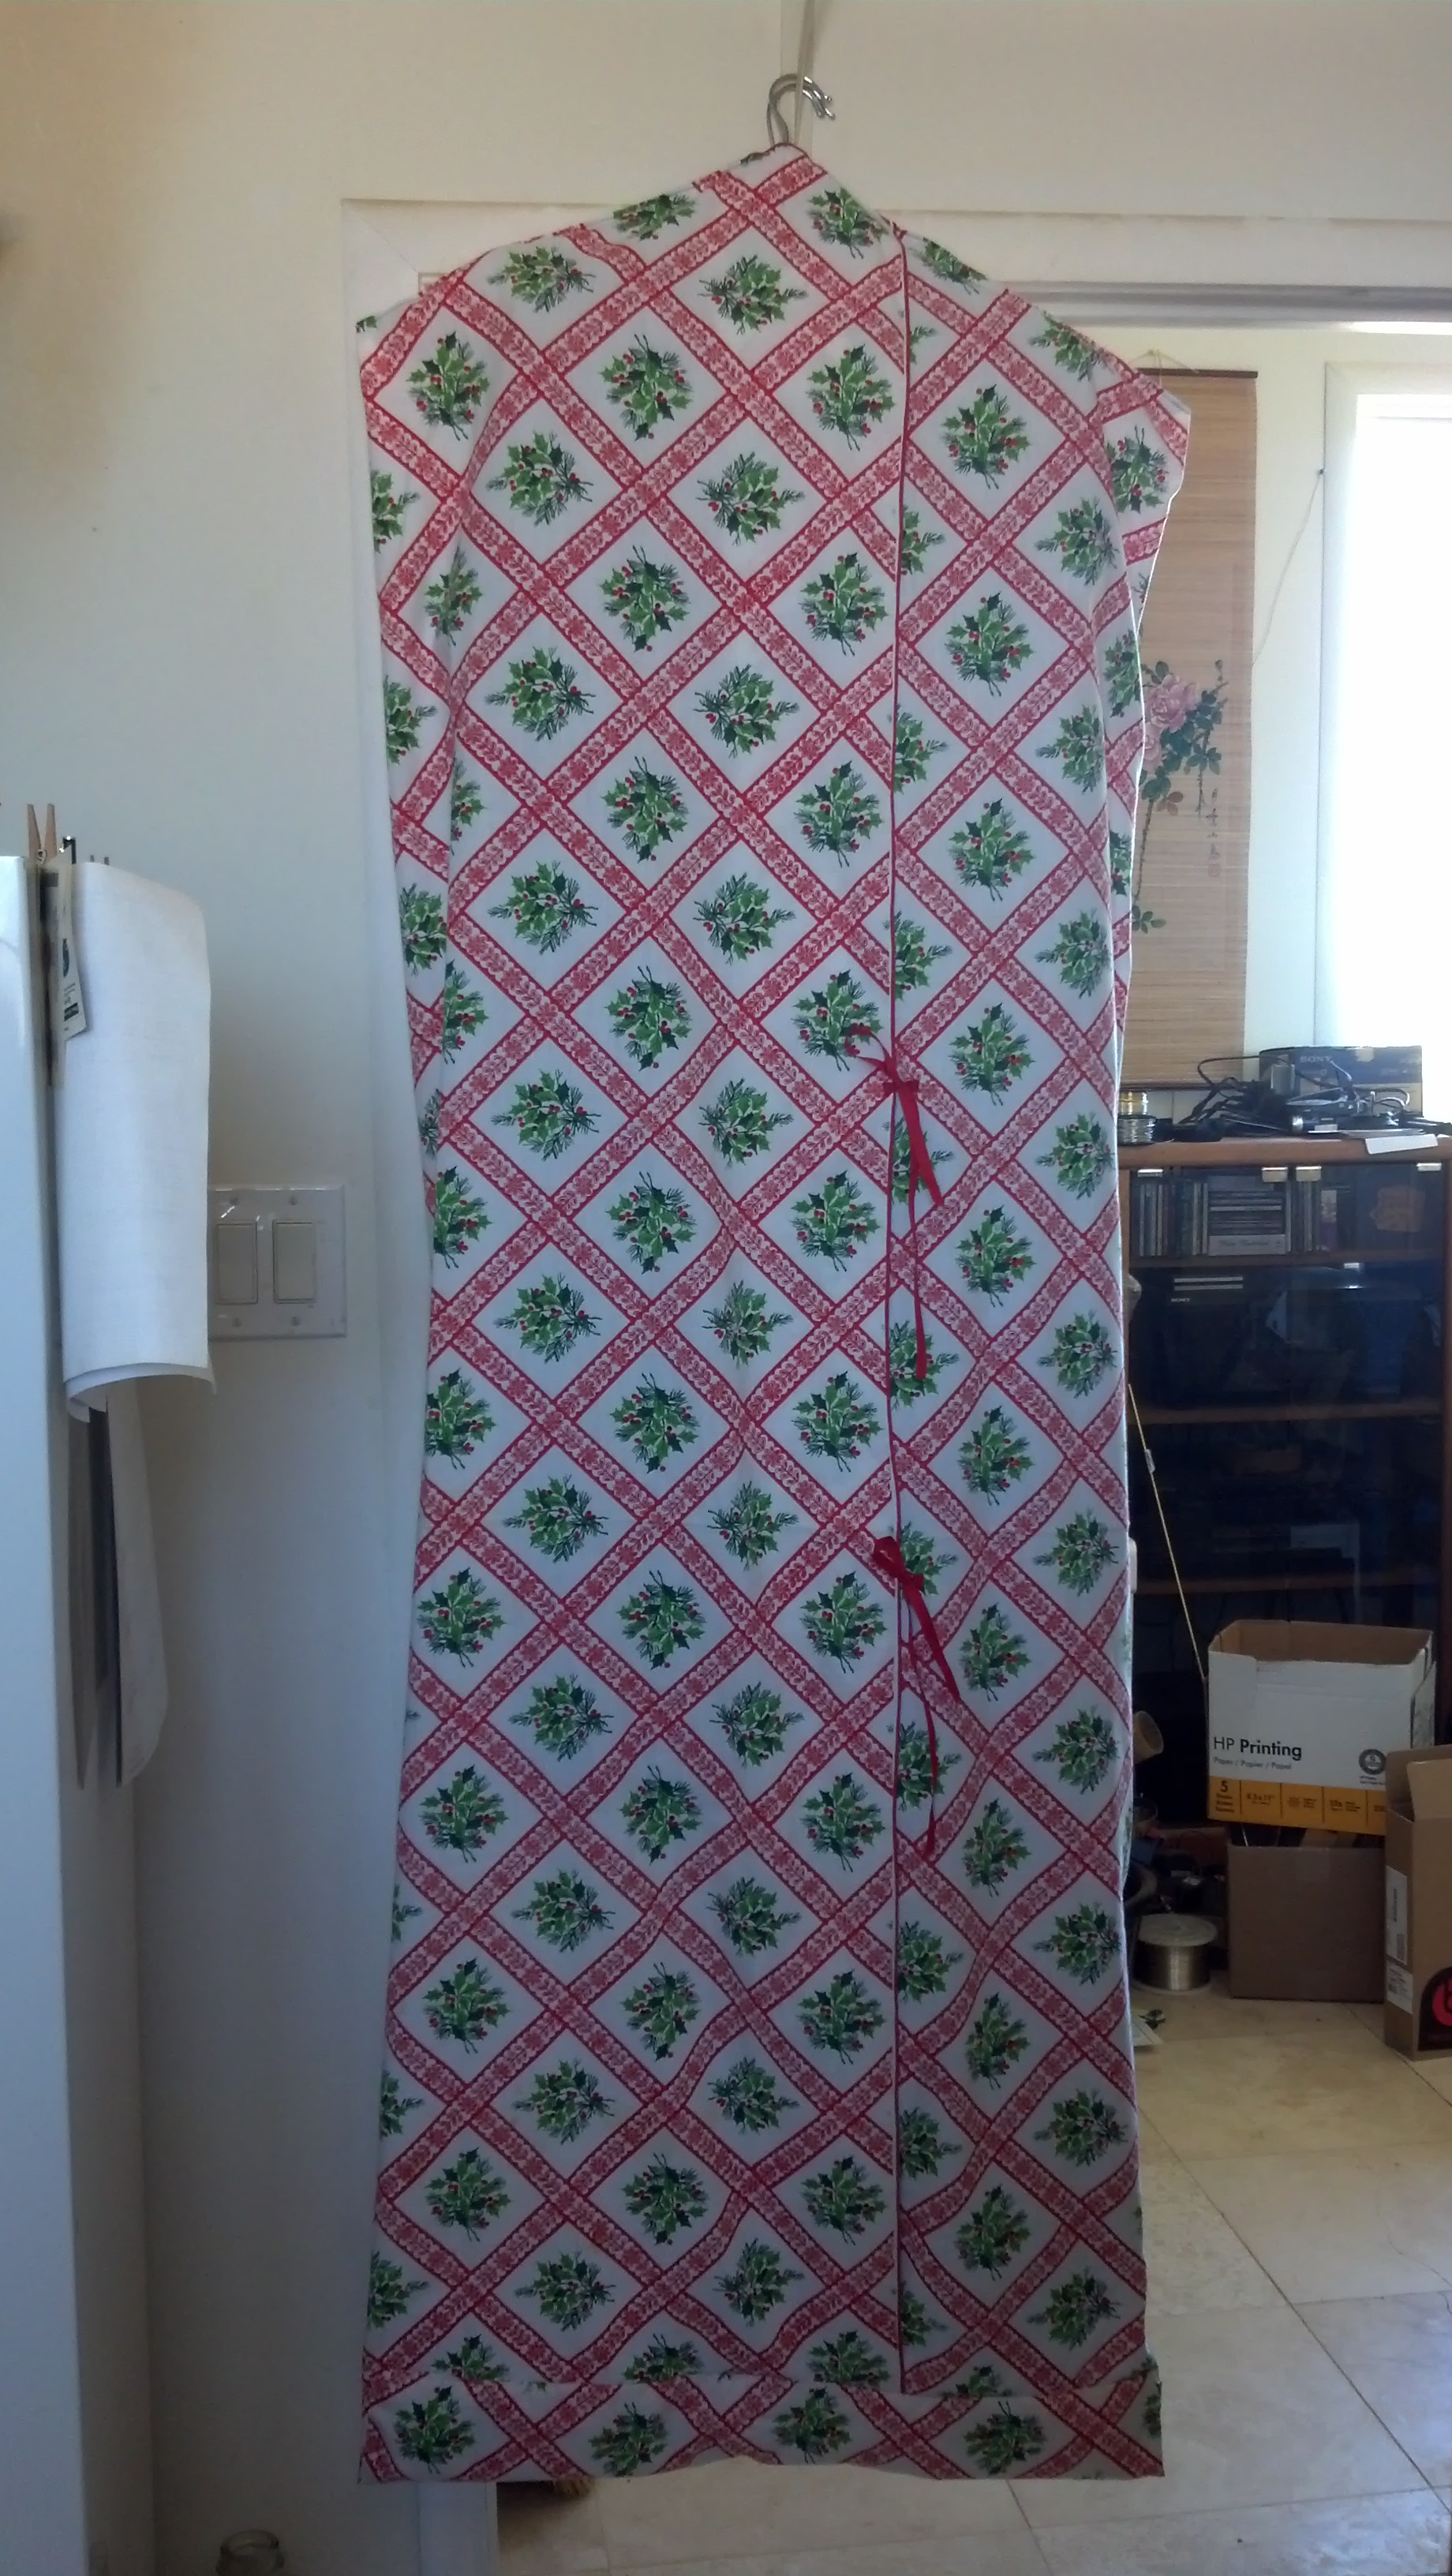
Once you have decided the length of the “bag” you can cut it, sew it, fold it, whatever you want. I decided to fold mine and then whip stitch it in place. I view the bag as a work in progress and I wanted the option to able to change things later.

garmentbag bottom

To take clothes in and out of the bag, just open the flap. If you are concerned about the flap opening you can add a tie or two to keep it closed.

garmentbag open

Here is my final version, hanging in the laundry room.

garmentbag done


Why Should I go to a “Great War”?

Many people that I know in the Society for Creative Anachronism (SCA) only go to local events. For some it is a choice based completely on finances, the quality of their car, and the amount of time that they can get off from work. But for others it is just a lack of interest.

The kingdom that I currently live in, Atenveldt, is my third kingdom. I started my SCA journey in the East, lived in the West for many years, and only later moved to Atenveldt. My collection of “great wars” includes Pennsic War in PA, Great Western War in CA, Gulf War in MS, and Estrella War in AZ. And I have been to many “second tier” events such as Battlemore and Potrero War.

Fighters practising at Gulf Wars XIII (2004)

Fighters practising at Gulf Wars XIII (2004) (Photo credit: Wikipedia)

I sometimes hear the statement, “Why should I bother to go that far? I can have just as much fun closer to home.” Well, there is no doubt about having fun close to home. Fun is generally an important part of the reason that we play this game in the first place. But going to a great war can really change your perspective on the game.

I had only been playing in the SCA for about six months when my husband and I packed up and drove 14 hours to go to Pennsic with our local group. Fourteen hours. And that is nothing compared to our friends from Canada who drive 24 hours to attend Pennsic. And people wonder why I have a low tolerance for folks who refuse to drive an extra hour to attend an event …

The first year that we attended Pennsic we only went for one of the two weeks, but it was AMAZING! There were more classes than I had ever imagined, including classes on Rapier and Heavy Fighting techniques, the basics of making your own archery equipment, costuming, and a zillion different crafts techniques. And that brings up another issue, if the war is longer you can settle in, and still have LOTS of time to do a bunch of different things – fighting AND Arts and Sciences, Rapier AND Archery. Why choose, when you can do it all?!?!

The battles at Pennsic were monumental, with entire groups in matching armor and tabards. The bands of Celtic fighters, marching to the field singing with small herds of women and children banging drums behind them. The Japanese units in full Samurai armor, and the Roman legions, complete with helms, armor and shields.

Pennsic XXX . c

Pennsic XXX . c (Photo credit: danielle_blue)

In short, it was amazing, exciting, and inspiring. Even more important, it made me realize just how many legitimate games there are available to be played within the Society. Dramatically different levels of costuming, fighting, archery… you name it. European Dance performed to a live band. Middle Eastern Dance performed to a live band, with stringed and wind instruments, not just a drummer.

It is all out there for our enjoyment, but sometimes we need to leave our own backyards in order to truly experience it. In the western US there is West Antir War, Great Western War and Estrella War. In the eastern US there is Pennsic War, Lilies War, and Gulf Wars. And once you have been to one great war, go to another in a different part of the US. Dare to step outside your own local area- you might be amazed at what you discover!

Enhanced by Zemanta

The “Button Card” Blog

My hubby and I have been calling this the “Button Card Blog” since I originally told him the story.

I have been making and selling reproduction glass buttons in my shop for about five years. They are available as singles, or organized onto cards by size. They have been for sale for the same price for the past five years – $20 for a card of six matched buttons or $3 each for single buttons. No one has ever questioned this arrangement until last fall. Someone, reading the information on prices, asked the question “Is this an intelligence test?” I admit… his question made me laugh. I sell other things, like veil pins, in multiples. $2 each or 3 for $5. The person sorts through the pins, chooses any three that they like, and pays $5.

So why isn’t the button “deal” as good as the veil pin deal? Well, for those who may not have seen these buttons, they are glass with metal shanks. And they are for sale either on cards, or in small compartments in a plastic box. They require a LOT more labor and skill than the veil pins do, and there is more to processing them.

This is my process. As soon as the buttons are cool they come up to the house and wait their turn on my beading table. They are sorted into compartments based on their size, using a digital micrometer. When an individual compartment gets too full (I often make over a hundred buttons in a sitting), I stop and put them on cards. Each card is pre-punched with slits for six buttons. The individual button shanks are pushed through the slits and I assess how they look together. These buttons are made by hand, so there are slight variations in the shape of the buttons. This is consistent with the pre-1600’s buttons that I have seen – the smaller and rounder they are, the more likely they are to be close to round, and the larger they are the more likely they are to be slightly oval. After I approve of the collection that is on the card, I use a large tapestry needle to thread a cord through the backs of the buttons to keep them on the card, and the card is transferred to the button stock – either on the display racks or in the back-stock box. And this is why people pay extra for matching buttons.

I have seen people spend over a half hour sorting through the individual buttons in the “singles” box to find a collection of buttons that are “close enough” to work together. They are allowed to do that! But personally I don’t usually want to spend that much time at an event sorting through buttons, when I can buy them pre-sorted. So, no, it is not an intelligence test, maybe it is just a time management test. If you LOVE to shop and sort through tiny little things like buttons, then please be my guest…there are things that I will sort through for long periods of time, too. But if you have other things to do, just buy a card and go!

Black Buttons