I accept commissions to make one or two coronets a year. As a part of this process, there are two things that I usually do, other than make them; make a liner and make a case. To me it is the final touch for the process.
First the liner. I know some folks who prefer a coronet without a liner. They always wear a veil, hat or coif, so the coronet is simply fit to go over one or more of these items. Coronets that are particularly light and airy – like some of the openwork ones, may also not need a liner. Personally wearing a coronet against my bare skin gives me a rash, so I prefer a liner.
As a landed Baroness I spend a LOT of time wearing a coronet. Unfortunately both sets of cornets that belong to our Barony are too small for a liner, so I must settle for a lightweight veil or coif. But, when I make my own coronet for stepping down, there WILL be room for a liner. I want to be able to wear my coronet with a hat!
Before I made my first liner I looked at as many coronets as I could get my hands on. Individually owned coronets can be fit to whoever owns them, but Coronets and Crowns belonging to Kingdoms, Principalities and Baronies are usually made extra large, to allow them to fit a large variety of head sizes. Making the coronets or crowns larger, so that they will fit everyone who might need to wear them, requires the use of a changeable liner.
I have seen some pretty messy liner jobs. The messiest one was probably the heavy duty cotton upholstery cording that was wrapped around inside the coronet and glued in place with hot glue. Please, no hot glue! I have had to remove hot glue from an assortment of surfaces before, and it should NOT be used on Coronets.
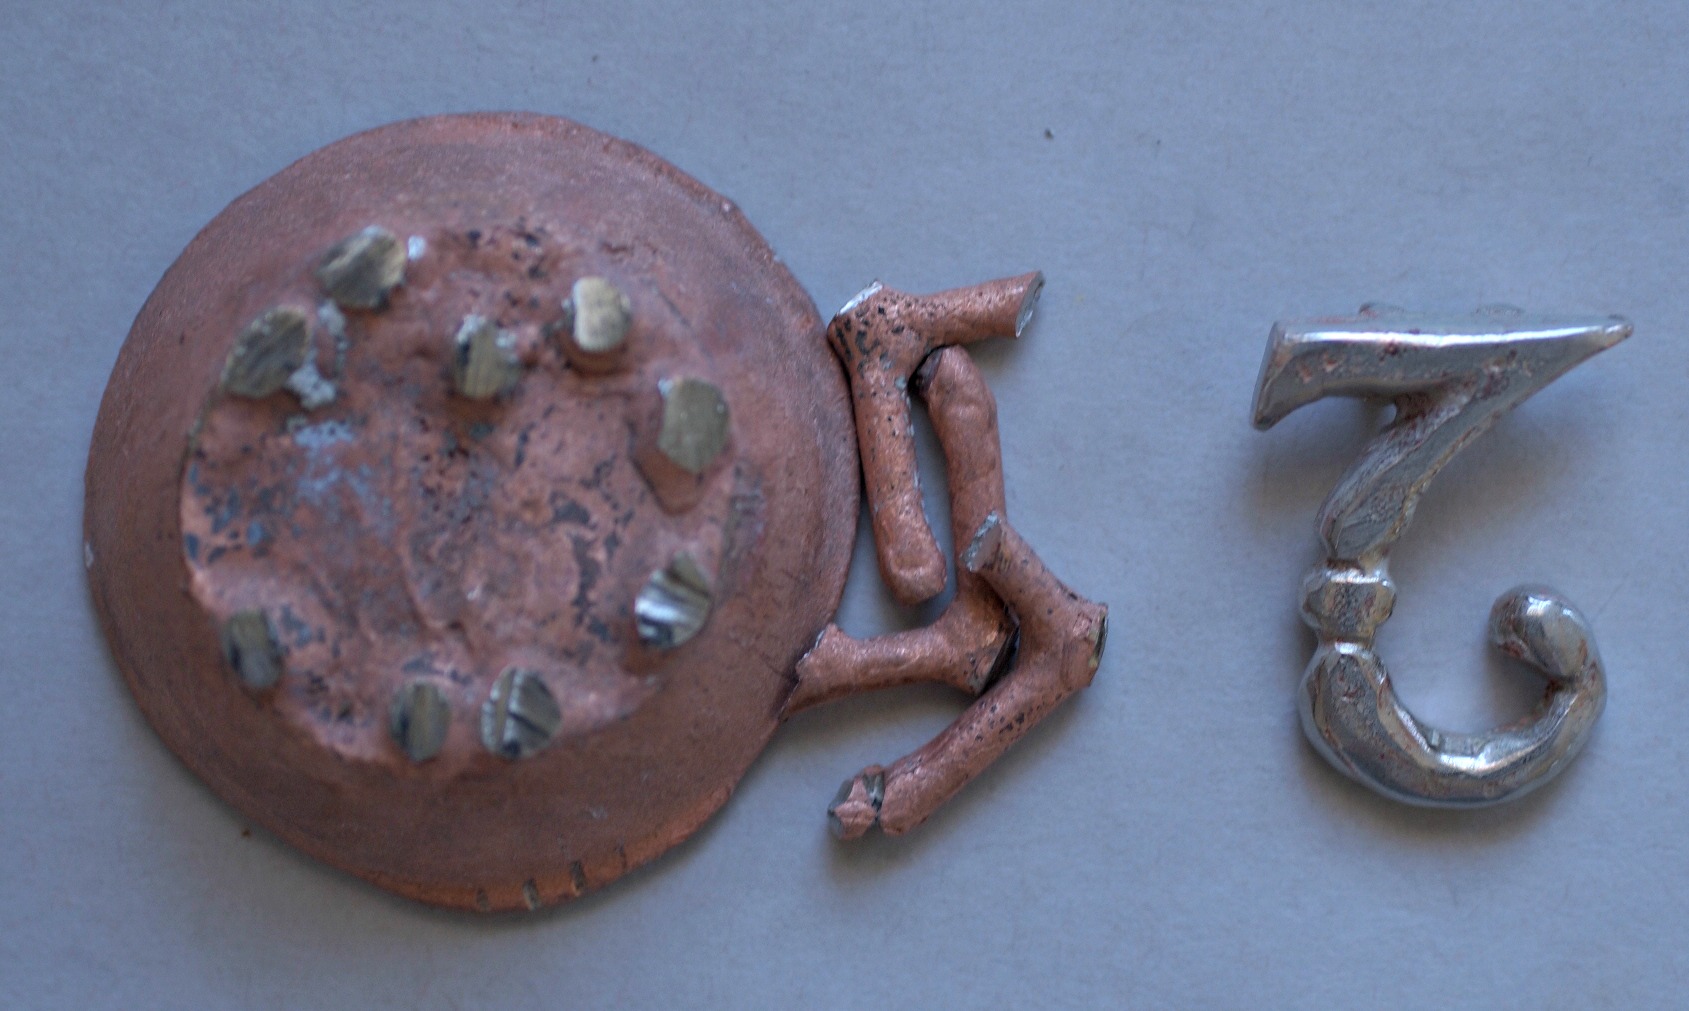
Then how to attach the liner to the inside of the coronet? Well, I have seen two major approaches: sewing the liner in place or some sort of glue. Sewing the liner in place is generally only possible if the coronet was designed to be lined that way. For instance if there are small pierced holes in the base of the coronet, or if you use rivets to assemble the coronet and the bottom rivets are hollow (that means they effectively form a tube through the coronet).
My personal preference for gluing in a liner is stick-on Velcro. Why stick-on Velcro? It stays in place well, it allows the liner to be easily removed if the wearer wants to wear a hat under the coronet instead, and it allows the liner to be easily removed for washing or replacement. If something happens to the Velcro it is easy and inexpensive to replace. It also comes in several colors, so that you can at least make an attempt to match the Velcro to the liner. But we are getting ahead of ourselves! First we need a liner.
The liner itself is simply a tube of fabric that is stuffed, sewn into a closed circle of the appropriate size, and then placed inside of the coronet, using the “hook” side of the stick-on Velcro. Here is the beginning of a black velvet coronet liner. I simply estimated how big around I wanted the liner to be – think sausage here – and then added a seam allowance. I also measured the interior of the coronet to figure out how long the strip of fabric needed to be, and added a seam allowance.
Let’s take a minute to discuss how to measure the length of the piece of fabric for the liner. Obviously if you were involved in the manufacture of the coronet you will have the size of the headband and you can just add an inch for seam allowances and go from there. If you are remaking a liner, you can measure the old liner, and assuming that it fit correctly you can essentially copy it. But if you are creating the liner from scratch you need to take some measurements. The easiest way to measure the size of the coronet is to simply wrap the tape around the outside of the coronet. If the outside of the coronet is heavily decorated with stones and other three dimensional objects you will definitely need to measure the inside of the coronet, or the liner will be way too long. If you are not concerned about wasting a little fabric measure the outside – it is easier. The width of the fabric strip will determine how big around your liner is. You can make a circle with a flexible tape measure and figure out how wide to make the fabric strip.
Once you have your measurements you need to sew the fabric into a tube. Simply fold the fabric in half with the good side on the inside, and sew along the seam allowance. Now is the time to look again at the liner, before you do any more work, and decide if the size looks correct. When I sewed up the first version of the black velvet liner I realized that I had made waaay too fat a “sausage”. If you simply squeeze the tube into a circle you can see how large it will be. Once you are happy with the size of the tube, you need to turn it inside out – remember the right side of the fabric is currently on the inside and the not-very-pretty seam is on the outside. My favorite way of turning a small tube inside out is with a string and a safety pin. Simply tie the string, which must be longer than the tube, to the safety pin, attach the pin to one end of the tube, drop the string through the tube, and then carefully use the string to turn the tube right side out.
Once the tube is turned right side out you need to fill the tube with whatever sort of stuffing you are using. I generally prefer polyester quilt batting because it gives me a LOT of flexibility in terms how fat and firm I make the liner, it breaths well, does not generally mat, and is washable.
When you think you are happy with the liner, do a trial fitting, holding the liner in place and seeing if the coronet fits well. If not, now is the time to make adjustments to the firmness or size of the liner.
I go to a lot of trouble to make my liners extremely neat and fussy. After all, a coronet is a fairly major investment and I want the customer to be happy with the finished piece – emphasis on the word “finished”. If it is your coronet and you just want to “get’er done” there is a much less complicated approach that will work.
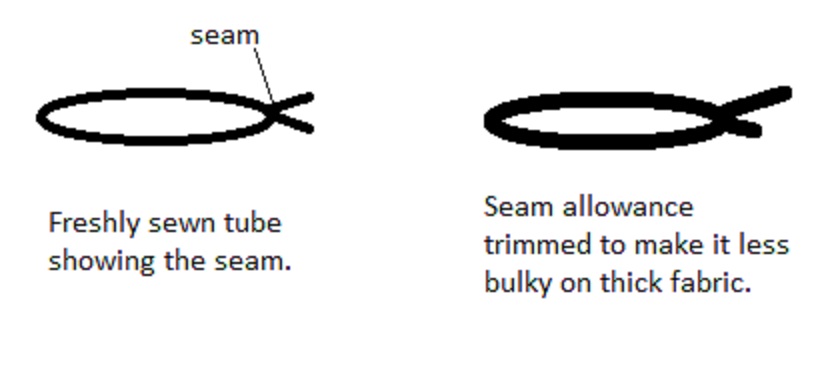
Determine the measurements of the liner. Add only a small seam allowance to the width of the fabric – perhaps ½ inch. With the right side of the fabric on the outside, fold the fabric in half the long way and sew your seam. Check the liner size by seeing how big around it will be. When it is the correct size, evaluate the seam. How thick is the fabric? If it is bulky you may need to trim the seam to two different lengths.
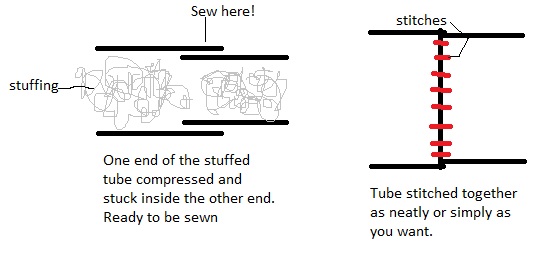
Stuff the tube, do a trial fitting to make sure the coronet fits correctly, and slip one end of the fabric tube inside the other end. At this point we have another opportunity to decide how fussy we want to be again. I carefully roll the cut edge of the fabric under and neatly hand stitch the tube closed. The “quick and dirty” technique is to simply whip stitch the raw edge of the fabric in place with thread. This is NOT a good idea if your fabric has a tendency to fray.
Once your tube has been joined together it is time to put on the stick-on Velcro. Velcro comes as a set – a strip of soft, almost fuzzy stuff and another strip that consistes of tiny little hooks that easily hook to the soft strip. The soft strip should be attached to the coronet. Why? Well, if you ever decide to wear the coronet without the liner, on a hat or thicker head scarf, the soft Velcro will not be uncomfortable or damage the hat or scarf. The hook side of the Velcro is actually attached to the liner.
STOP! Before you randomly place the hooked Velcro onto the liner you need to consider a couple of factors. Did you do a detailed, turned and hand finished liner, or did you do a simpler form with the seam on the outside of the tube? If you did a simple version with the seam on the outside it is very important that you actually line up the hooked Velcro tape over the seam. This will completely cover the seam and keep it from fraying. If you did a more finely finished seam and join on your liner I would still recommend covering the seam with your hooked Velcro strip because it just plain looks nicer, but it it not mandatory.
Once both Velcro strips have been pressed firmly in place you should be able to press the liner gently into the coronet and be able to enjoy the comfort of the fit. I hope that this makes your coronet wearing experience more comfortable!