Removing “Copper” Surfaces from your Brass or Bronze

Anyone who has ever done a bunch of soldering and casting, using brass or bronze has had it happen. You are working away, being careful to keep your pickle and other chemicals clean, and suddenly your piece looks as if has been copper plated. You change the pickle, re-pickle the piece, maybe run it in the rotary tumbler with media, but your piece is still “pink”.

What now? Well you can physically remove the copper – literally polish the surface of the piece until the “pink” is gone. No fun, and often not very effective. I grumbled to my partner Henry about the problem and he researched it. There was an industrial strength chemistry answer, but dangerous chemicals are low on my list of things to do if I can avoid it. So he did a more directed search on the Internet.  Magic! He found someone who understood the problem, the chemistry involved, and how to fix the problem.

So, here is how it works. Sometimes the layer of copper is actually “plate” – that is your pickle has been contaminated with iron, which effectively creates a battery, and literally copper plates your piece. Other times you have done some soldering or casting, you toss the piece into the pickle and the black fire scale is removed, but not the copper coating. And worse, sometimes the piece is coated with a reddish oxide that leaves copper behind. What happened? The black is cupric oxide and the reddish or pink coating is cuprous oxide. They are both the result of the heating of the original copper alloy. The pickle removes the black, but not the reddish pink. But there is a “special” pickle that will usually remove the cuprous oxide or the copper plating. And best of all, it does not require any unusual or exotic ingredients. Warning – as with all chemical processes – use this at your own risk! If you leave the piece unattended for too long the pickle may actually eat the surface of the piece away.

DSC_6560

Special Pickle Solution

3 parts Hydrogen Peroxide (3%) – Available at the grocery store and pharmacy.

1 part white vinegar (5%) – Available in your local grocery.

Place the mixture into a plastic or glass container and set the container in a bowl of warm water (100-110F). Place the items to be cleaned in the mixture, and wait. I like to swirl the piece around every couple of minutes to see how it is doing and remove the bubbles. It will develop a brown gunk on the surface. I keep another container with more plain white vinegar at hand, and when the gunk gets too dark for me to see the piece clearly I dump the piece into the plain vinegar. This will clean off the surface of the piece. You may need to rub the piece under a little running water and turn it over to get both sides to clean off. Check to see if the piece is clean enough, and repeat as necessary with the pickle and the vinegar wash. Rinse with clean water when you are done. Polish the piece in a tumbler and you are “back in business”. WARNING: This process will remove every bit of oil from your hands, so if you have sensitive skin, I recommend that you wear rubber gloves.

The original article that Henry found is at www.artmetal.com/files/imported/project/TOC/finishes/nonfe/H2O2.html

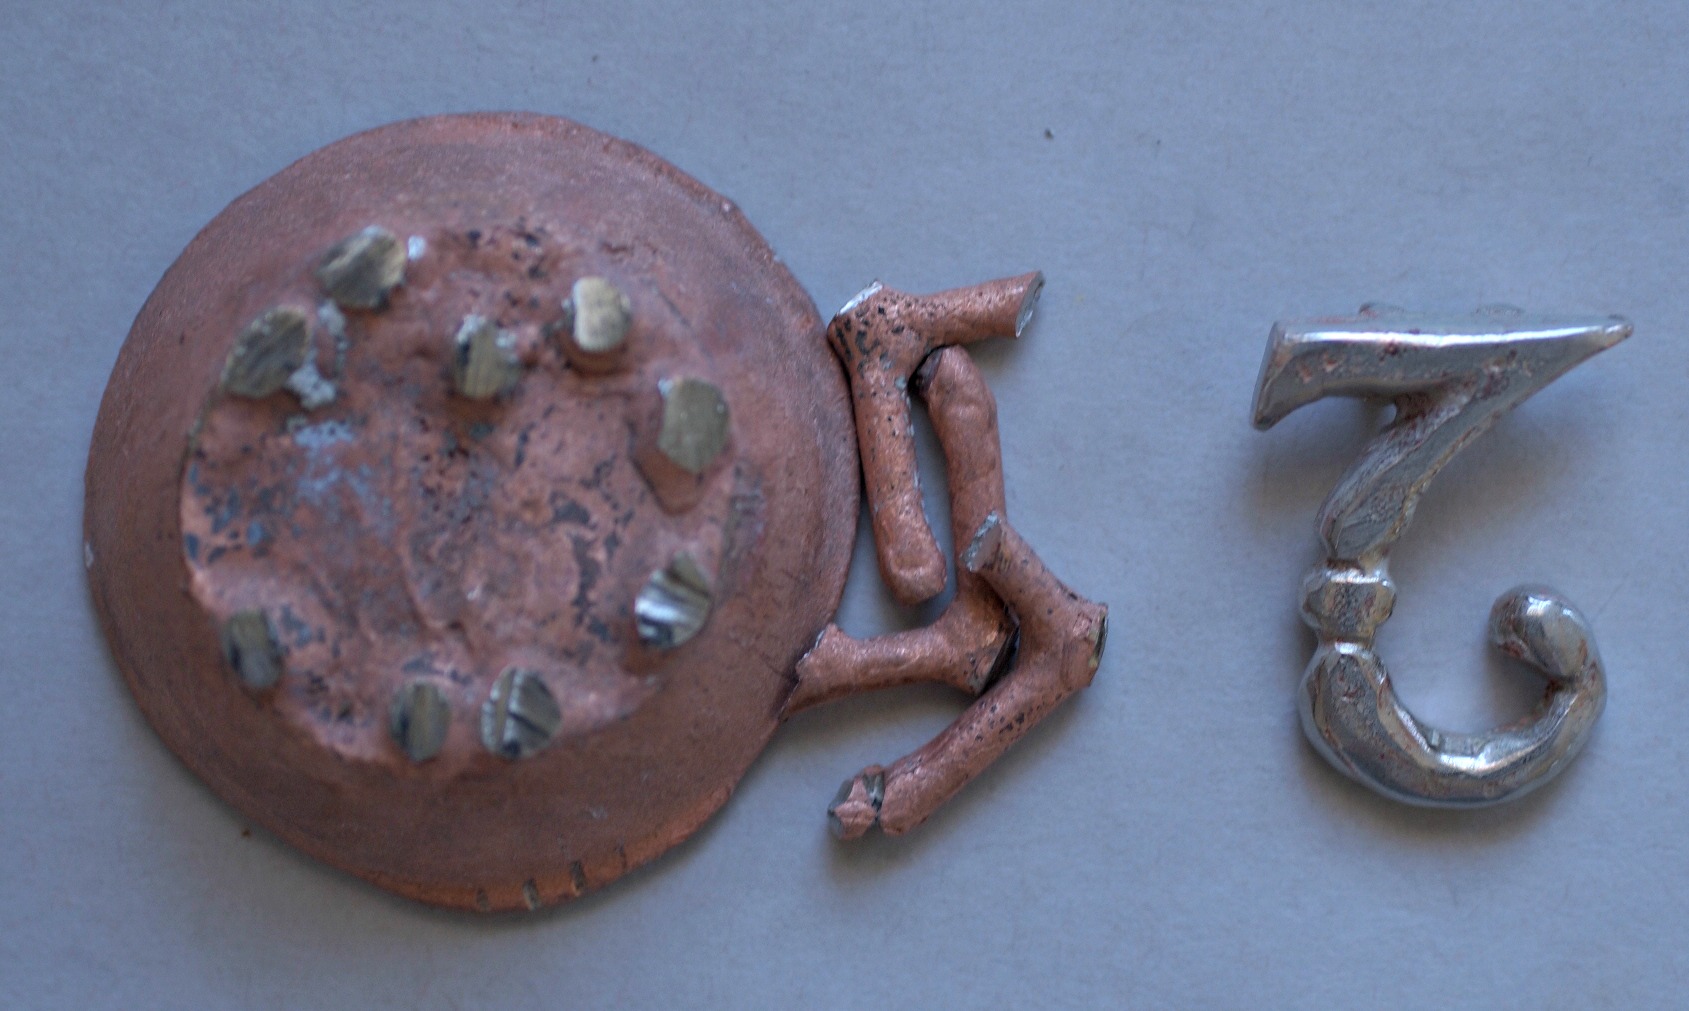
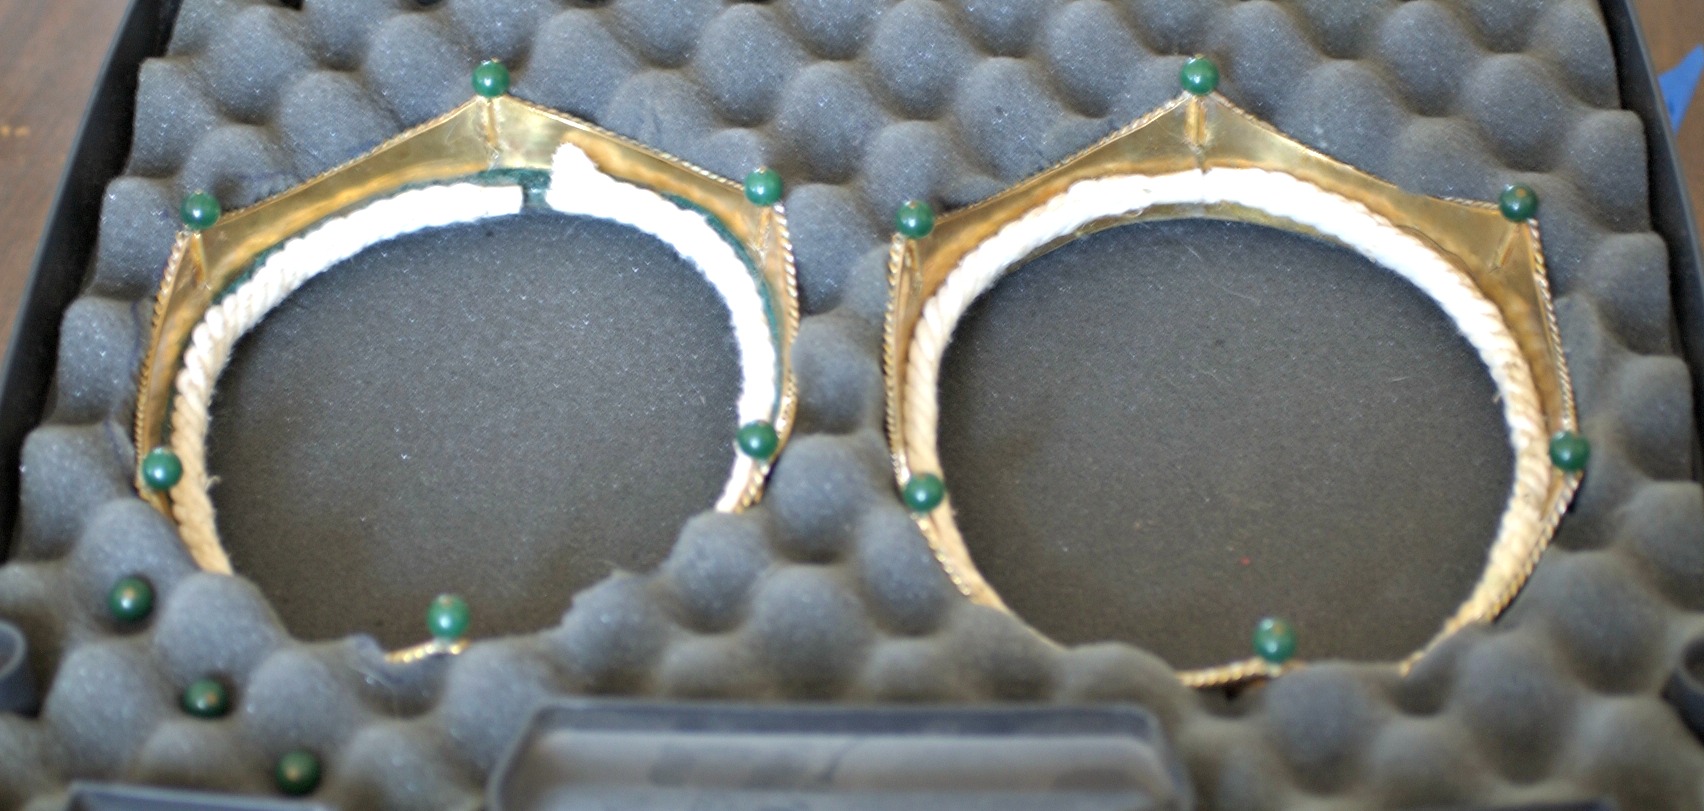
A before and after picture of white bronze that had turned “pink” after being pickled.

DSC_6540

Part 3 – Making a Cool Storage Container – Interior Finishing Touches!

We have talked about choosing your box, designing your storage inserts to keep your item safe, and some of the basic principles of assembling your storage box. Now it is time to give the interior of your container a finished look.

I thought a LOT about this and decided that the best approach would be pictures, so I did a simple box and took a bunch of pictures!

steps 1 thru3

So here we have the process of a basic box. The entire box, the cut down box, and cutting the foam insert for the box – very messy process.

steps 4 thru 6

Here we have the final foam insert, stacked and glued together, the foam insert in the box, and the first fit of the fabric in the foam form. Once you are certain that the fabric is large enough, remove the storage item and the fabric from the foam. Apply the hot glue to the foam, put the fabric back in place, and quickly press the storage item back into the cavity. This will create a nicely lined cavity in the foam. Allow the hot glue to cool for a couple of minutes.

steps 7 thru 9

Trim the fabric into a rough circle (remember the box in this case is a circle so you want to be able to distribute the fabric evenly around the edge of the box). Lift up the edge of the fabric and apply more hot glue to hold the fabric down along the sides of the foam. Be extra careful during this process. The hot glue tends to leak out, and it can burn you and make a mess. I like to hold the fabric in place temporarily with a rubber band (that is what the blue stripe is). Allow the glue to cool and then, with the rubber band in place, slide the foam insert down into the box. As you slide it down, work the rubber band up and allow it to come off. Use a butter knife or a super thin metal spatula (narrow cake icing spatulas are perfect!) to push the fabric down between the foam and the wall of the box. This allows you to adjust the tension of the fabric and have a very neat and clean looking finish.

If I am using a form that is raised in the center, I glue the fabric in place on the foam and then tie a ribbon at the bottom of the center piece of foam for both appearance and sturdiness. The ribbon can be hot glued in place – be careful – random drips of hot glue on the lining will not look good! Or it can be pinned in place with straight pins. The pins are simply pushed through the ribbon and fabric and into the foam. I prefer to use flat headed plain metal pins – they look almost like tiny studs or nail heads. If you are concerned about the pins coming out, they can be glued in place with a tiny bit of liquid glue. I don’t usually glue them in place, but if I do I use glue that is compatible with the foam in my form and dries clear. I use as little as possible to avoid drips and smears.

foam with fabric and ribbon diagram


Enhanced by Zemanta

Part 2 – Making a Cool Storage Box : Customizing the Interior

In Part 1 we discussed how to choose a box or container. Now it is time to decide exactly HOW to store your items.

One of the basic techniques for creating safe storage for a precious item is by creating a form inside your container. Now what exactly do I mean by form? Well, if you just toss an item into a box it will rattle around. How fragile is your item? Will it shatter? Will it bend? Can it be nestled into a hole or does it have a hole in the middle that can be used to anchor it? Does it need to be secured from the top and bottom, or can you always keep the box “right side up”?

The following simple diagram shows an example of what I am talking about. The bottom of the box is lined with a piece of foam, with another piece of foam glued in the center to secure the coronet or tiara in place. I make sure that this central piece of foam is as large as possible, while still allowing the item to be removed from the form. Don’t forget that you will be covering the foam with fabric – I prefer black velveteen for coronet boxes because it provides a really nice backdrop for the shiny metal and is not too slippery. While fabric like satin looks really nice, it can drive you crazy. Remember -you need to choose your level of “crazy” and go with it!

storage box architecture

I do NOT glue the bottom piece of foam into the box – I press fix it. This means that I cut the bottom piece of foam so that it will barely fit into the bottom of the box. Why a press fit? If you want to change the décor on the inside of the box, or the design of the storage container, or if the use of the box ever changes, having glued in foam will make the “change” a serious pain. You risk damaging the box, or even losing your temper!

The next picture shows the foam glued together before the fabric has been put on top. Note the newspaper and plate under the glue gun. The glue will peel off the plate easily once it is cold and both the plate and newspaper protect the countertop. Formica countertops or tables can be damaged by a hot glue gun.

M3361S-3034

This arrangement assumes that your piece is hollow and can be anchored by a form placed inside that hollow. Some items will require that you create a hollow inside of the box for them to nest in.

inset storage


This picture is an excellent example of two items that could have been stored using a central form, but instead were inset into foam rubber.

pistol case

This example uses a plastic pistol case. It is very functional, but NOT pretty. The case comes with three layers of foam and you customize it by cutting the foam to create a good fit for your piece.

Evaluate what you need to store and figure out what the best technique is for keeping your item safe. Then pull together your supplies and start the process. A box, foam, or other padding, a hot glue gun (I use a high temp glue gun because the glue sticks better), a sharp knife and a ruler should be all that you need to get started!